
First off, welcome to Fitli! We provide the online scheduling and payment platform for the business you're trying to sign up for. Signing up and booking is as easy as 1-2-3! Here's a helpful guide to get started.
Step 1: Sign up for an Account.
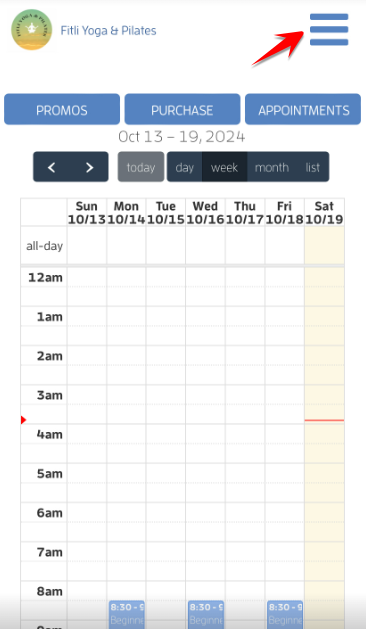
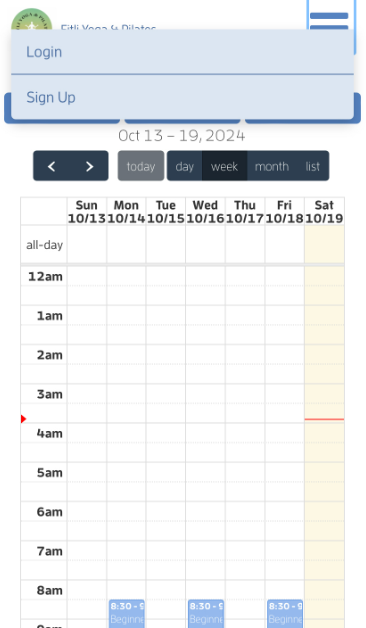
On the business' public calendar, tap the 3 lines at the top right side and tap "Sign Up".
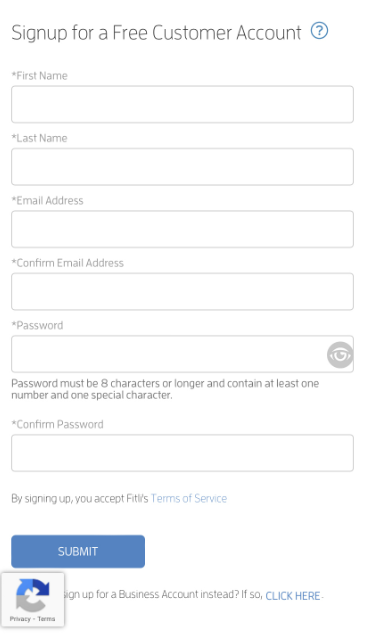
Fill out the registration form and hit SUBMIT.
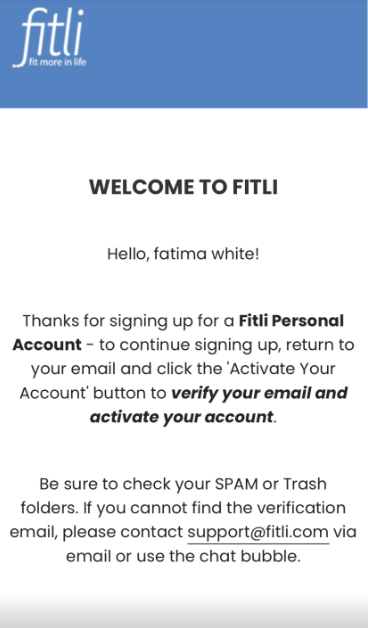
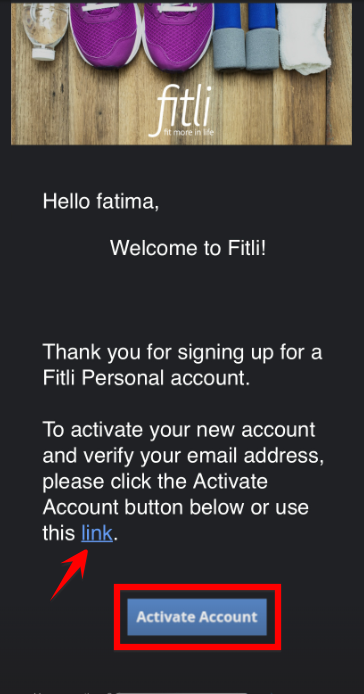
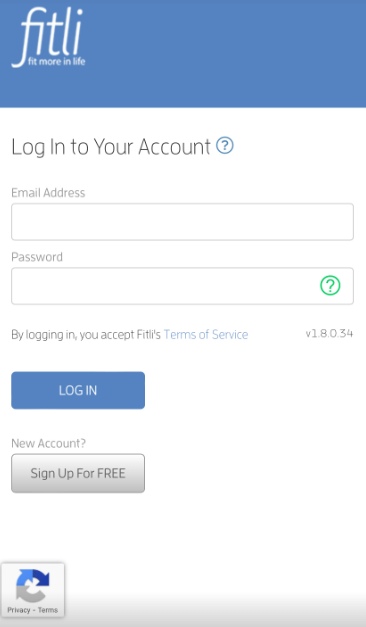
IMPORTANT: If you sign up directly to fitli.com, you'll be prompted that you successfully signed up for an account. To continue signing up, return to your email and tap the "Activate Account" button or link to verify your email and activate your account. You'll be redirected to the Login page. Enter your login credentials and hit LOG IN. Be sure to check your spam or trash folders. If you cannot find the verification email, please contact support@fitli.com via email. If you sign up from the business' public calendar or sign up link, you don't need to do these steps. You'll be automatically directed to the "Business Specific Sign Up Information" section. Sample screenshots below.
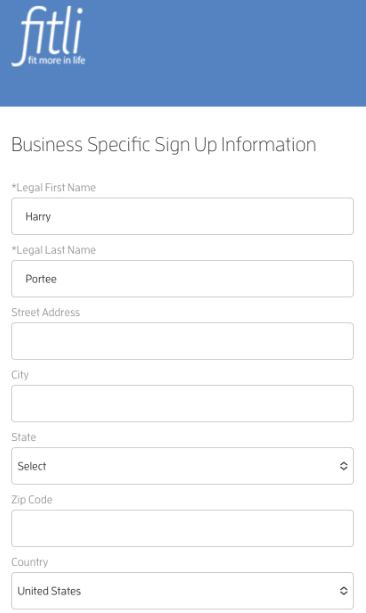
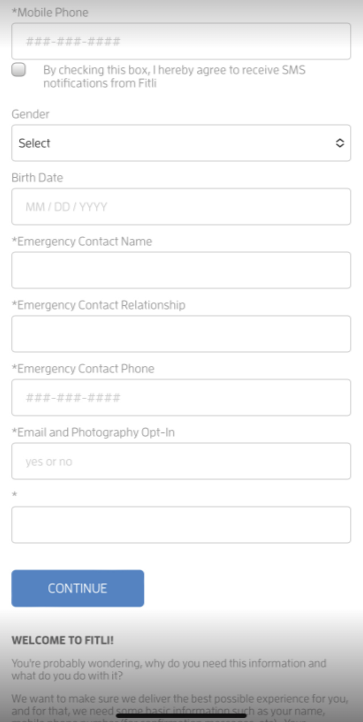
On the "Business Specific Sign Up Information" section, fill out the required fields and hit CONTINUE. A message will appear at the top and the required field/s will be highlighted in red prompting you that the required field/s should be filled out if you tap CONTINUE on this section.
IMPORTANT:
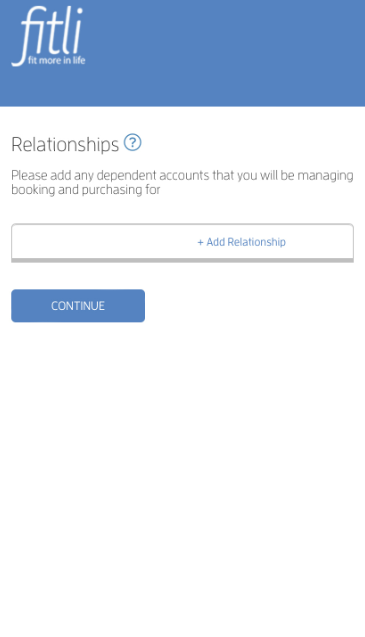
- If the business allows you to add relationships during registration, tap + Add Relationship, fill out your relationship's info, hit SAVE and CONTINUE. Otherwise, you'll be directed to their public calendar. Click HERE for a detailed guide.
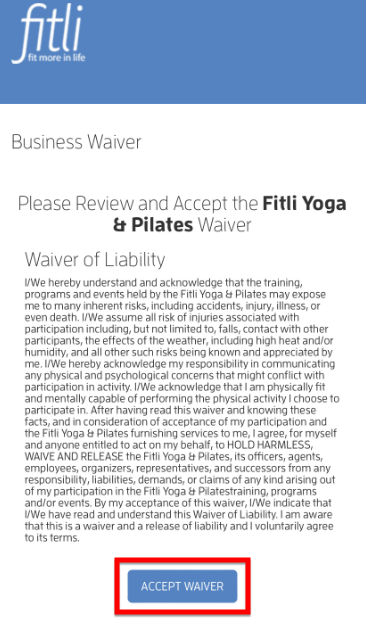
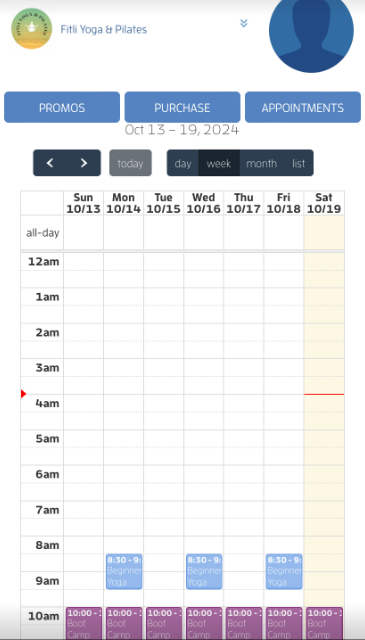
- If the business you're trying to sign up for has a waiver, you'll be directed to the Business Waiver page. Tap the ACCEPT WAIVER button to complete signing up. Otherwise, you'll be directed to their public calendar.
Screenshots below.
Step 2: View the Schedule and Choose a Class.
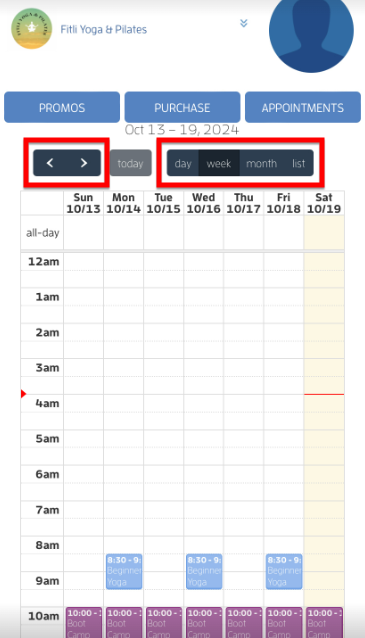
On the business' public calendar, you can use the Calendar Menu Arrows at the top left to advance backward or forward on the calendar. Or, the Calendar Menu View at the top right to view their schedule by "day", "week", "month" or "list".
Step 3: Pick a Class and Book.
Tap the class you want to sign up for to open its profile, scroll up and hit the "Book" button.
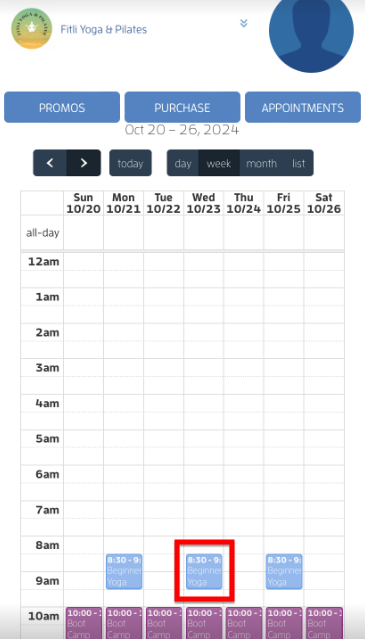
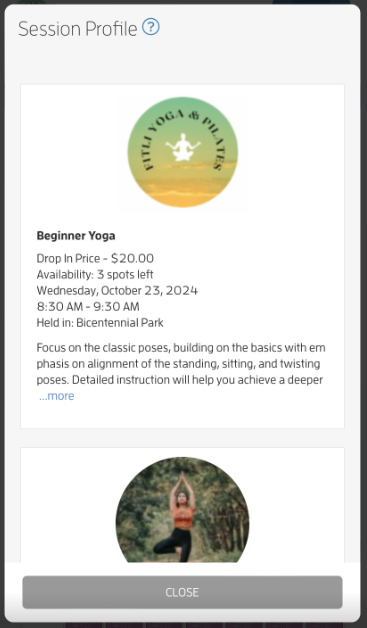
Note: You can also add relationships while booking. Click HERE for a detailed guide.
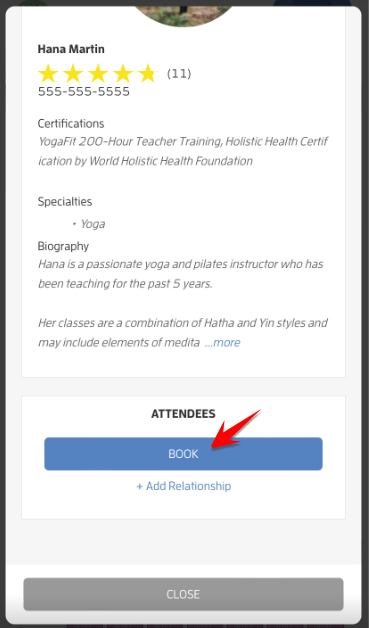
Step 4: Choose a payment method.
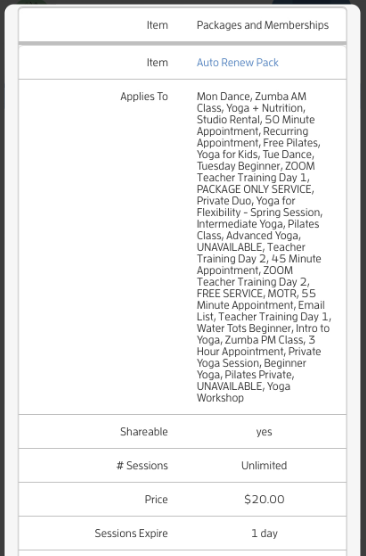
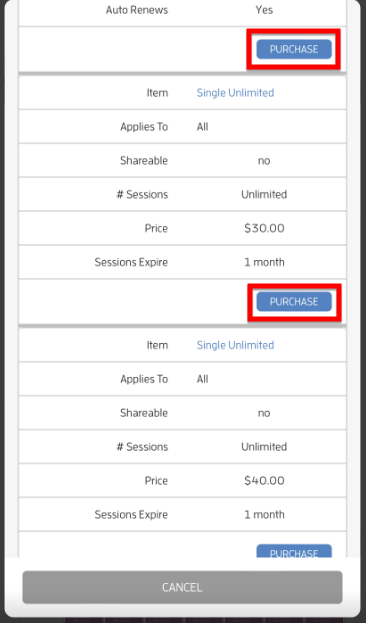
On the "Make Purchase" screen, scroll up. You'll be prompted to sign up with either the drop-in rate (if one is available), or to purchase a package or membership. Choose a payment option from the screen similar to the one below.
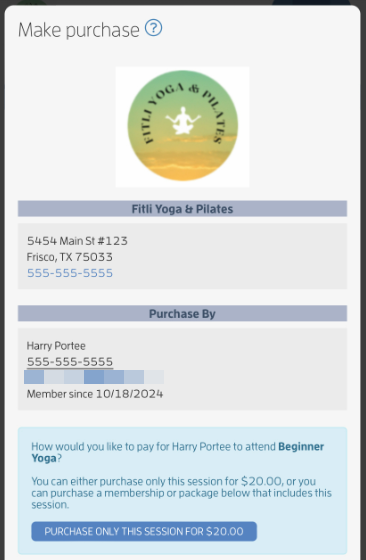
Step 5: Enter your payment information.
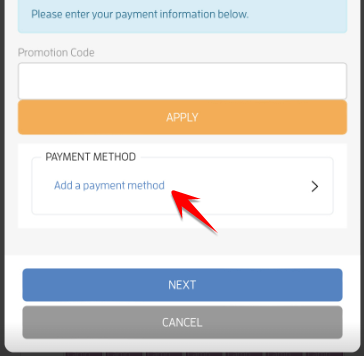
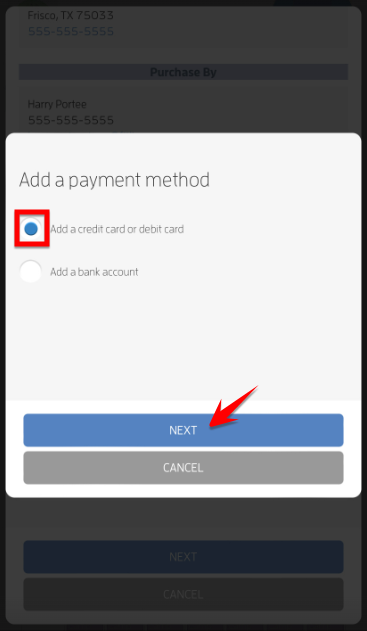
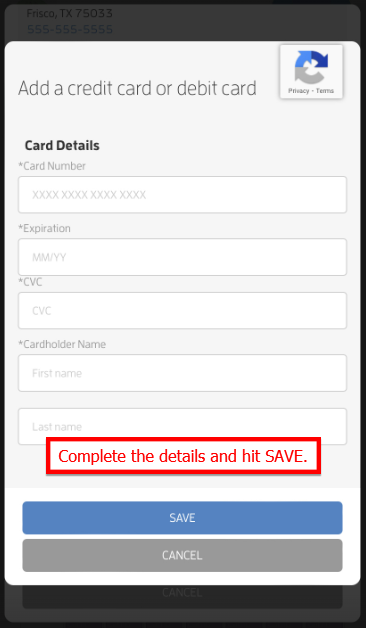
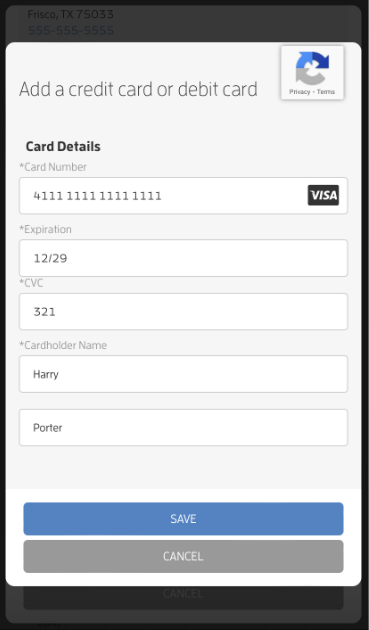
Tap "Add a payment method", scroll up, select "Add a credit card or debit card" on the modal and hit NEXT. Then, enter your card information and hit SAVE. If the business accepts ACH/bank payments, you'll see the option to "Add a bank account" similar to the one below. Otherwise, only the "Add a credit card or debit card" option will show up. For more information, contact the business directly.
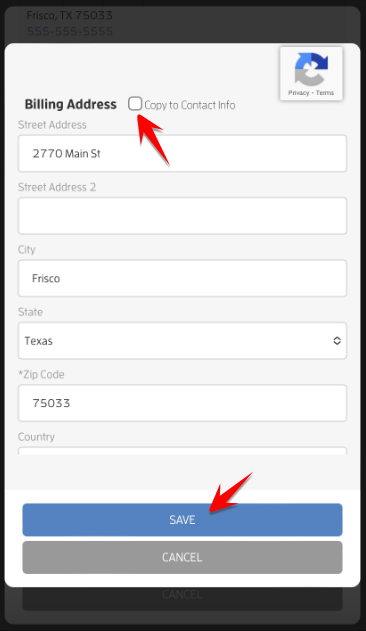
Note: If you have not added your billing address during registration or updated it on the "Contact Info" section, the "Copy to Contact Info" box will show up after entering your billing address. Tap "Copy to Contact Info" to copy your billing address to your "Contact Info". Otherwise, the "Copy From Contact Info" box will show up here. Tapping it will copy your "Contact Info" address to your billing address. If you tap CANCEL, you won't confirm your booking. This is a one time process. If you enter your billing address, the site won't prompt you to update your billing address on your next purchase/booking.
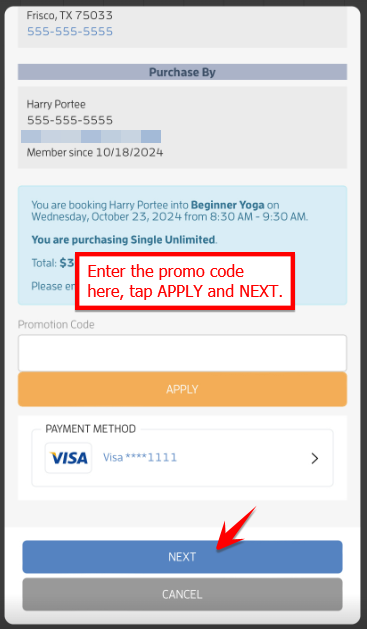
If you have a promotion code, enter it first on the promo code field, tap APPLY and NEXT.
Step 6: Confirm your Payment Method and Book your Class!
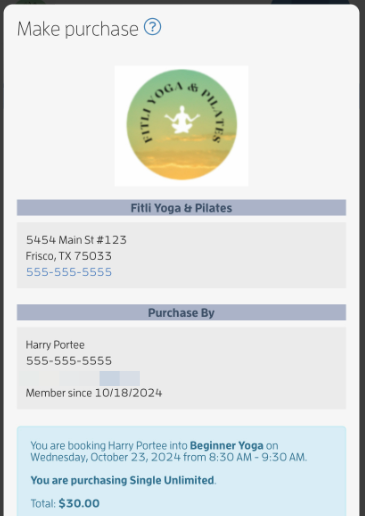
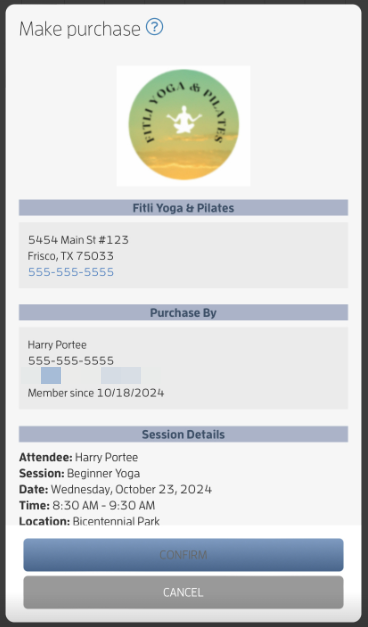
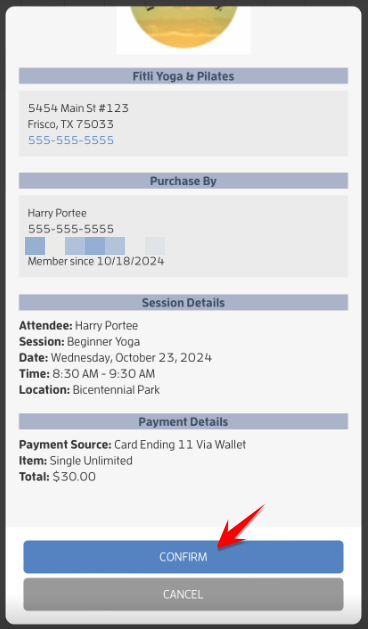
Once you've entered your payment method, this final screen, shown below, will confirm the details of your payment choice and the total amount. Tapping CONFIRM will charge your credit card and book you into the class!
Note: If the business setup a waiver after you signed up, you will need to accept it. Tap the waiver link and/or toggle to accept it and hit CONFIRM. This is a one time process. If you accept the waiver, the site won't prompt you to tap on it again on your next purchase/booking unless you add relationships and purchase/book for them, or, the business updates and/or resets the waiver, in which case you will need to re-accept the waiver.
CONFIRMATION and REMINDER:
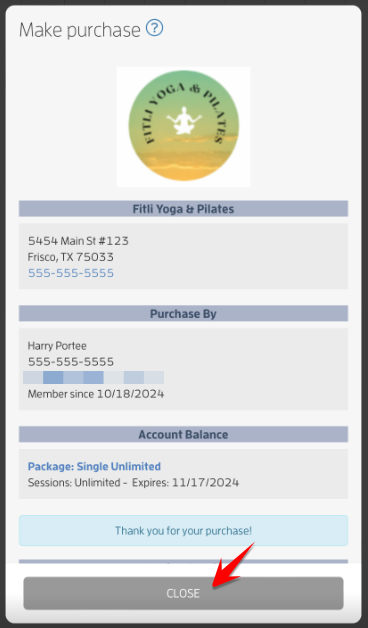
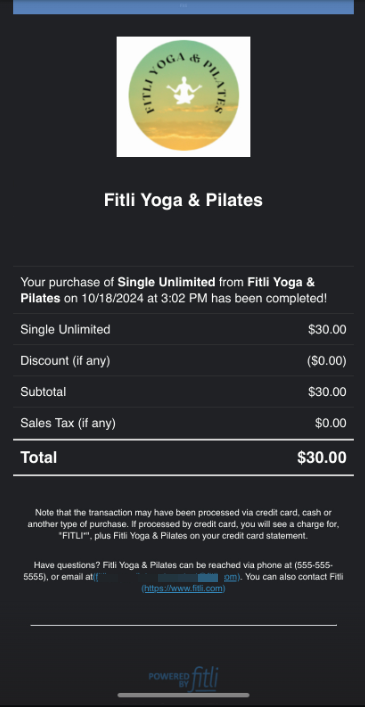
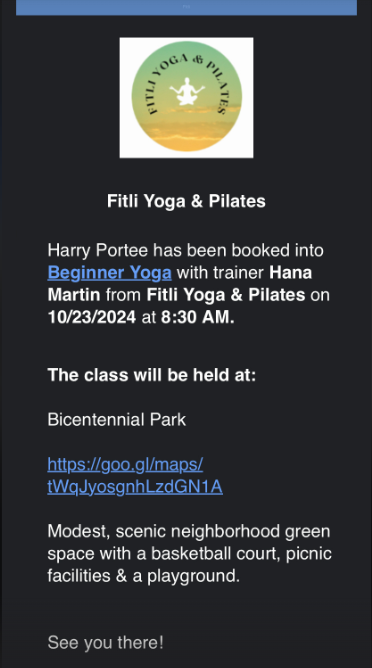
After tapping CONFIRM, you'll get two emails to your inbox. One will summarize the charge to your account, either the purchase of a single session or the purchase of a package/membership, and the second one will confirm your booked class. The payment confirmation email counts as your receipt, so don't delete it! You'll also see the purchase on your Purchase History and the booked session on your Fitli Calendar.
How to Book an Appointment:
To book a one-on-one appointment with a business, go to the business' public calendar and hit the "Appointments" button at the top menu.
Note: Not all businesses have the Appointments feature activated. This means that you won't see the Appointments button. Either they only do group classes or they prefer to do the booking for you. If this is the case, you'd need to contact the business directly.
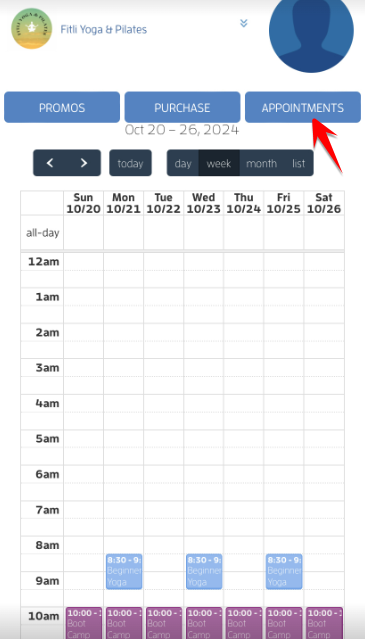
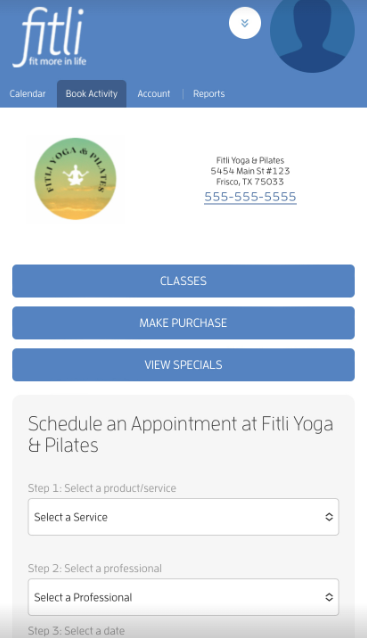
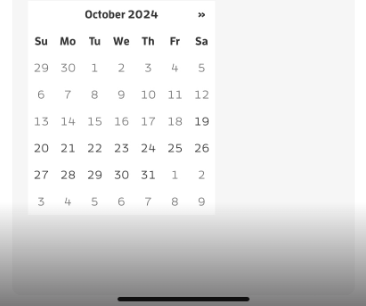
On the appointment screen, scroll up, select the service you want to sign up for, choose your instructor, select the date you want on the calendar, then pick a time.
Note: You can tap the arrow at the top right of the calendar on the right side to advance or forward on the calendar. You can also add relationships while booking. Click HERE for a detailed guide.
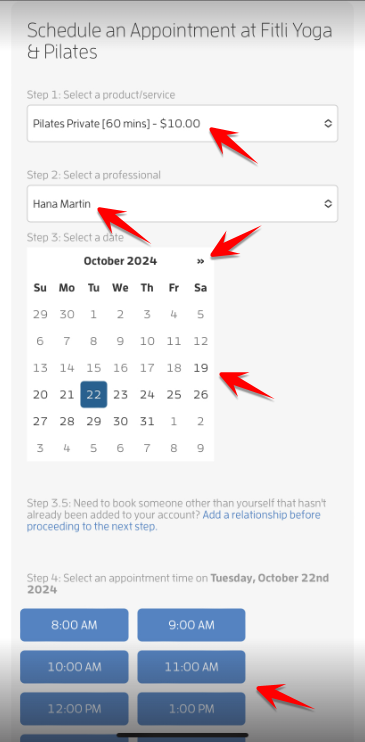
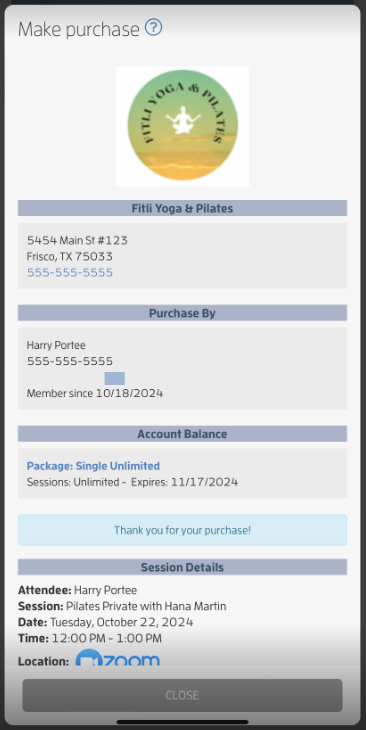
You'll then be directed to the "Make Purchase" screen where you can sign up with either the drop-in rate (if one is available), or to purchase a package or membership (if you don't have an account balance or your existing package is not applicable to the session). Choose a payment option, enter your payment method (if you don't have one saved), then confirm your payment. In the example below, the customer has an existing balance applicable to the session.
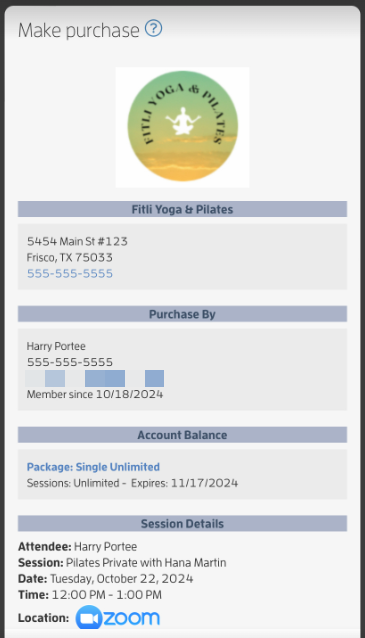
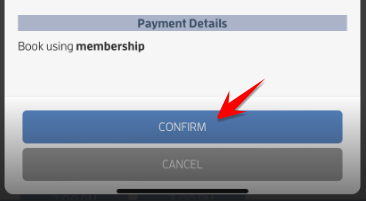
Now, you're booked into your first class/appointment! From here, you can continue booking if you purchased a package/membership, or search for other businesses to book with.
That's about it! If you have other questions, comments or concerns, feel free to send us an email at support@fitli.com or contact the business directly.