
Did you know that you can also add your relationships while booking? Here’s how.
For Group Classes
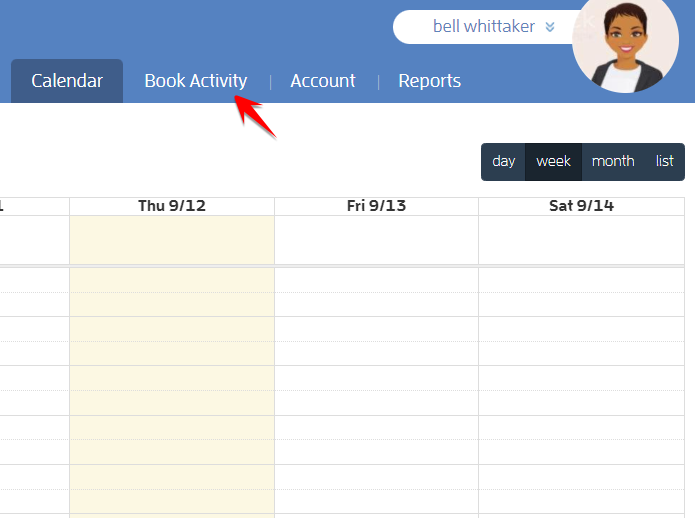
Log in to your Fitli account then click BOOK ACTIVITY at the top menu.
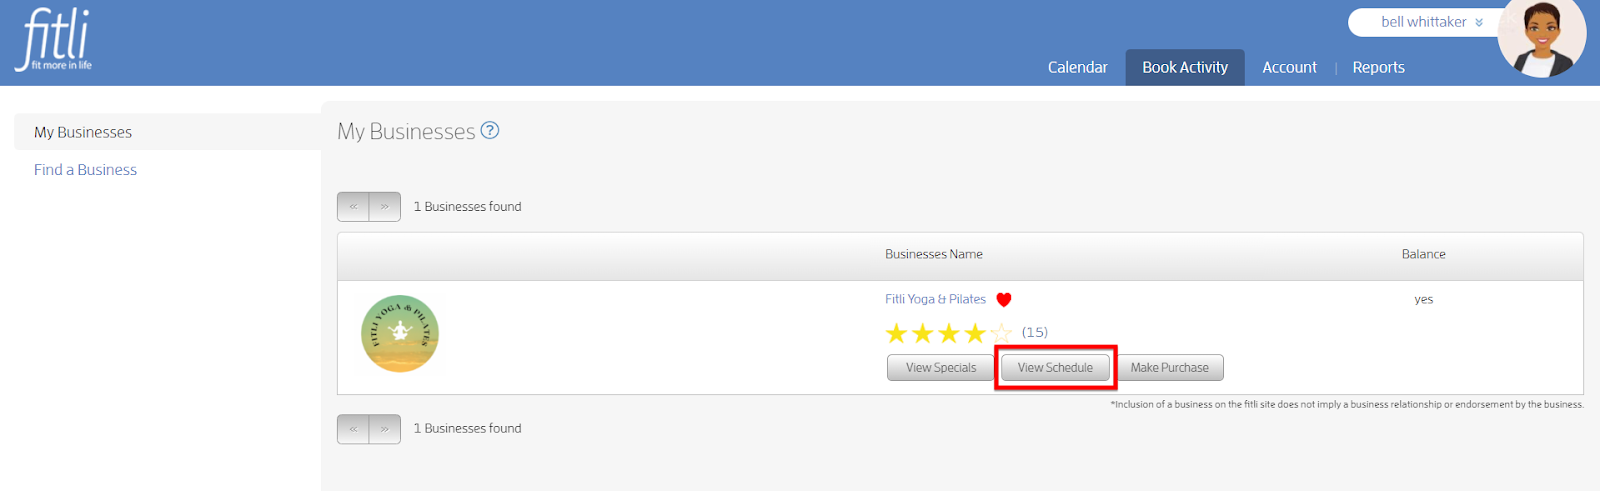
Click the “View Schedule” button of your business.
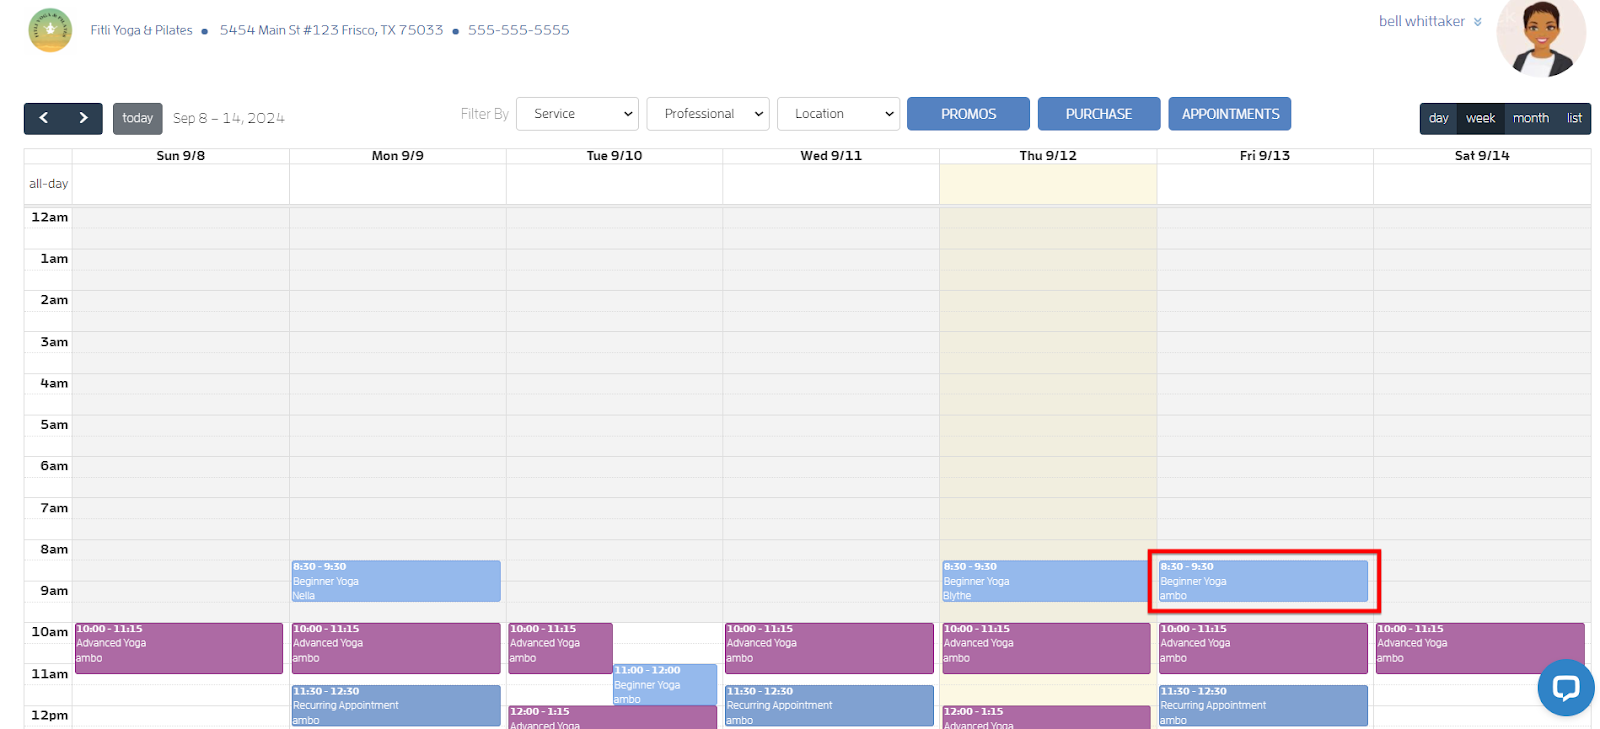
On the business calendar select the class you want to book to open its profile.
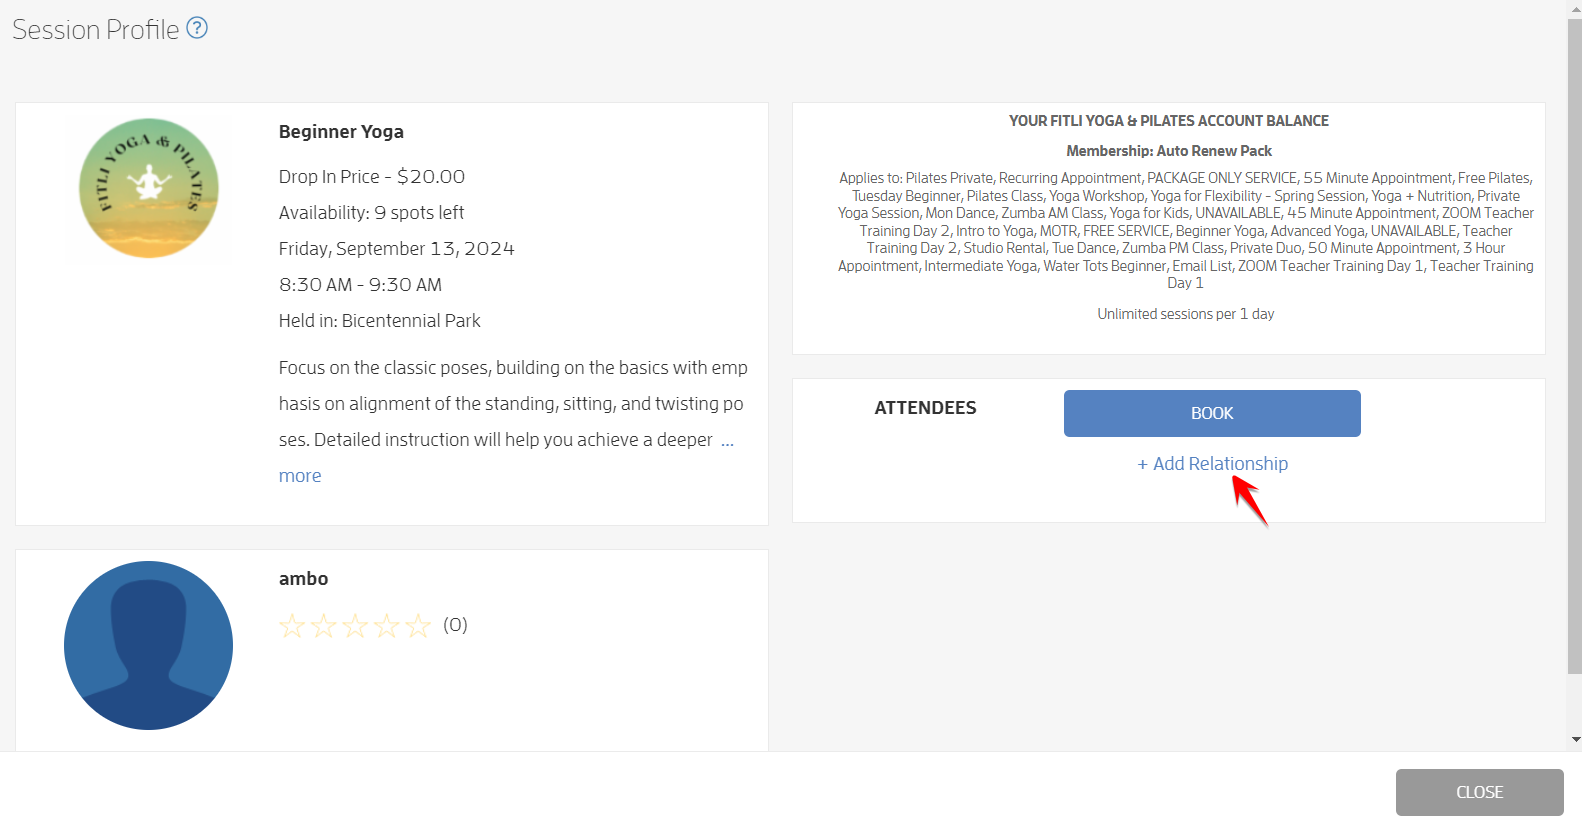
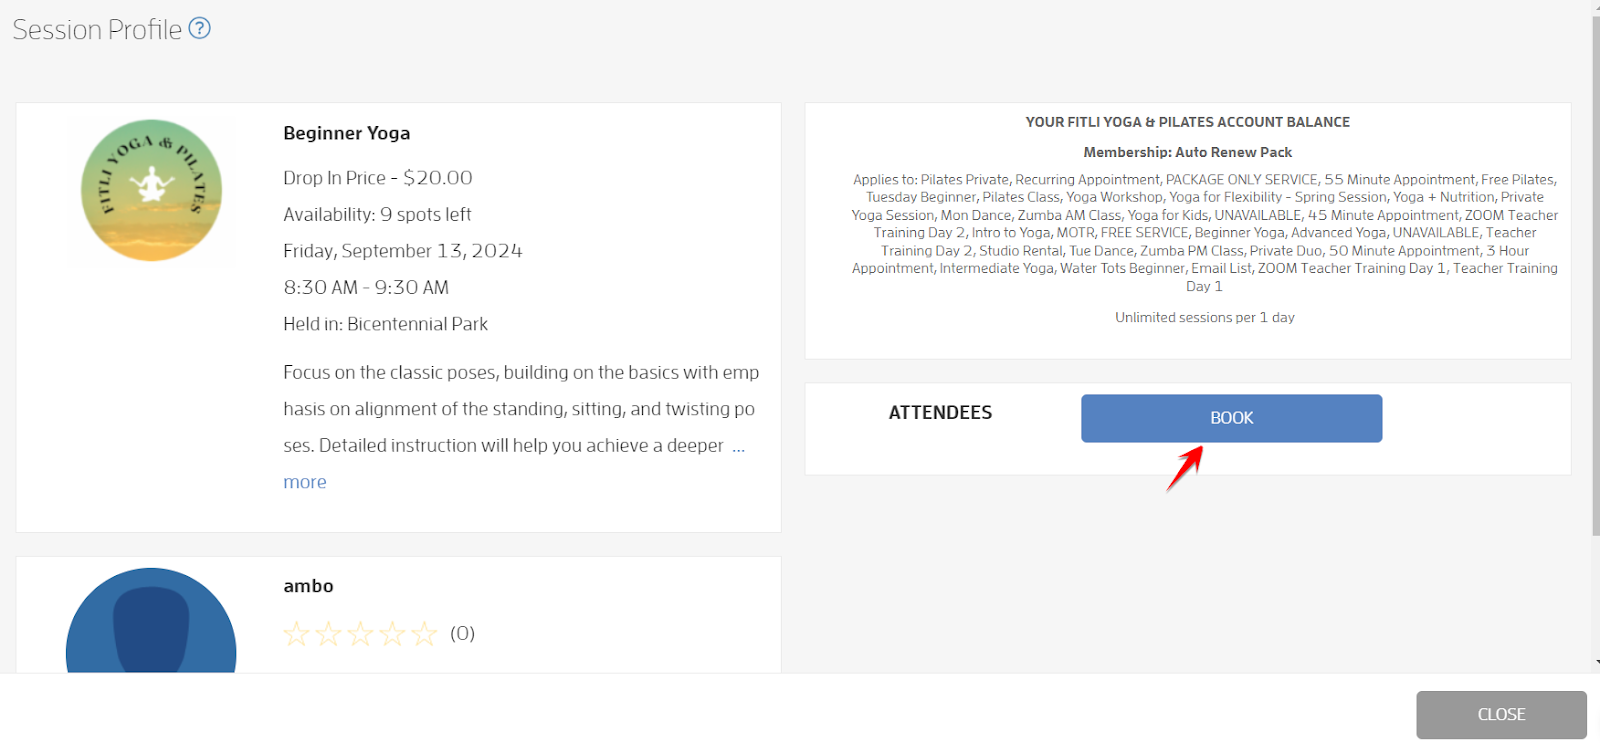
On the Session Profile, click + Add Relationship to add your relationship.
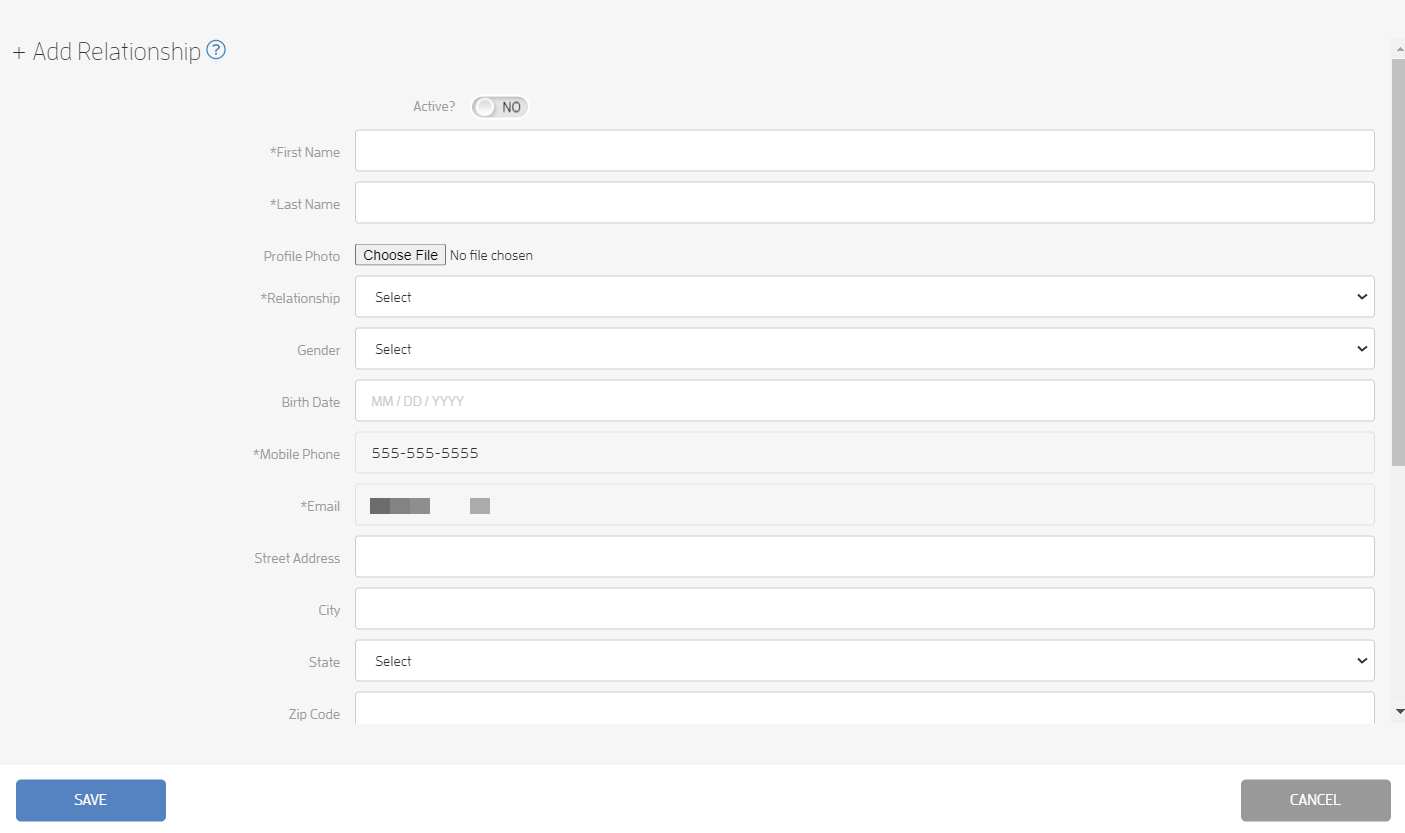
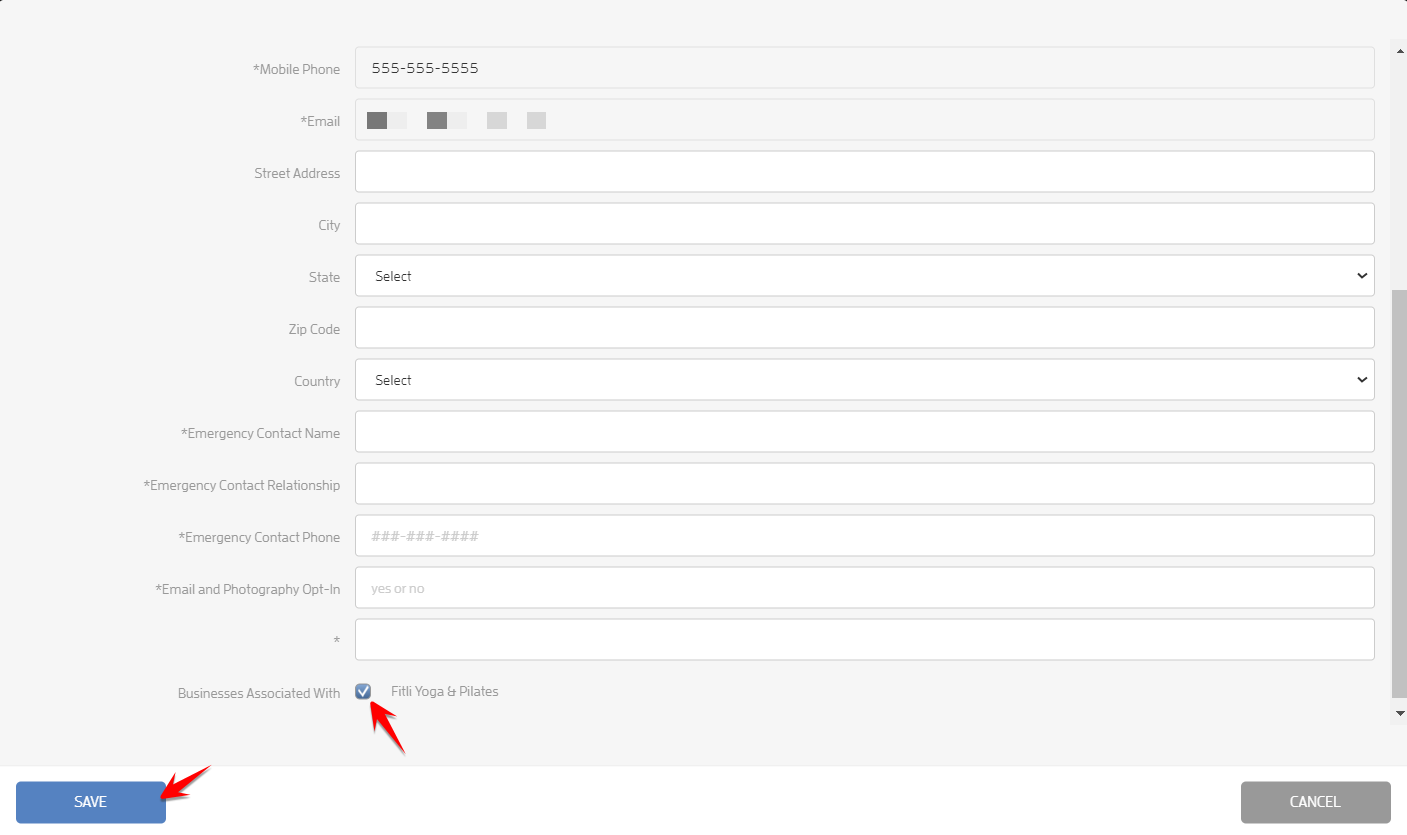
Fill out the modal, make sure that the business is checked at the bottom then hit SAVE.
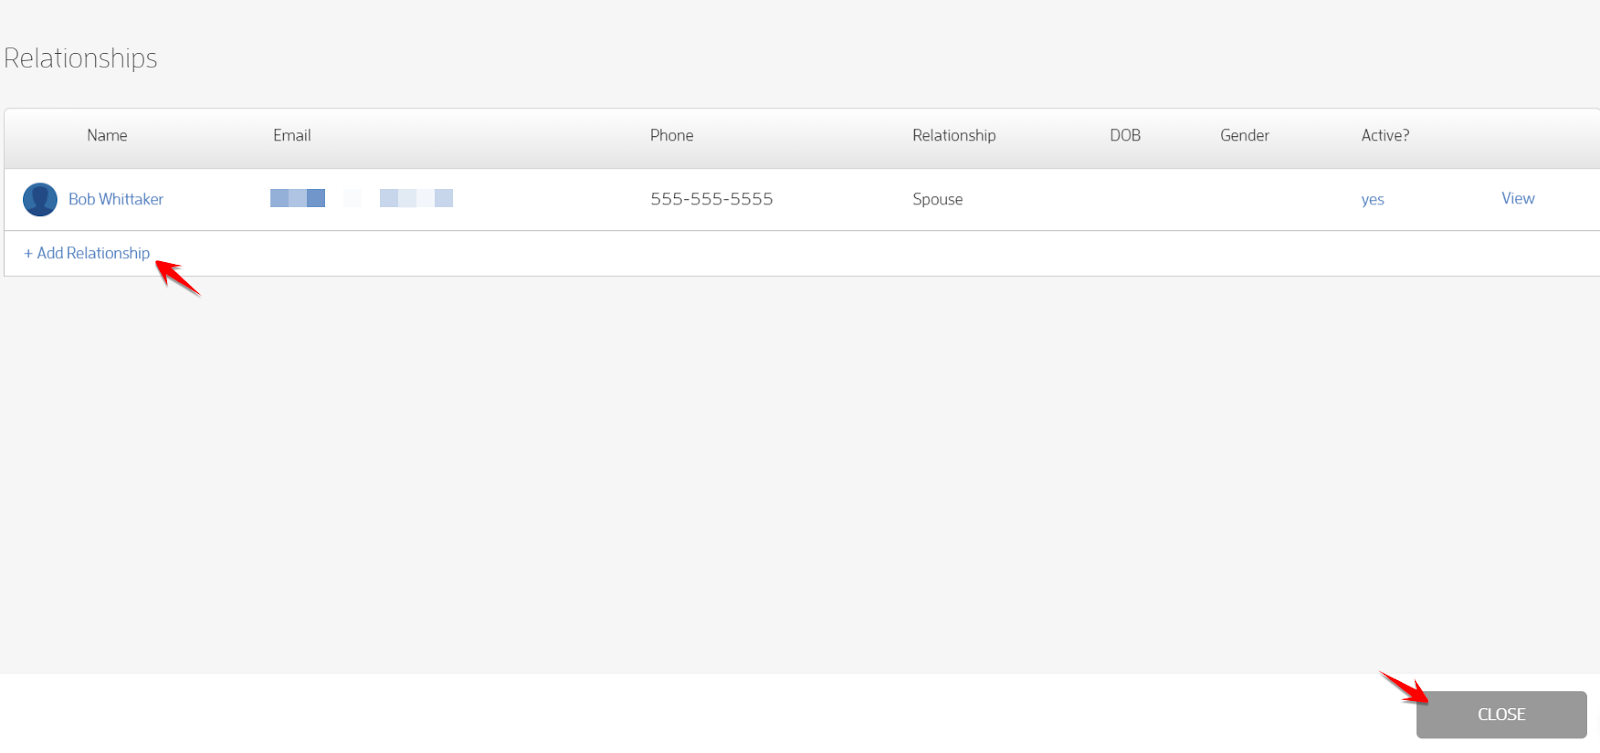
You’ll see that your Relationship is saved on the modal. From here, you can either add more or click CLOSE.
If you already have relationships in your account, the option to add relationships will not display on the Session Profile. Don’t fret! You can still add your relationships on the “Select User” modal as shown below.
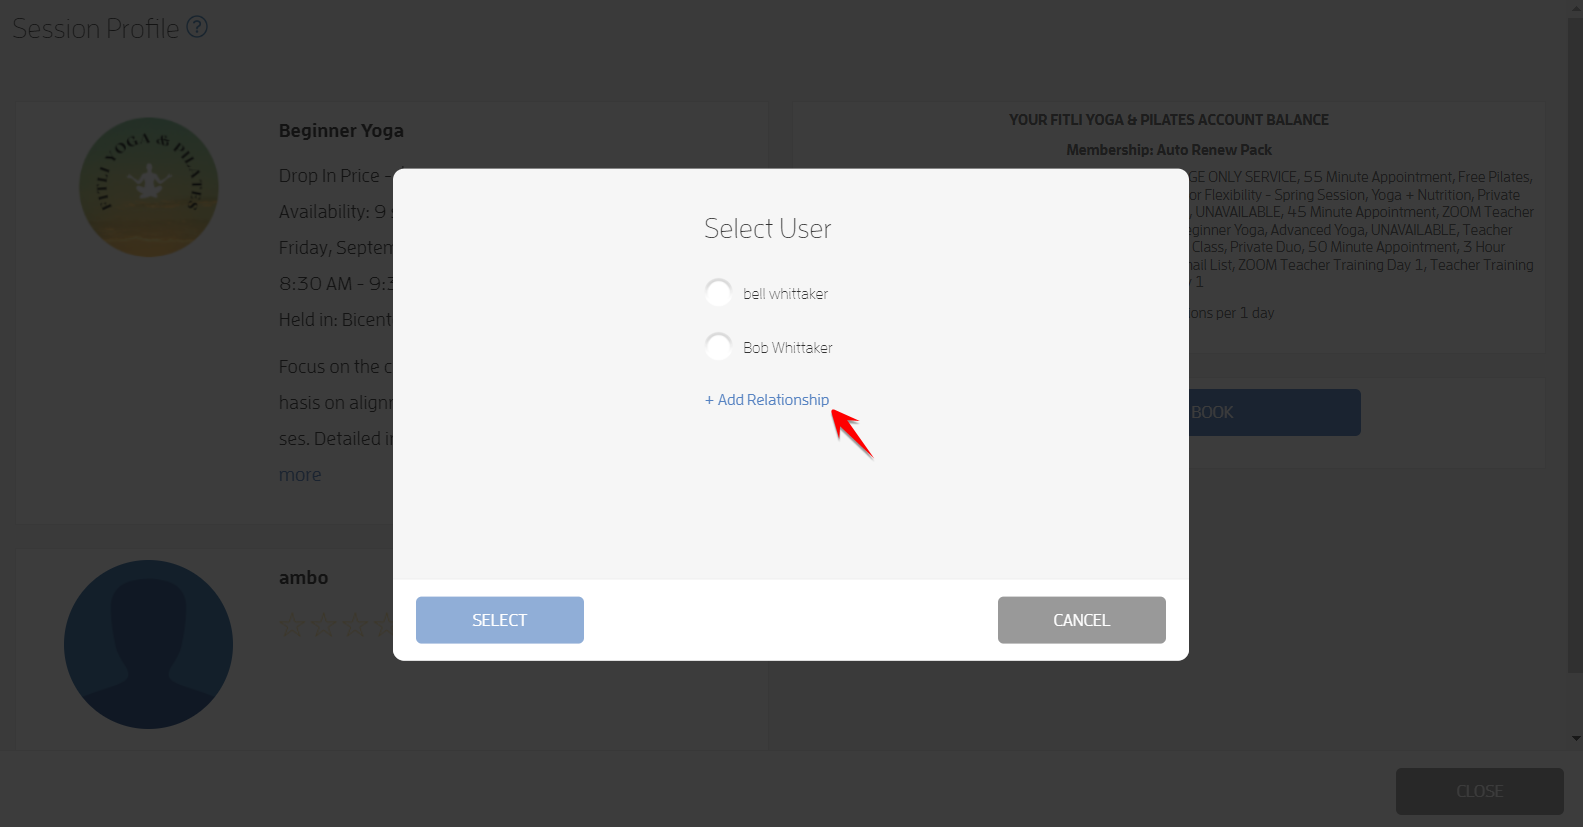
Simply repeat the steps above, select your relationship during the booking flow and complete the process.
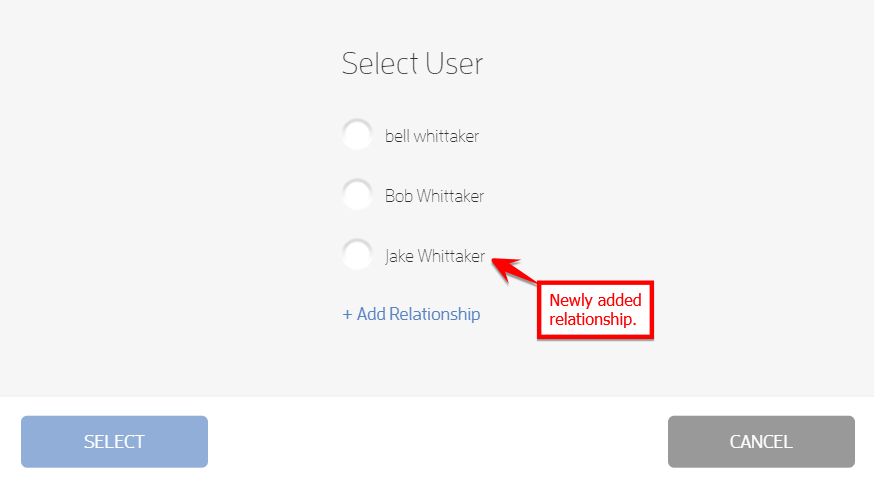
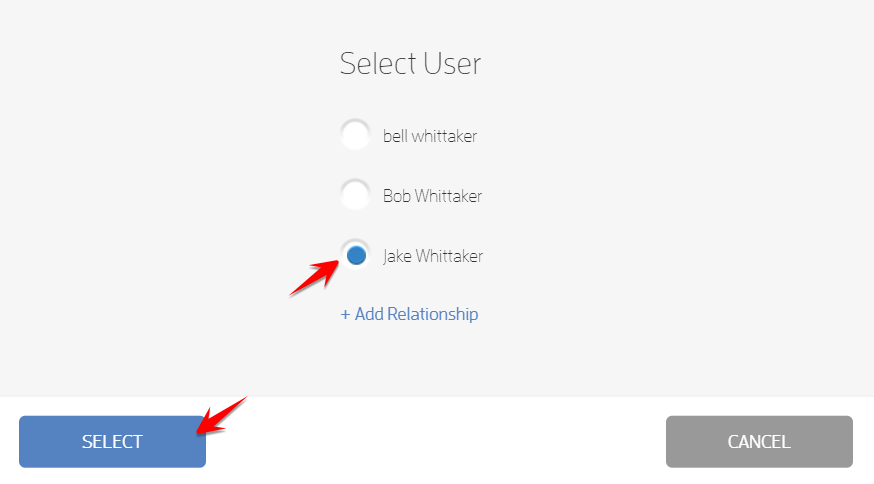
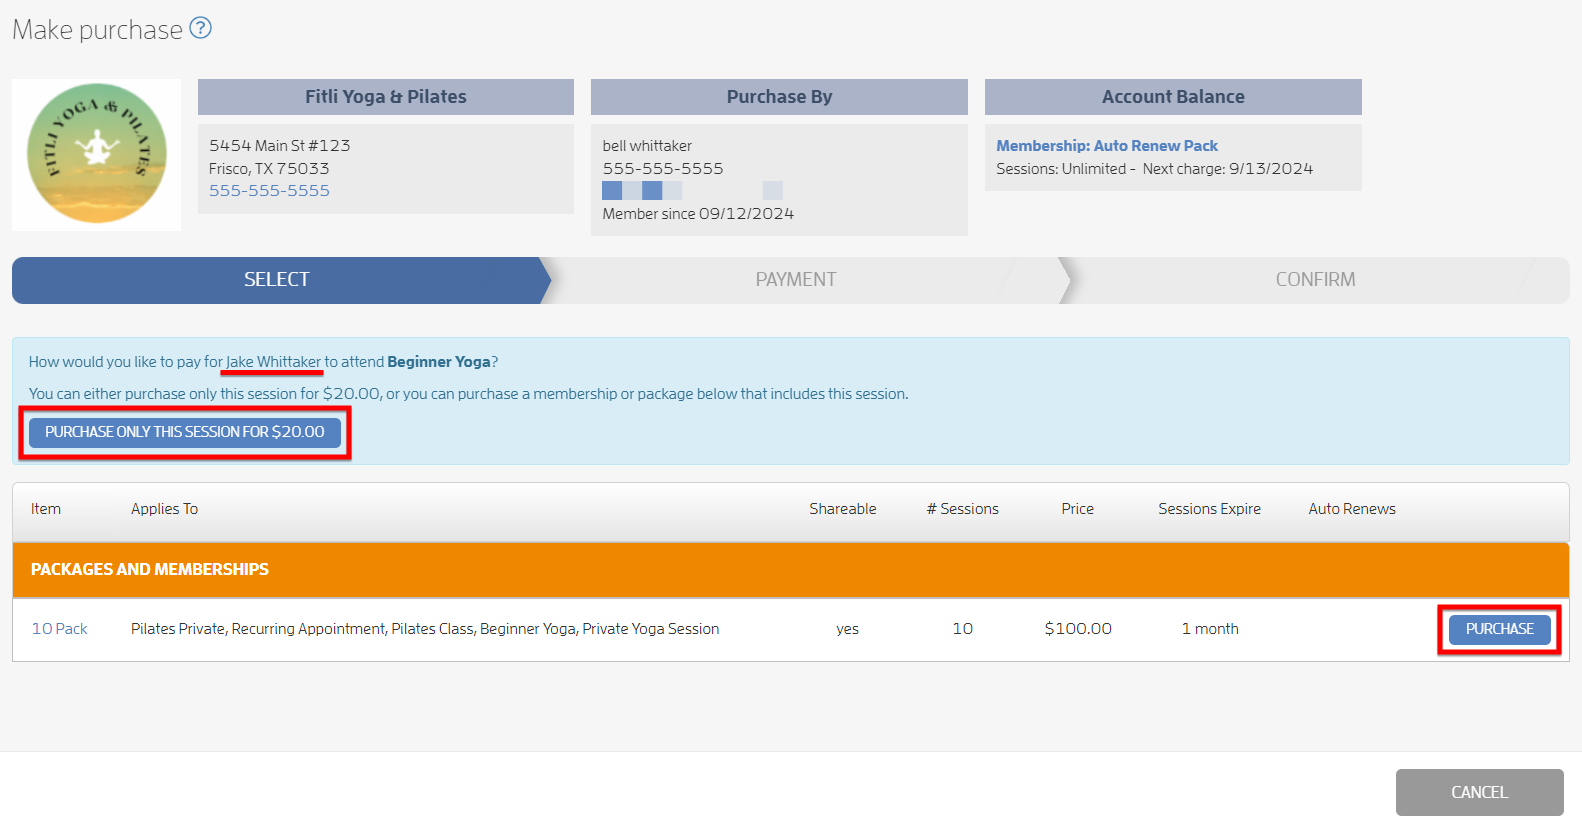
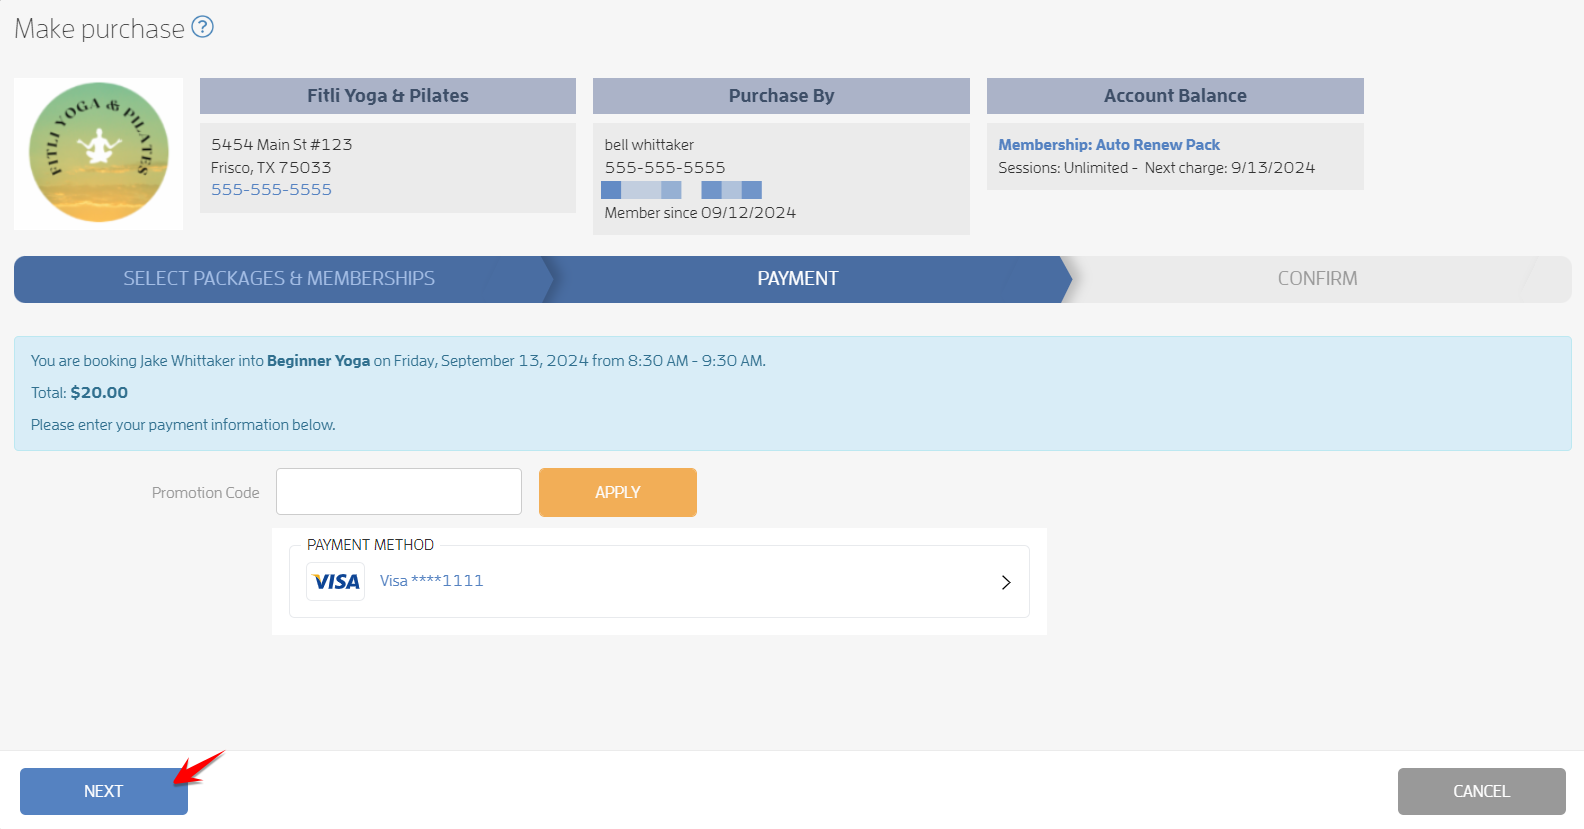
Note: If your business set up a waiver, simply accept it and hit CONFIRM to complete the booking process. Otherwise, just hit CONFIRM and CLOSE.
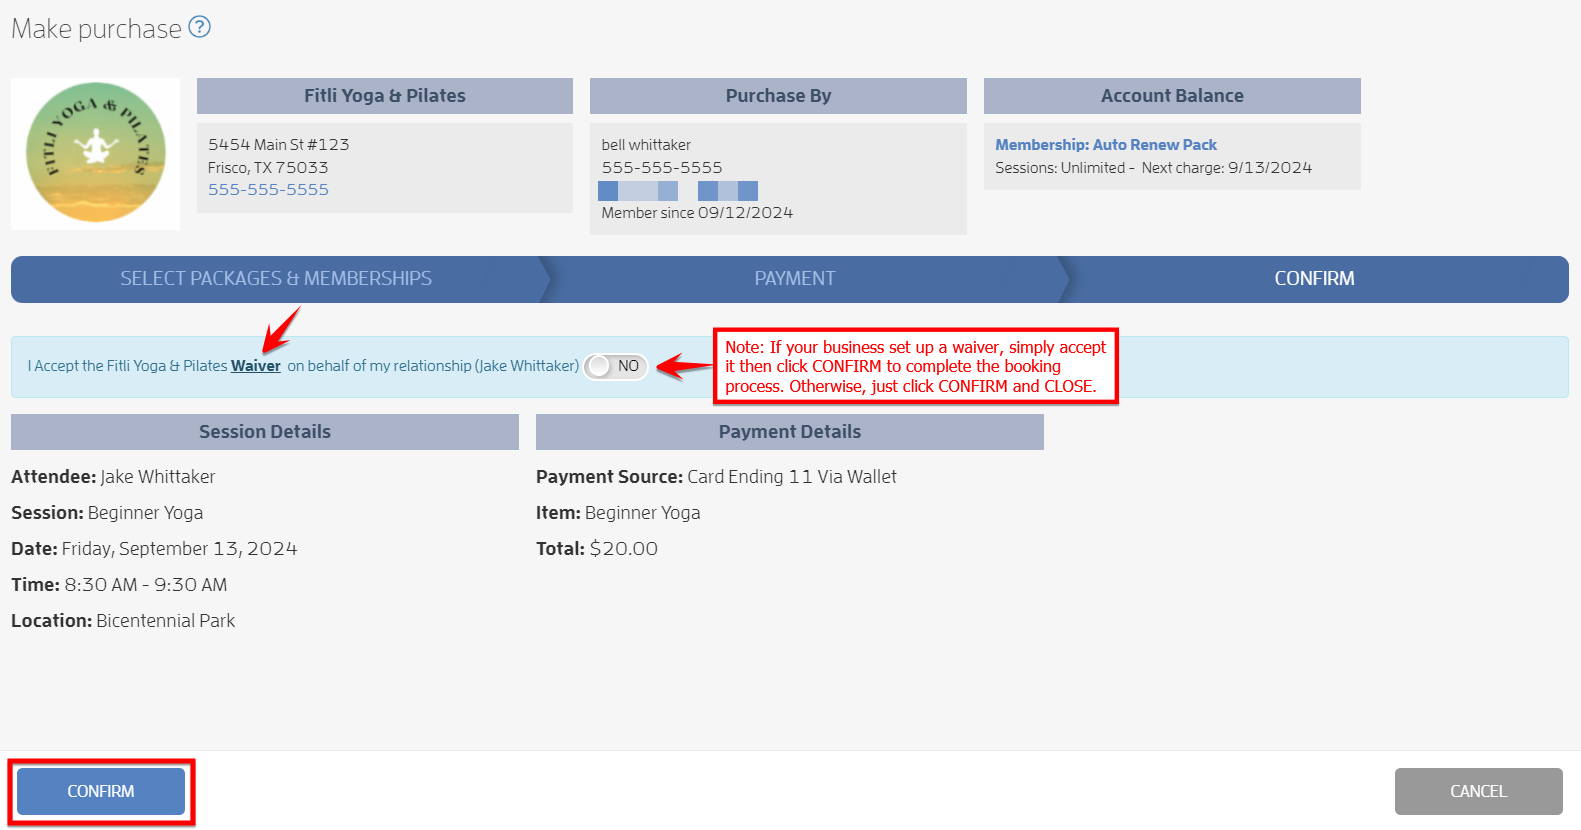
That’s it! You’re done!
For Appointments
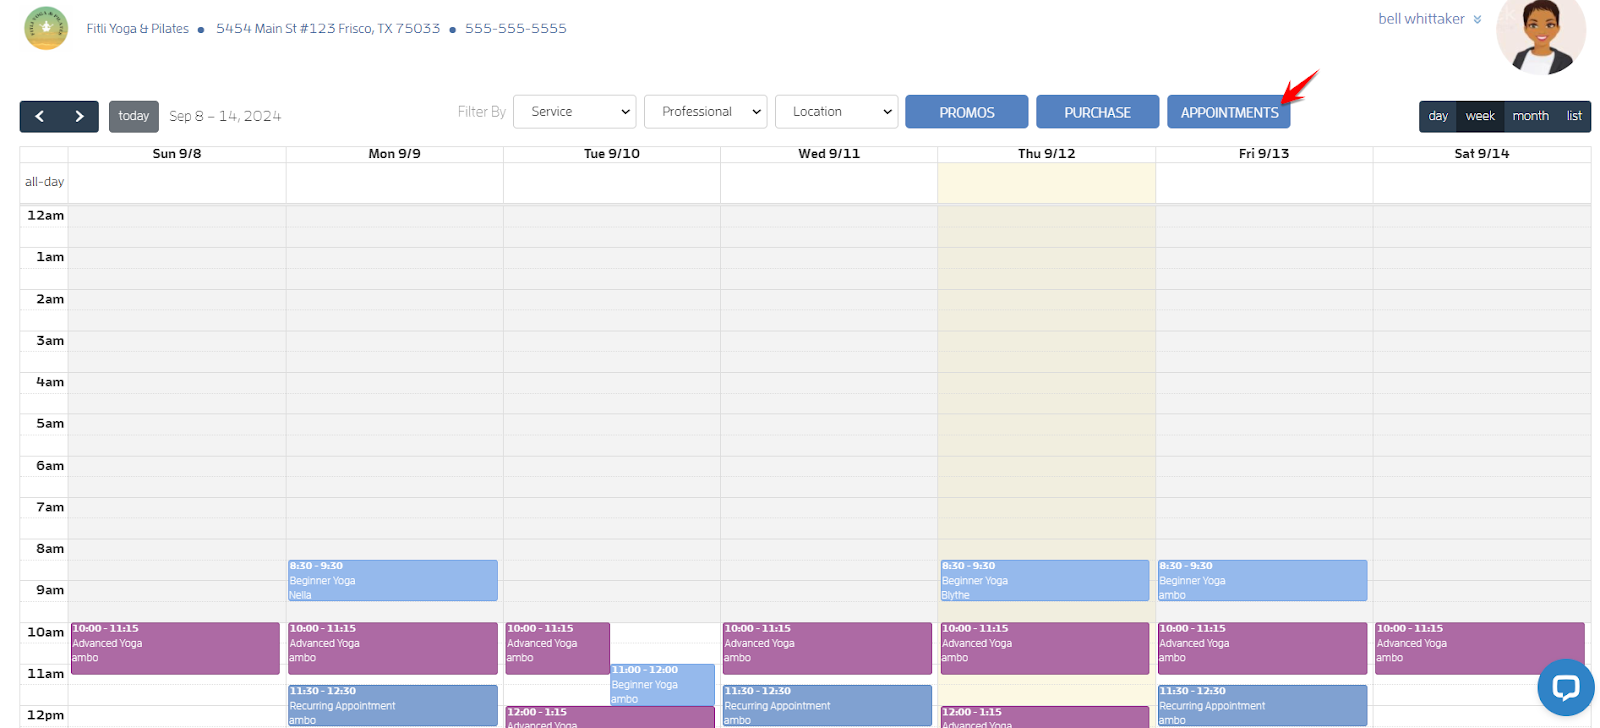
On your business calendar, click APPOINTMENTS at the top.
Note: Not all businesses allow their clients to book appointments. If your business does not allow this, you’ll not see this option on their calendar. For more information, contact your business directly.
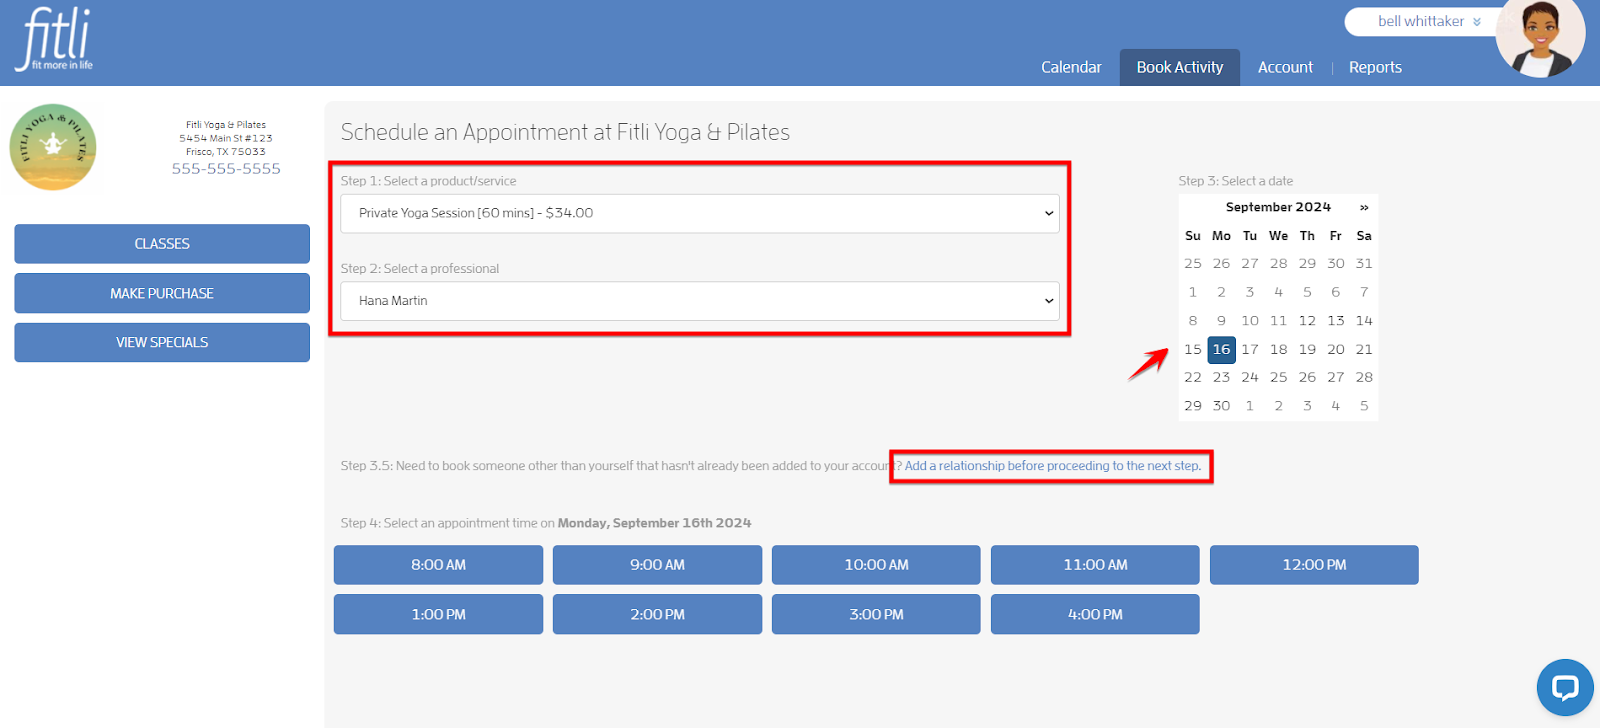
On the Appointment Scheduler page, choose a service, professional, date and time.
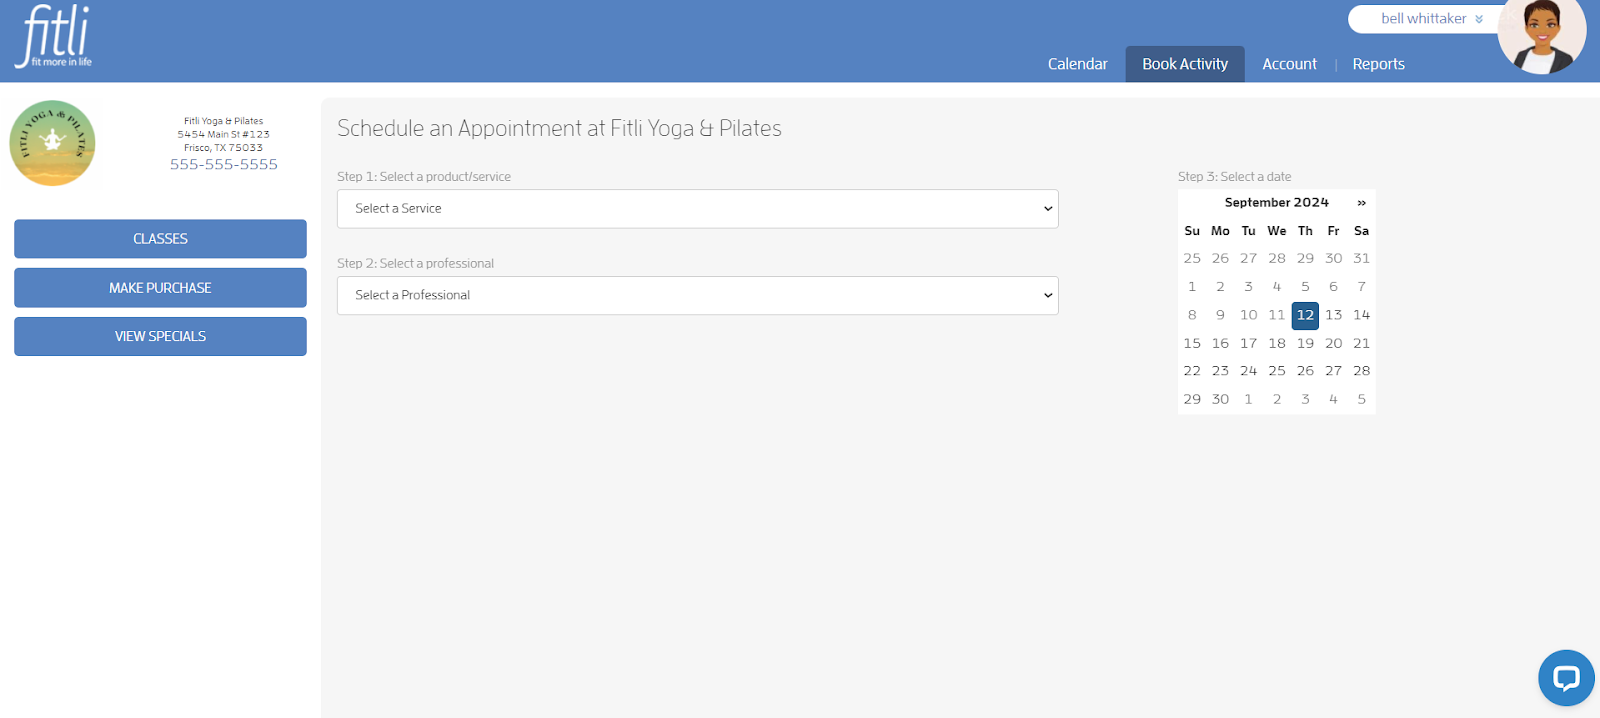
You’ll see an option to add a relationship before proceeding to the next step. Click the link, fill out your relationship’s information on the modal, make sure that the business is checked at the bottom then hit SAVE and CLOSE.
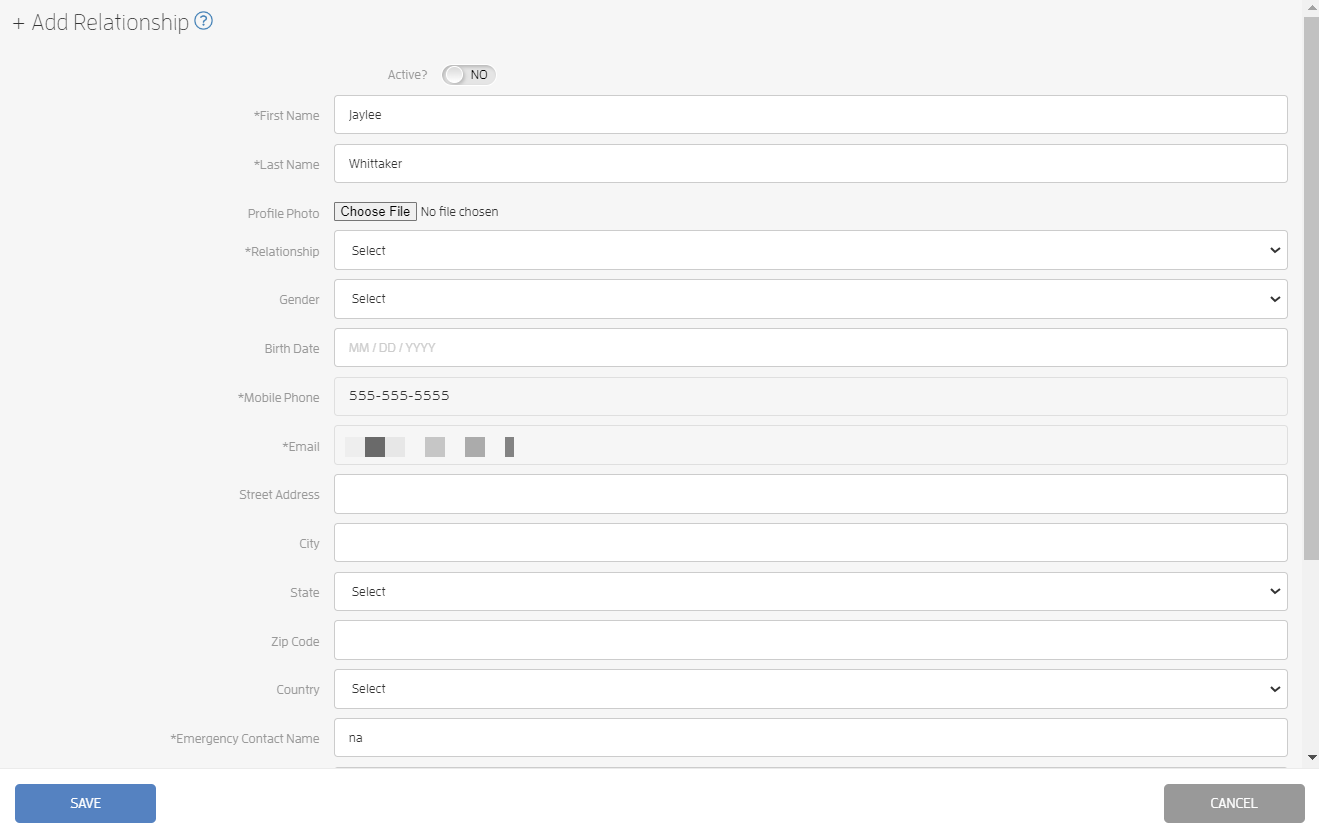
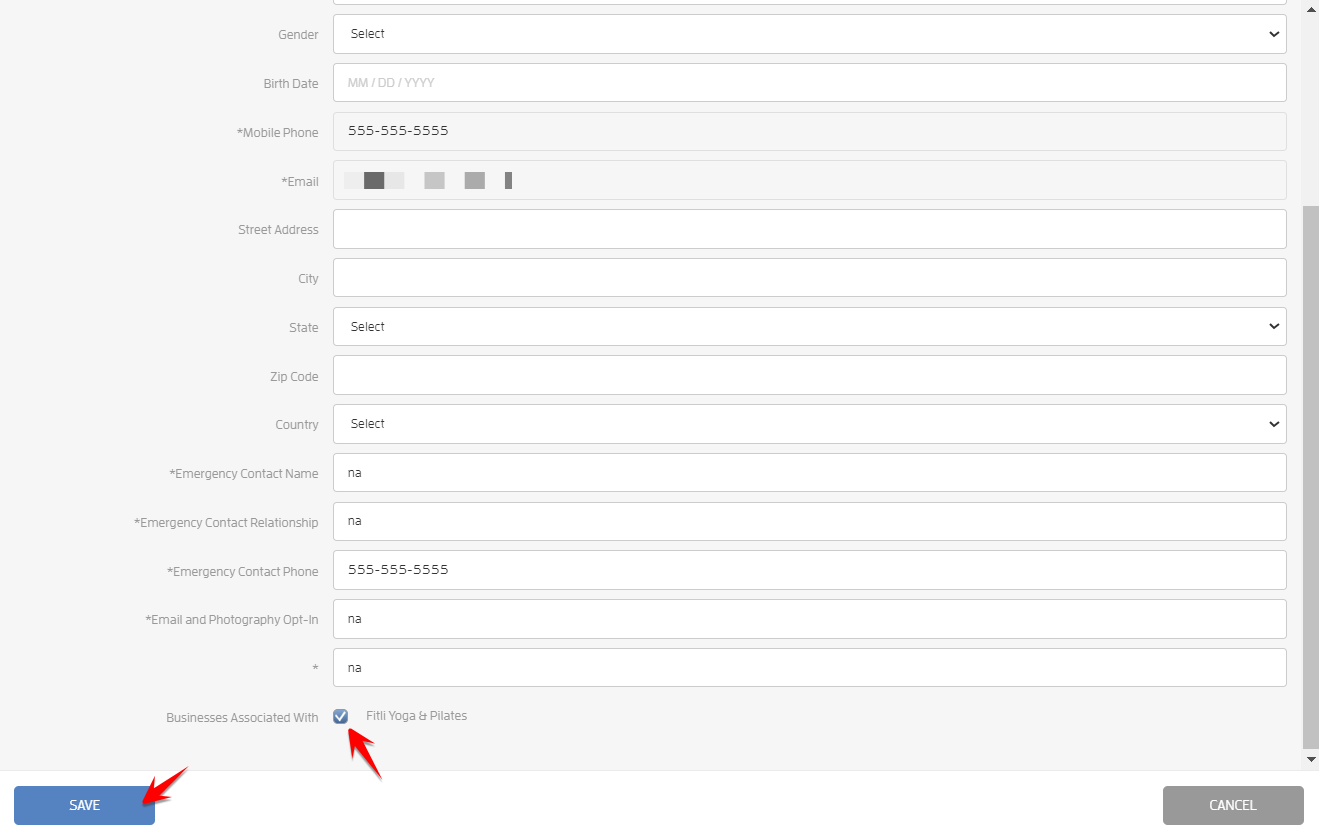
You’ll see that your Relationship is saved on the modal. You can either add more or click CLOSE.
If you already have relationships in your account, the option to add relationships will not display on the Appointment Scheduler. Don’t fret! You can still add your relationships on the “Select User” modal like the one for classes.
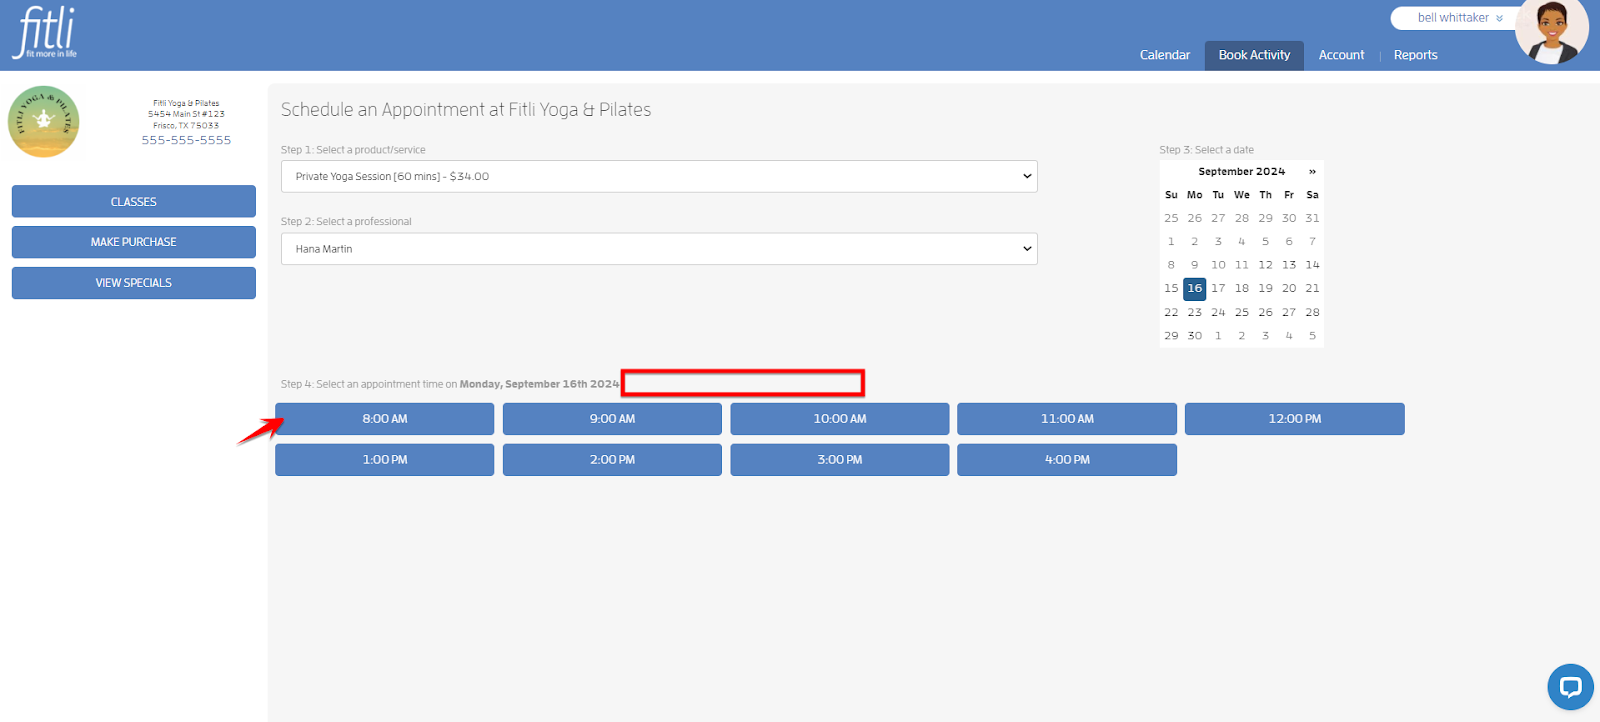
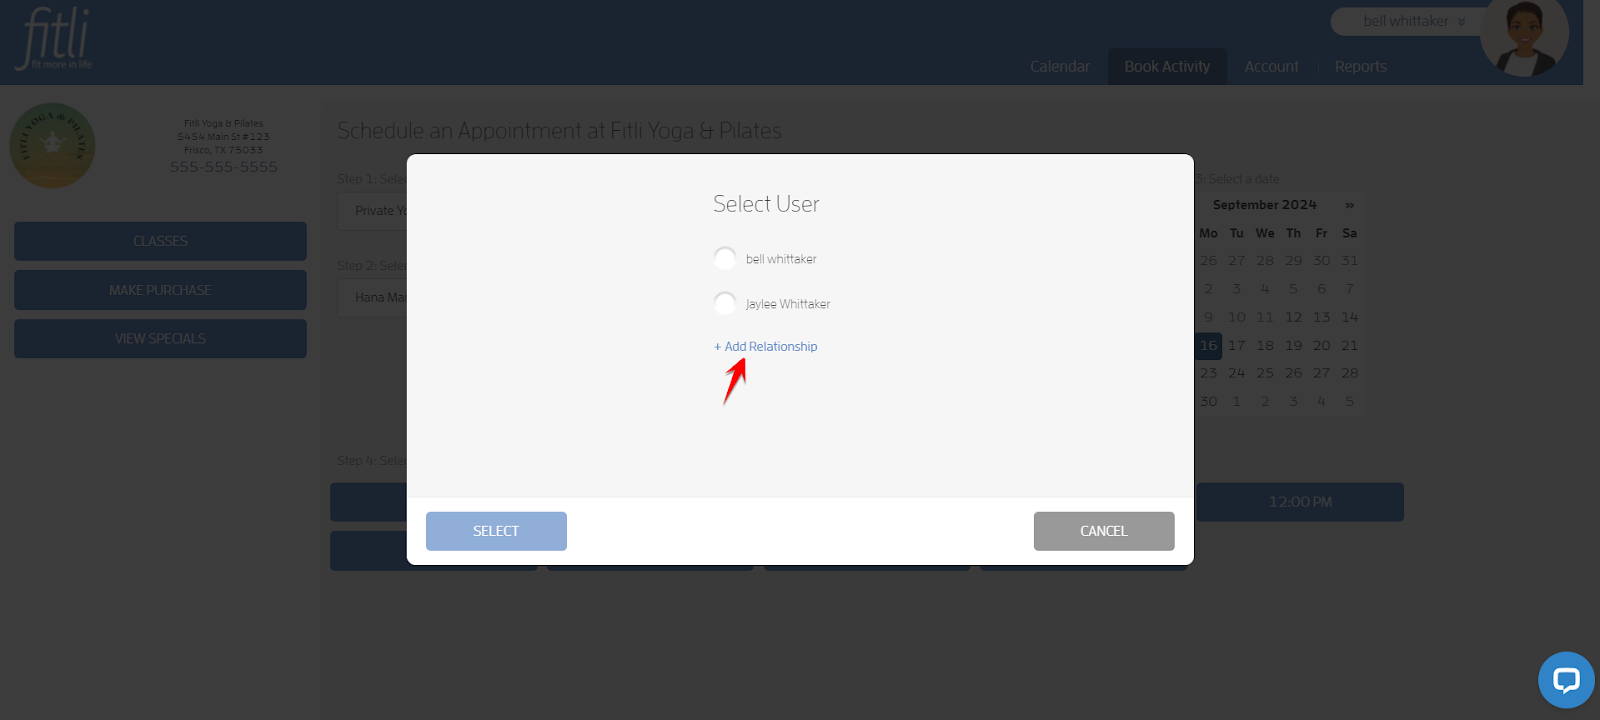
Repeat the steps above to book your newly added relationship and you’re done!
Any questions? Contact your business directly, chat with us or send us an email to support@fitli.com.