
Previously, we've discussed how to create a banner message for announcements. This guide will help you promote your merchandise/retail products or promote an event/class for your business. You can create a banner message for it with a link that will direct your clients to the "Make Purchase" flow to purchase and/or book.
Retail Products
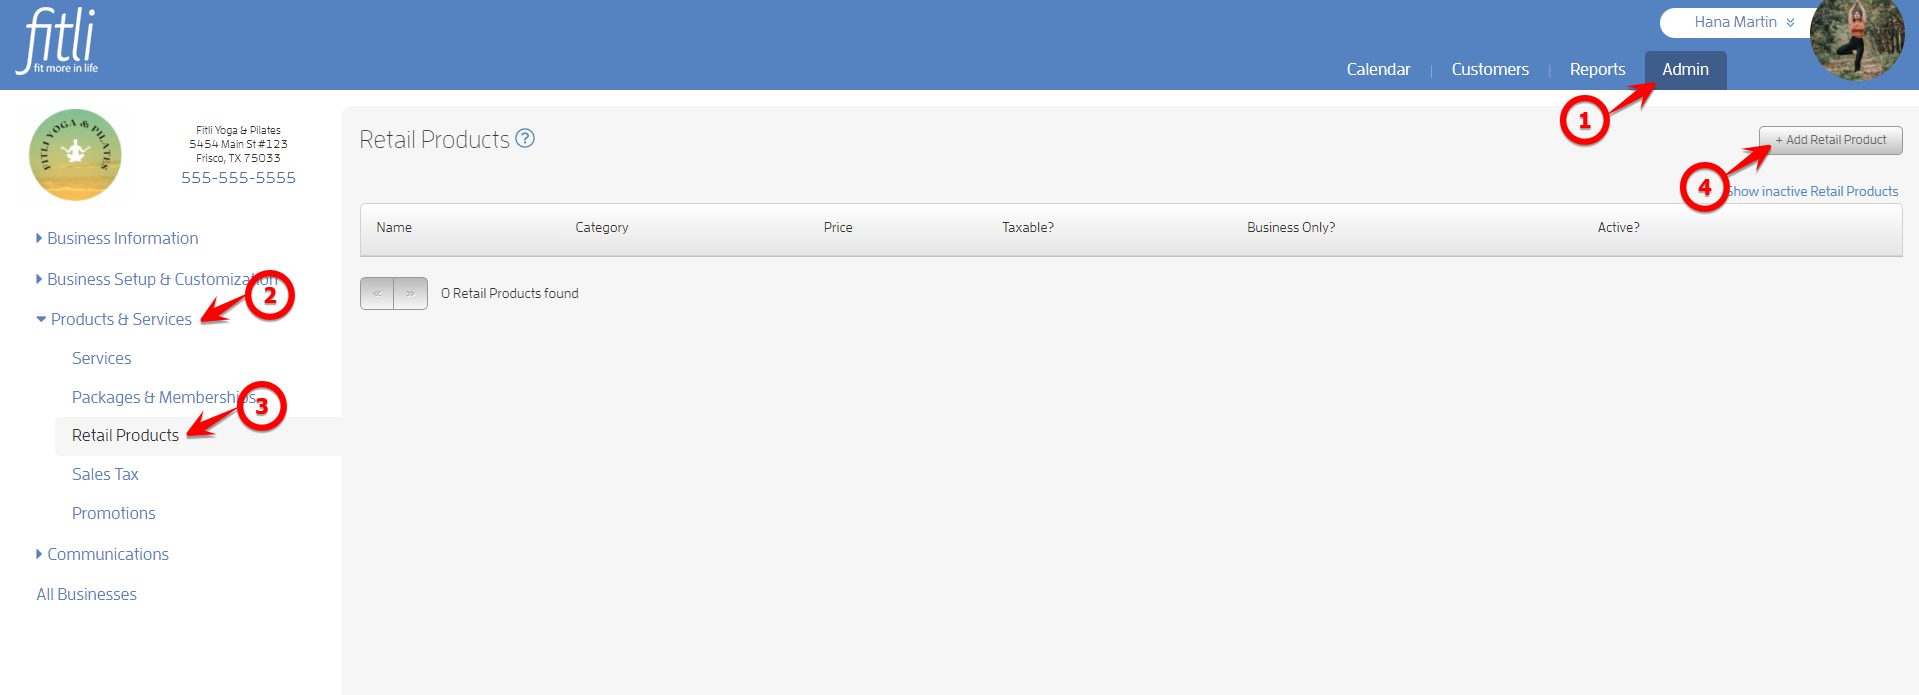
To add a link for your merchandise/retail product on your banner message, add a retail product on the "Retail Products" section. To do this, go to 1 - ADMIN > 2 - Products & Services > 3 - Retail Products, then click 4 - + Add Retail Product.
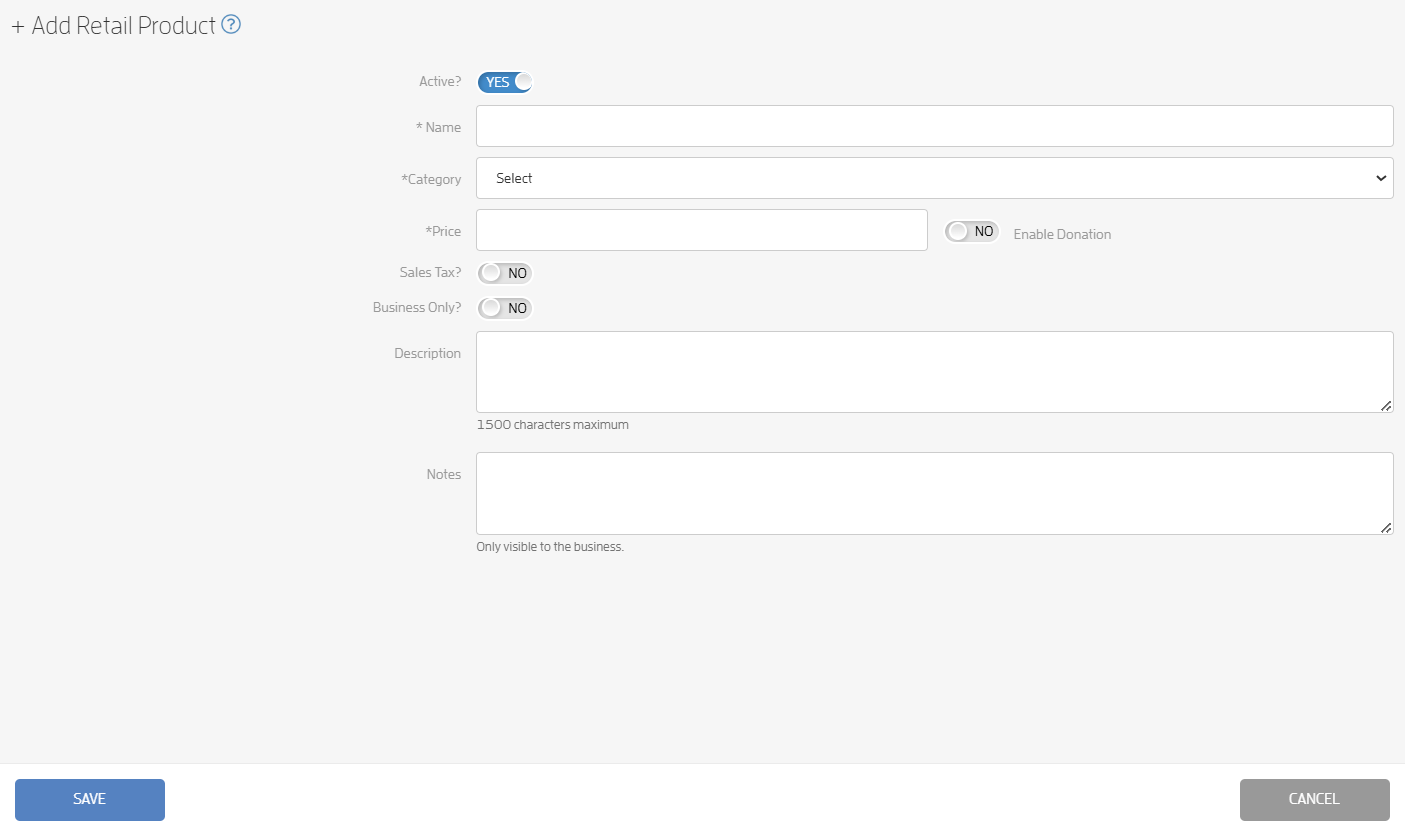
Fill out the "+Add Retail Product" form and hit SAVE.
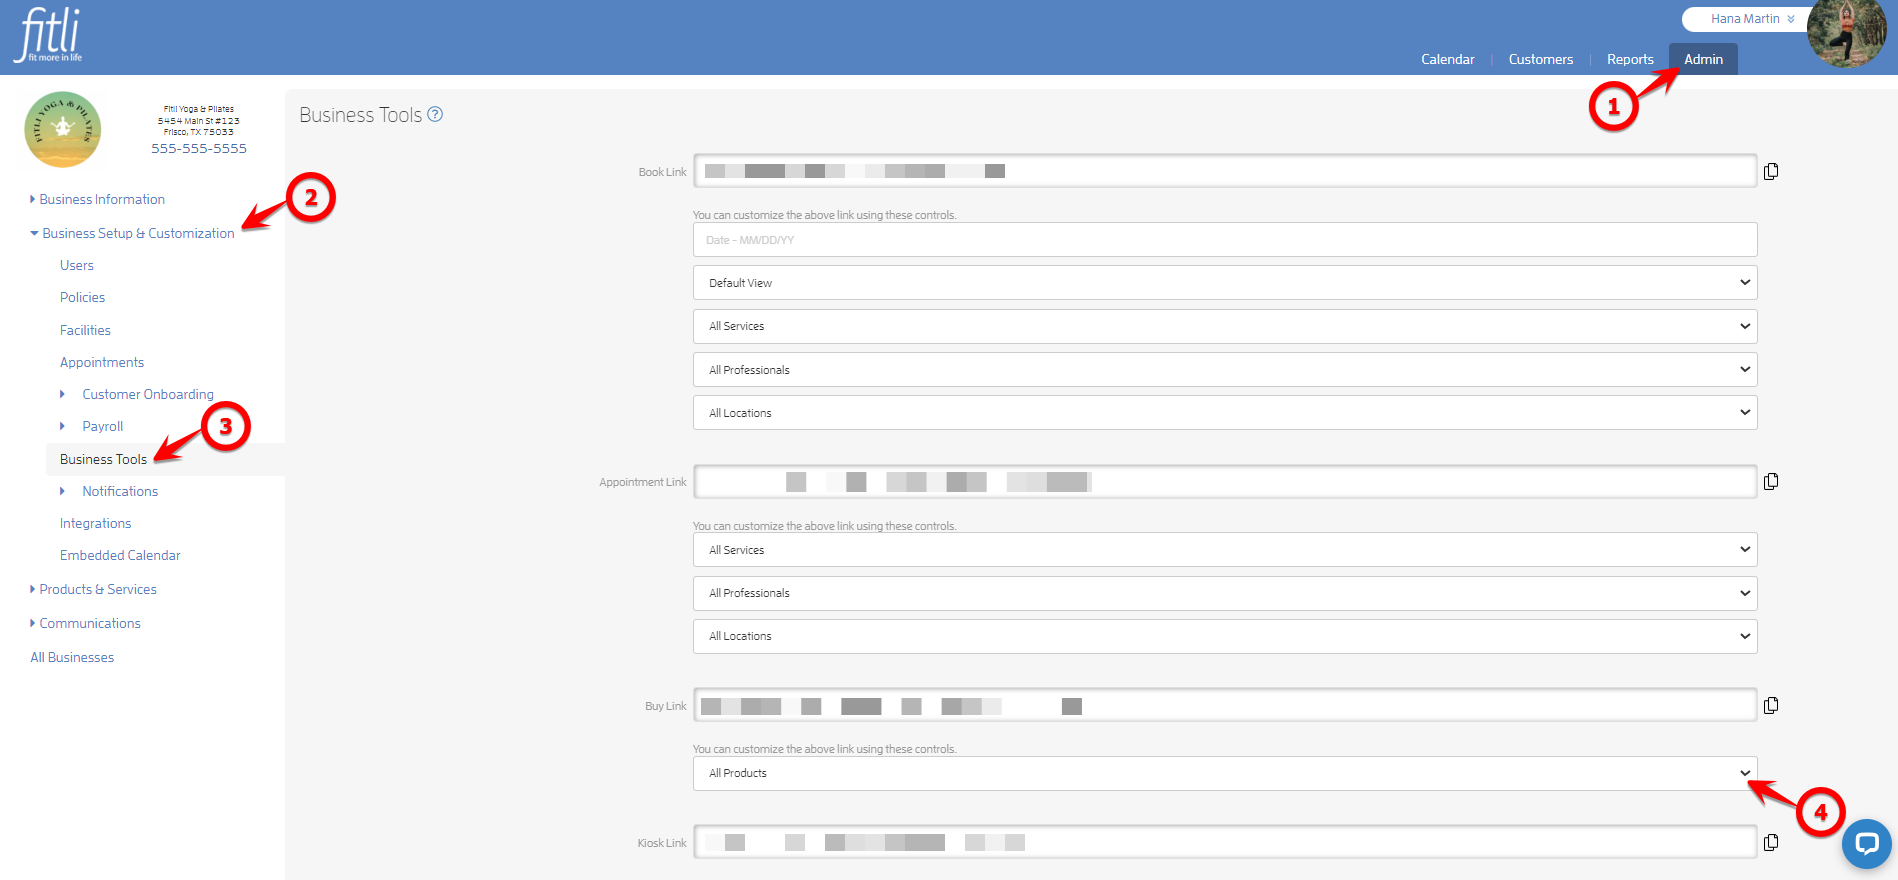
Go to the "Business Tools" section under "Business Setup & Customization" and scroll down to "All Products".
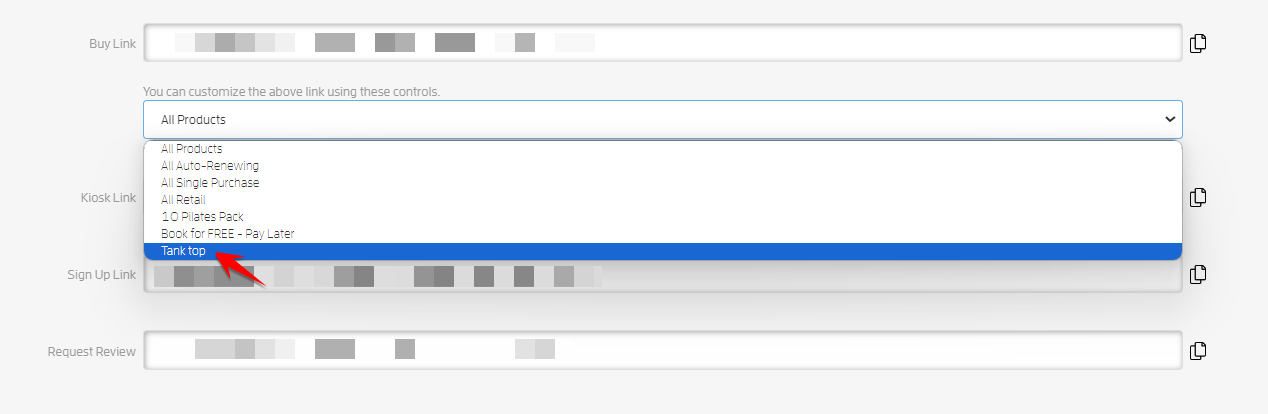
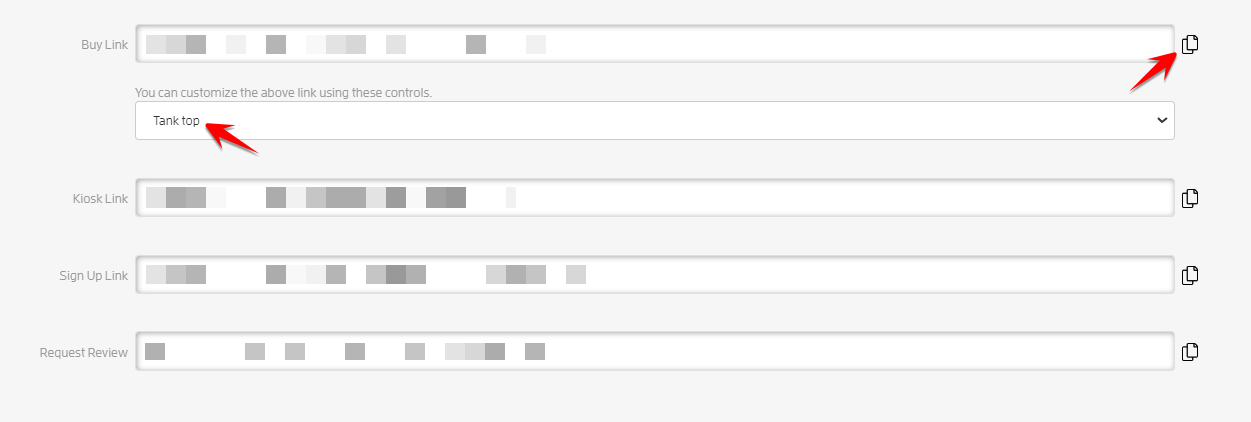
Select the retail product you've created from the pulldown and click the copy icon to copy the link.
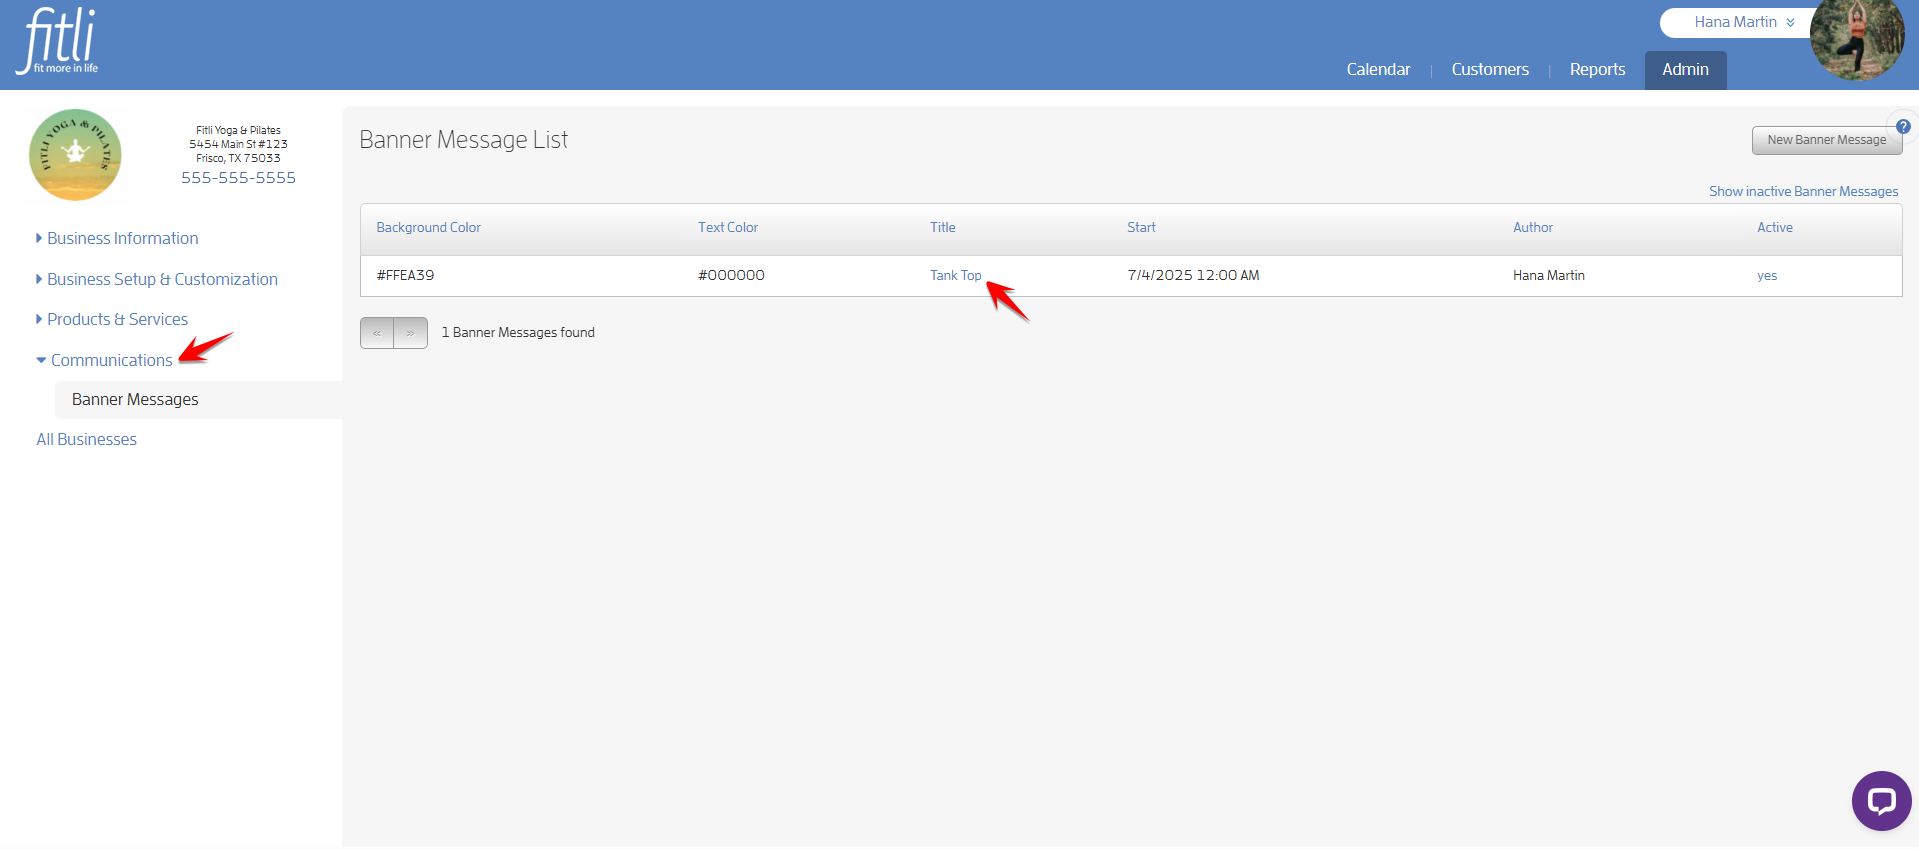
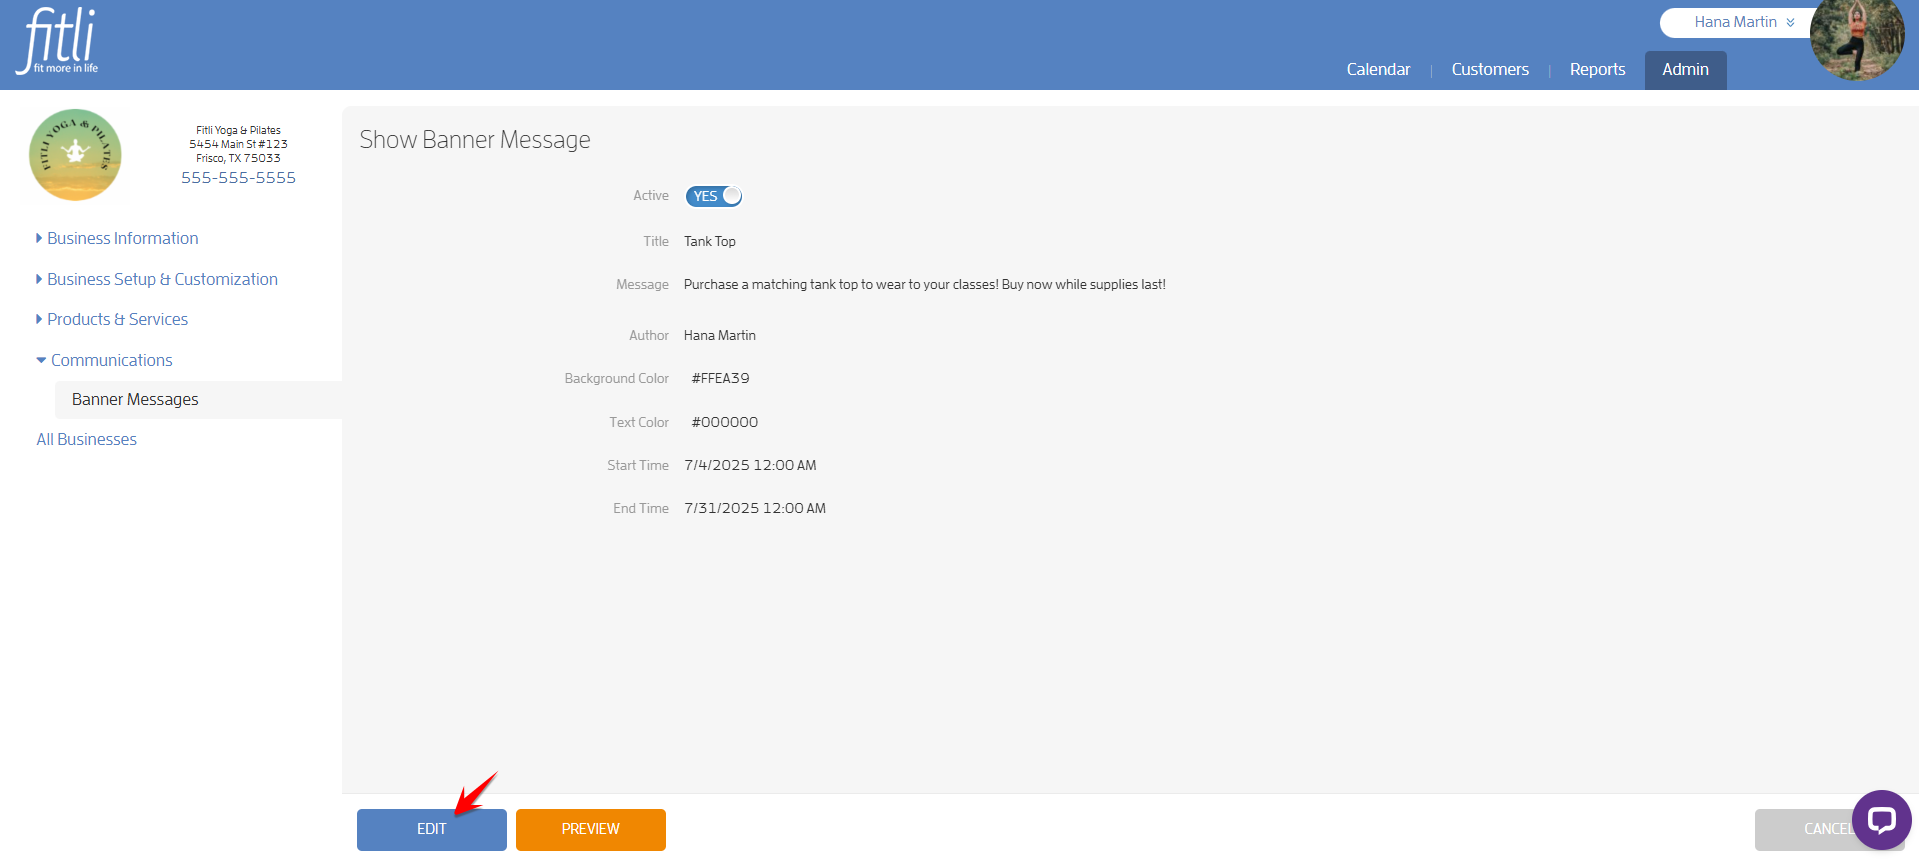
Then, click "Communications" at the left, click the title of the banner message to open it and hit "Edit".
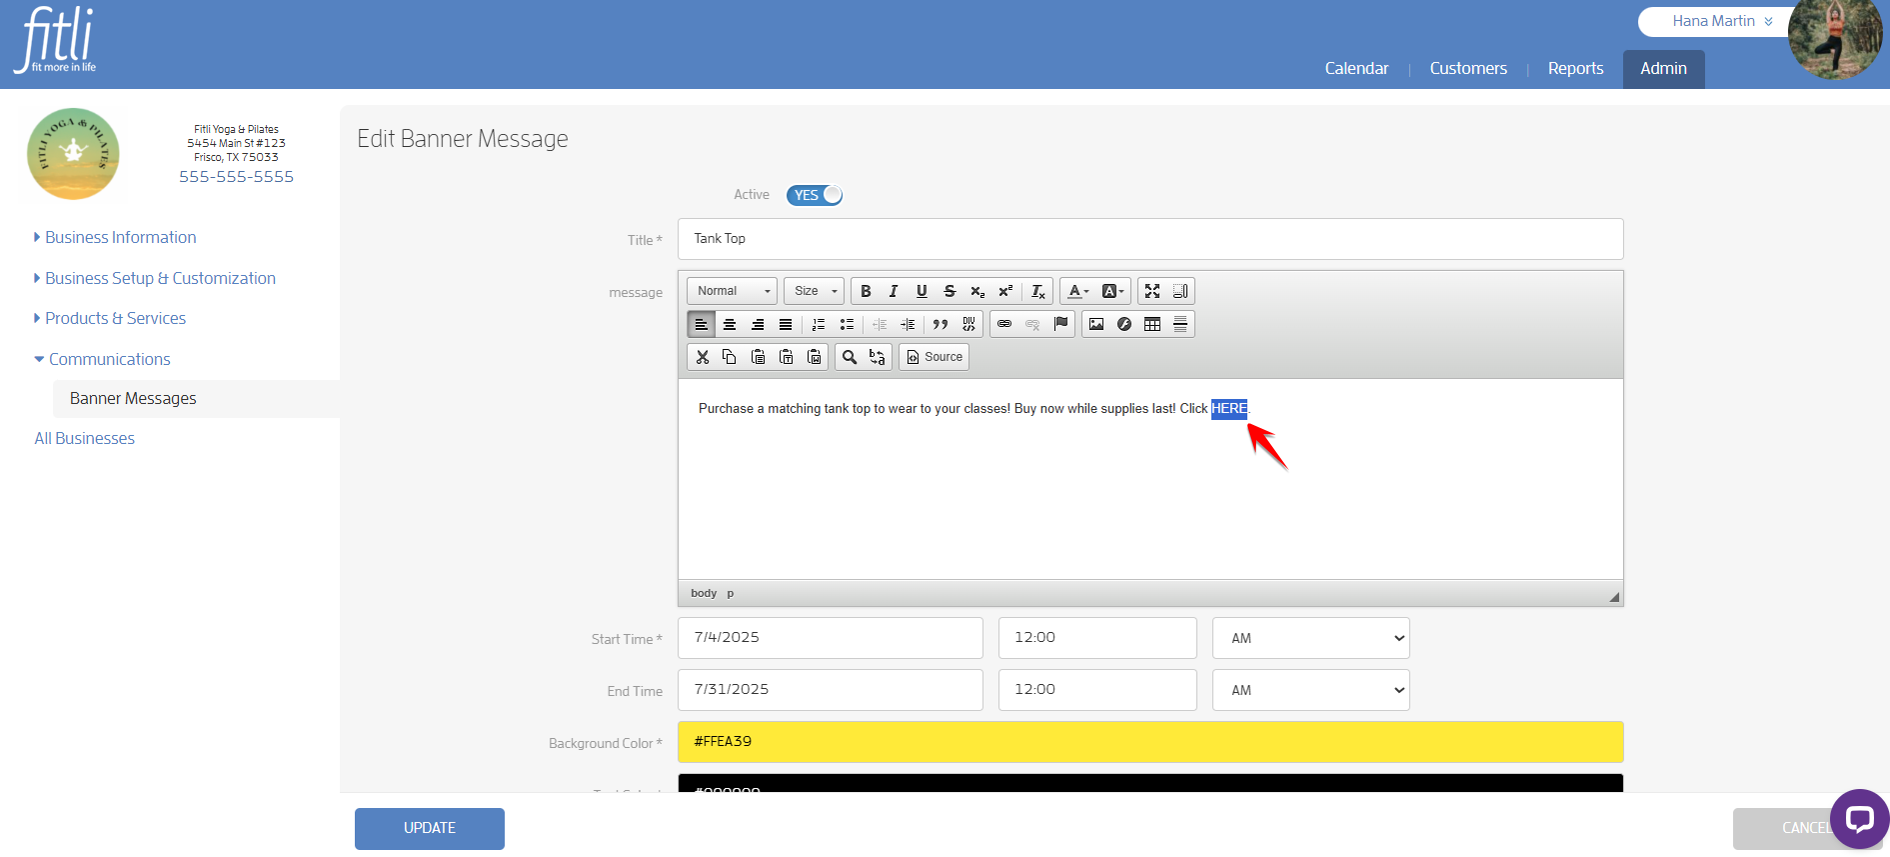
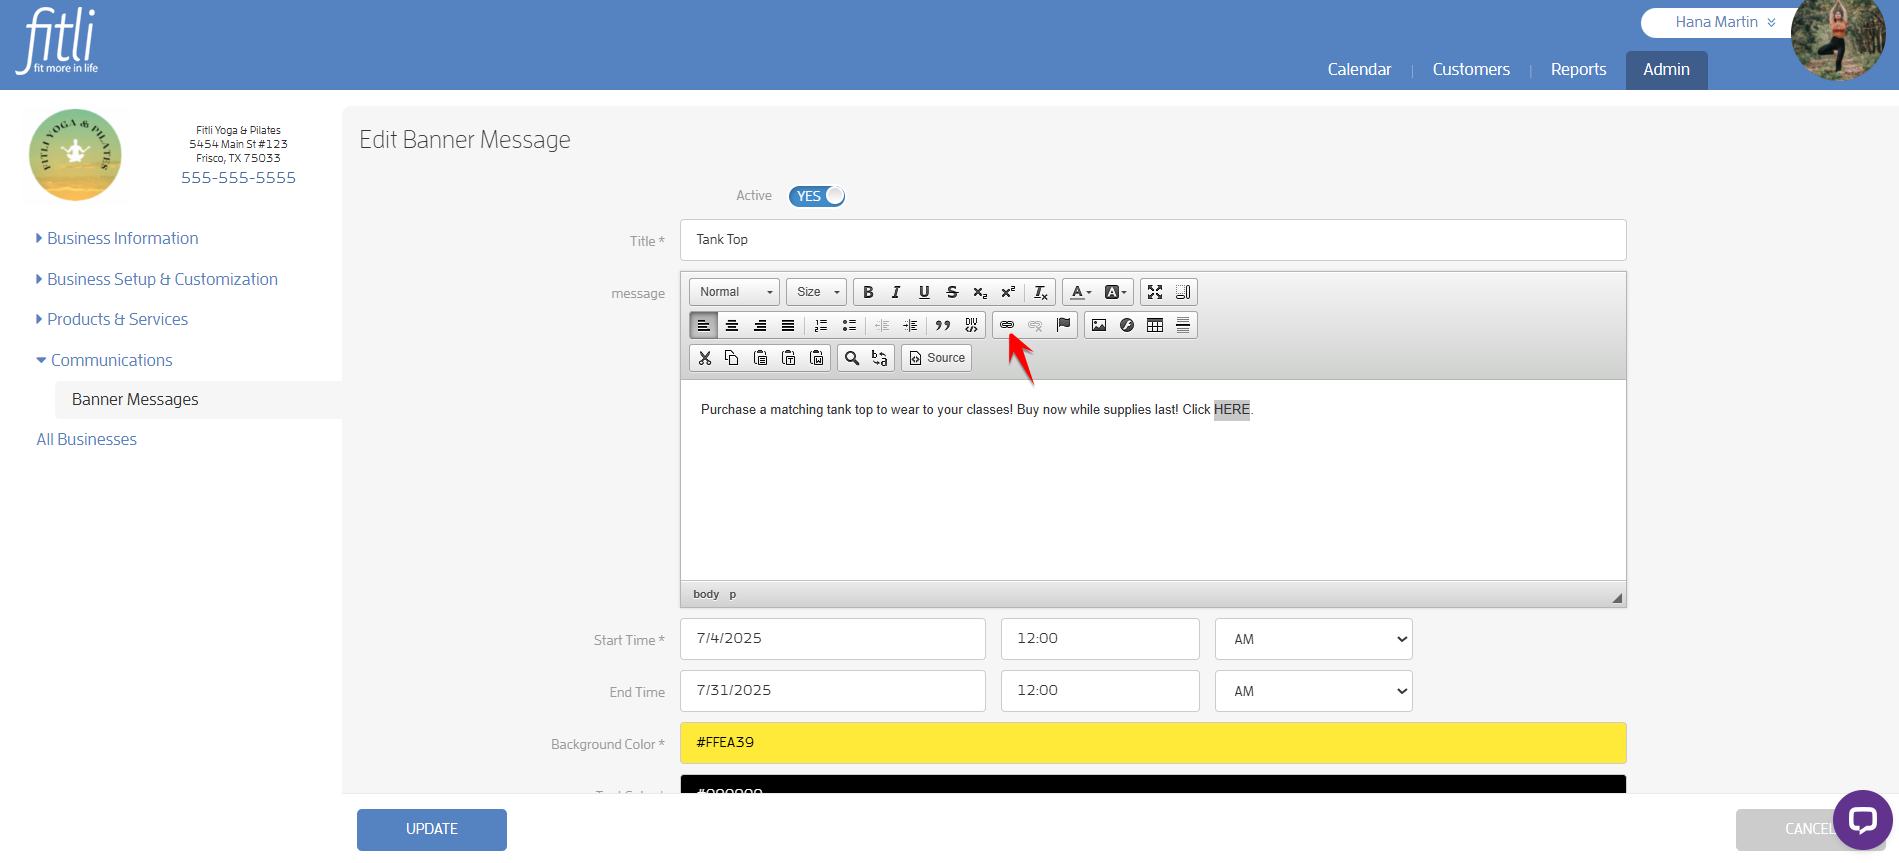
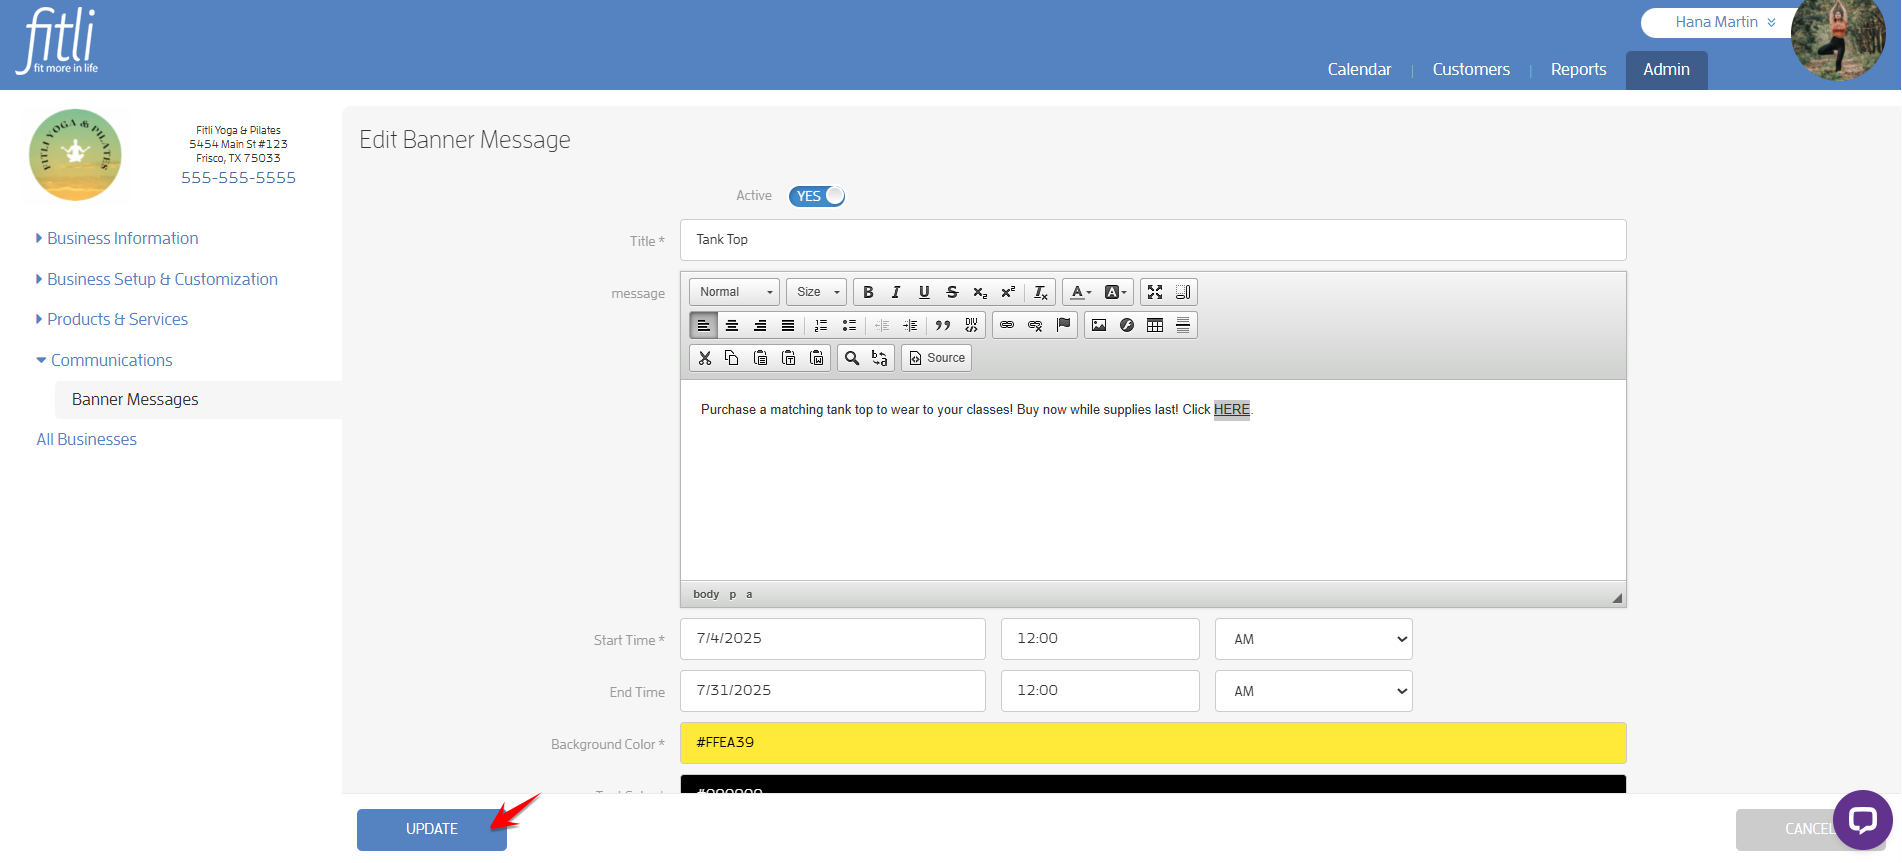
Add a text and highlight where you want to paste the link to the retail product.
Click the link button and paste the retail product's link on the "Link Info" tab.
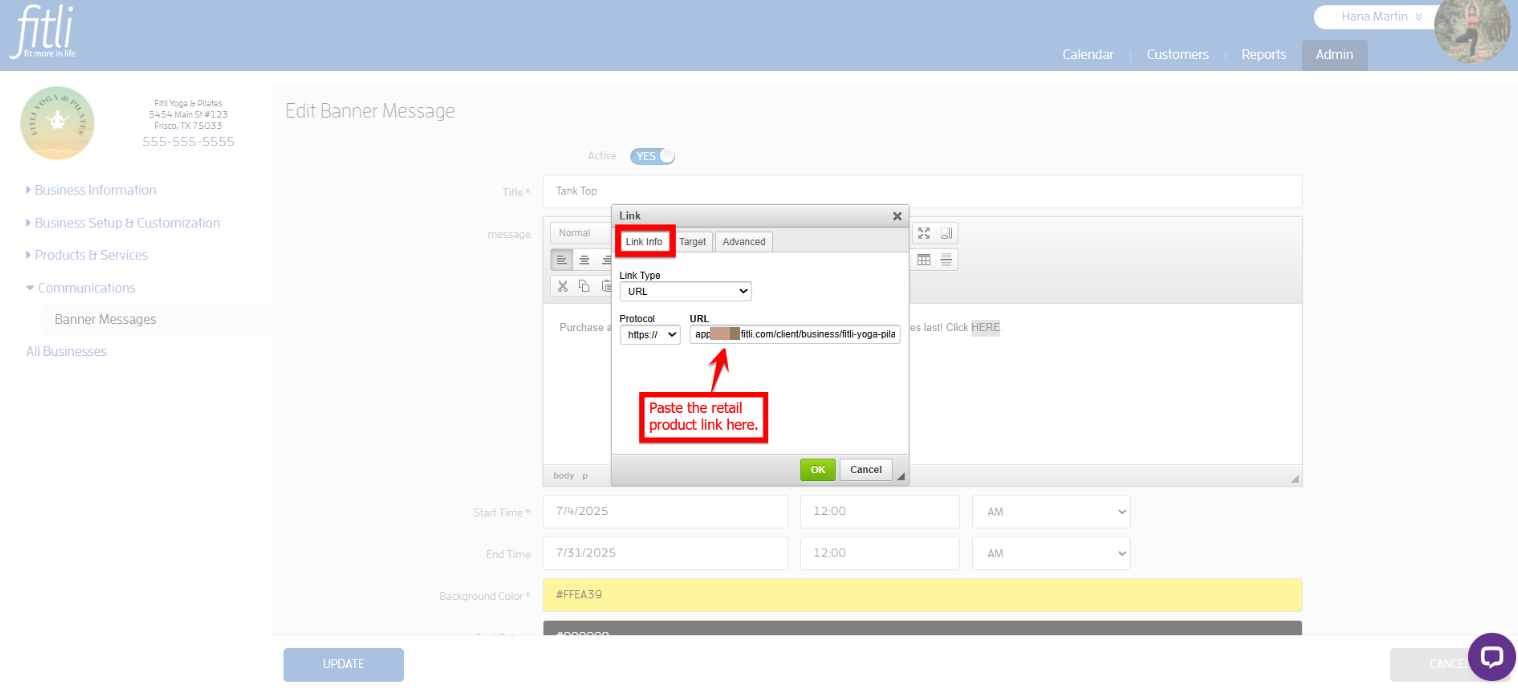
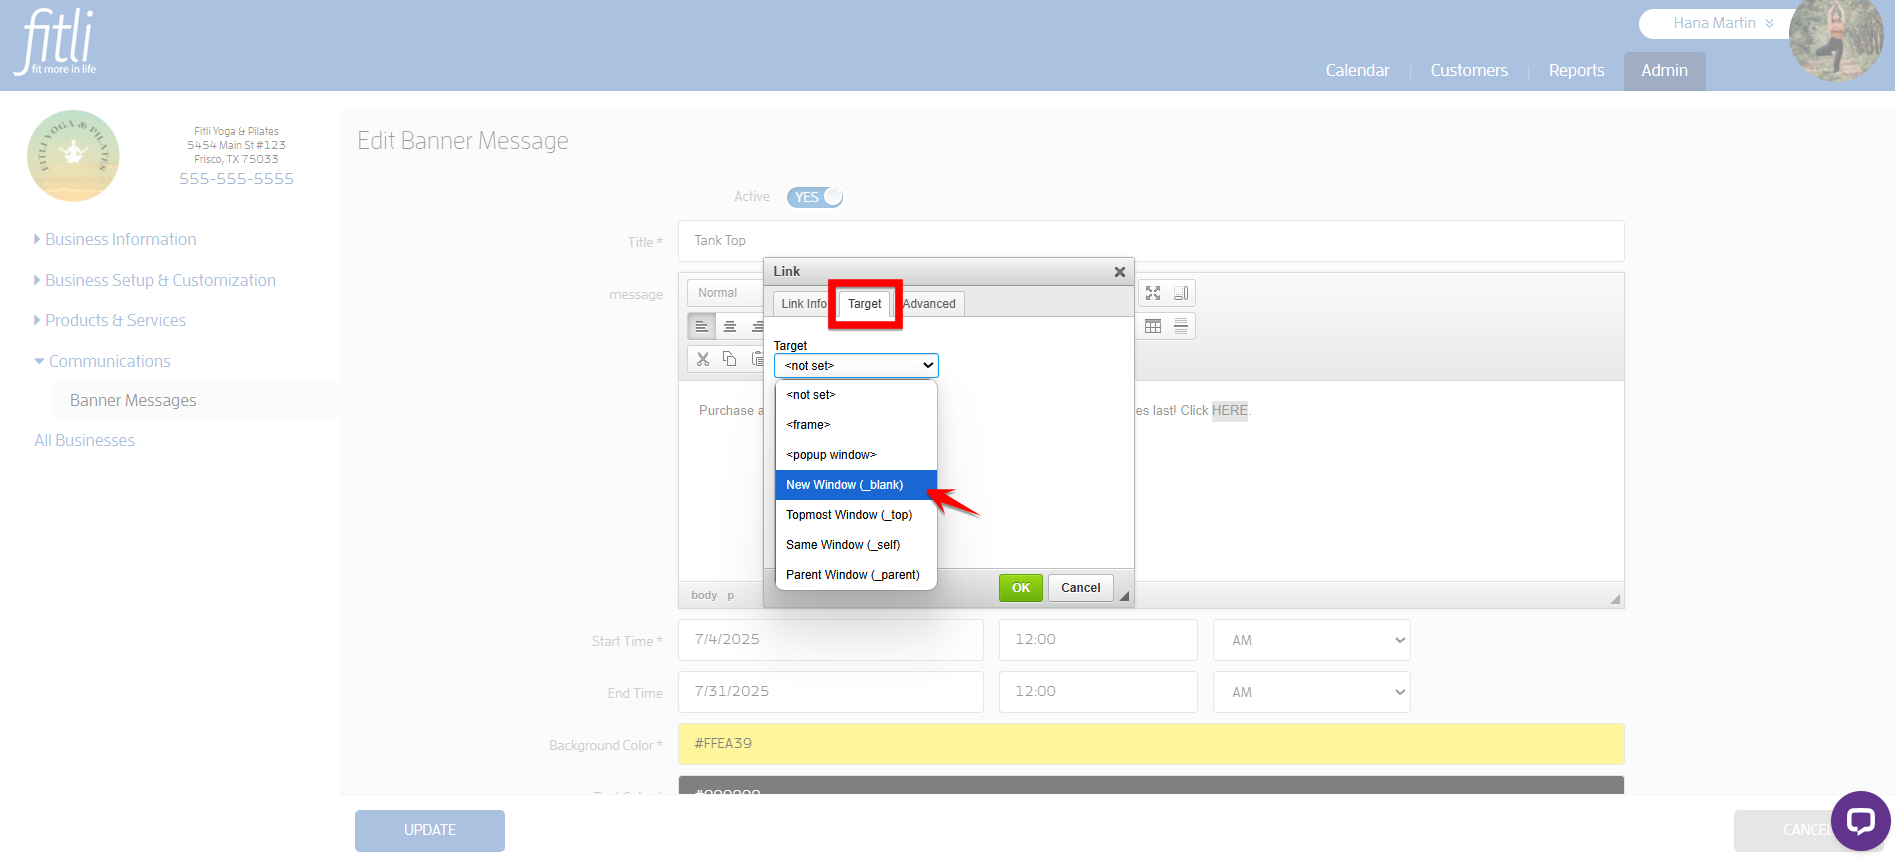
Click the "Target" tab, select "New Window (_blank)" from the pulldown and hit OK.
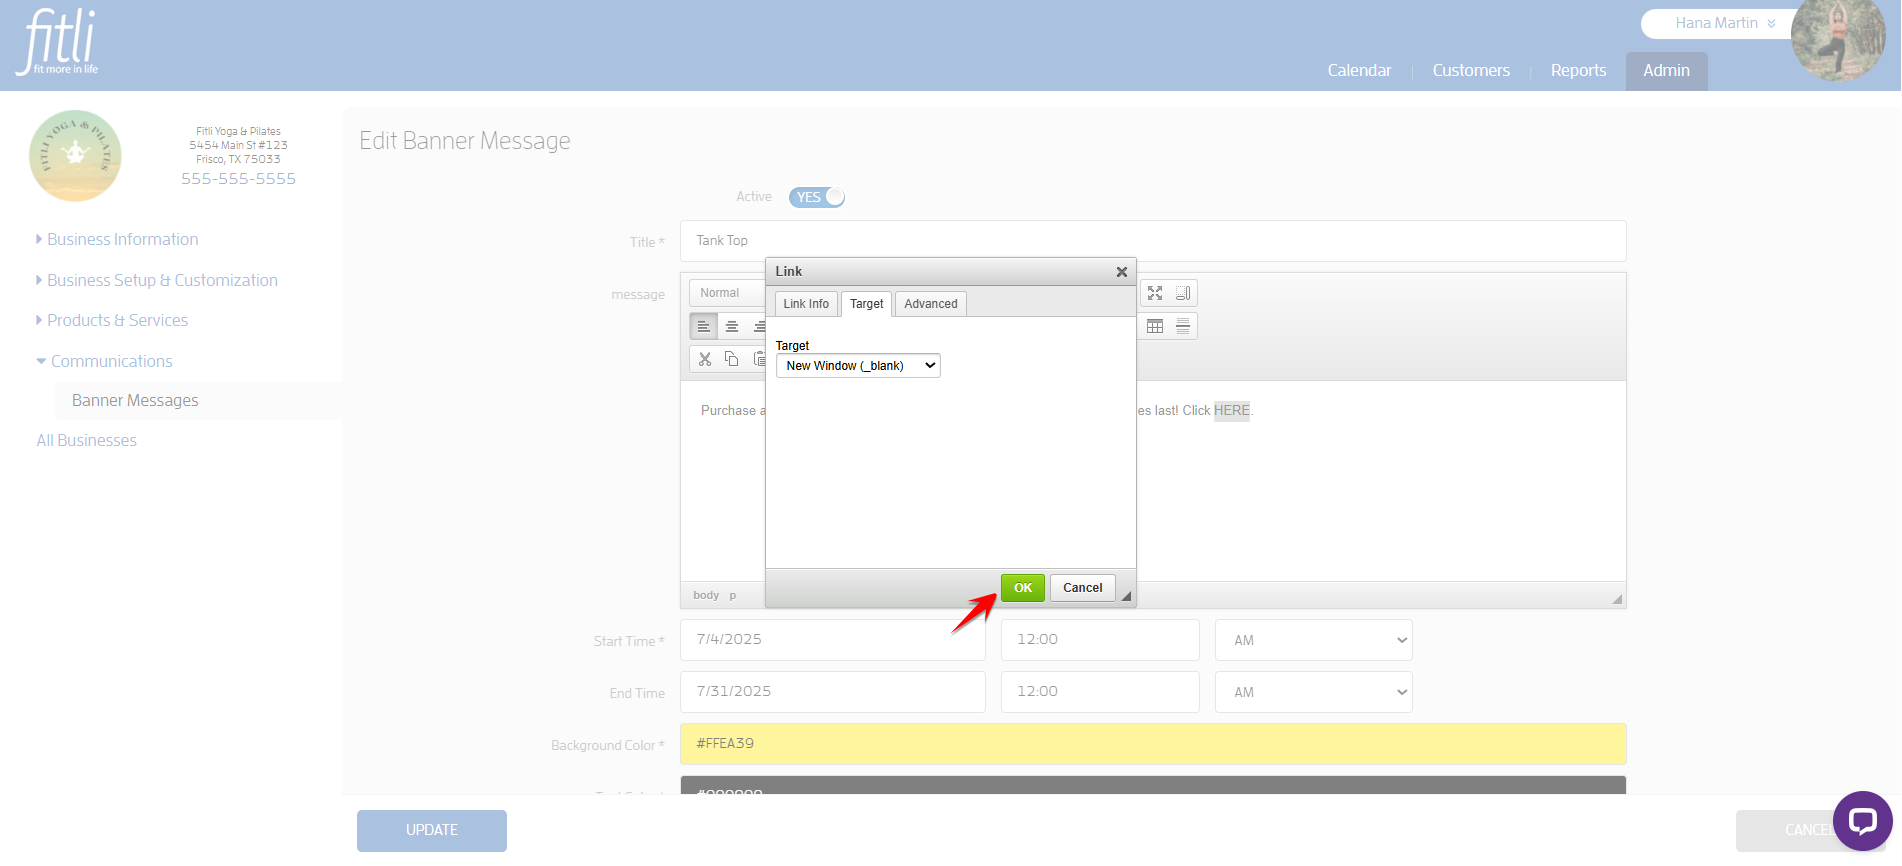
Click "Update". Very Important!
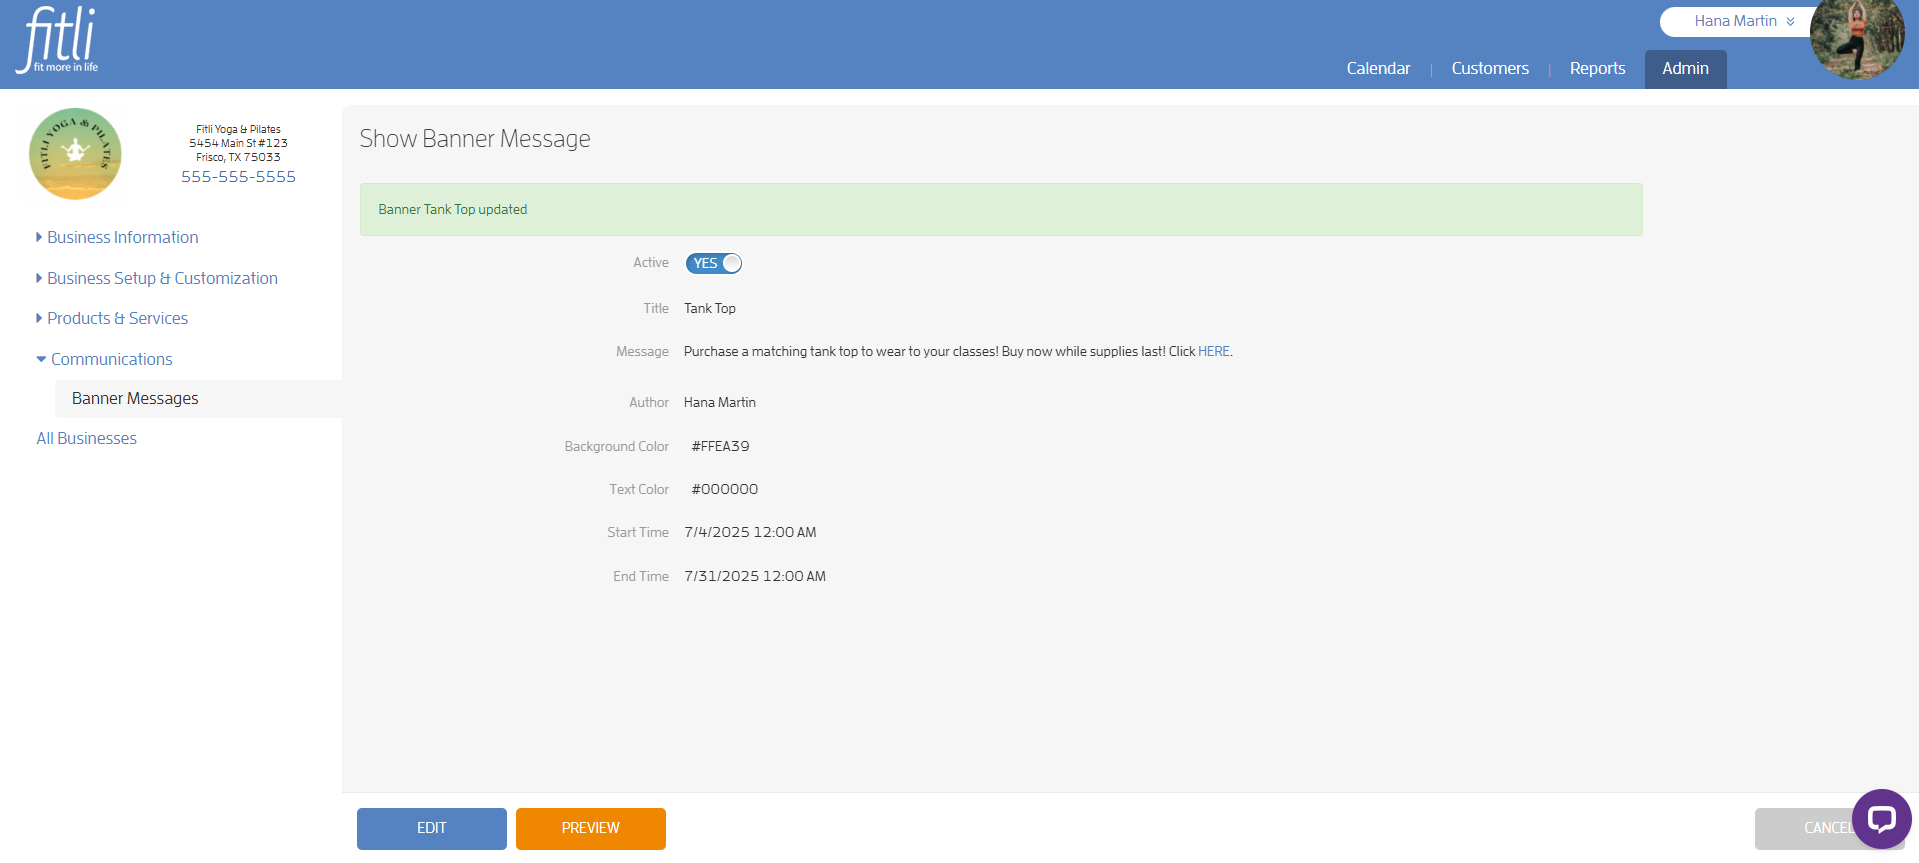
When done, a message in green at the top will confirm that you've successfully updated the banner message!
Retail Product Client View
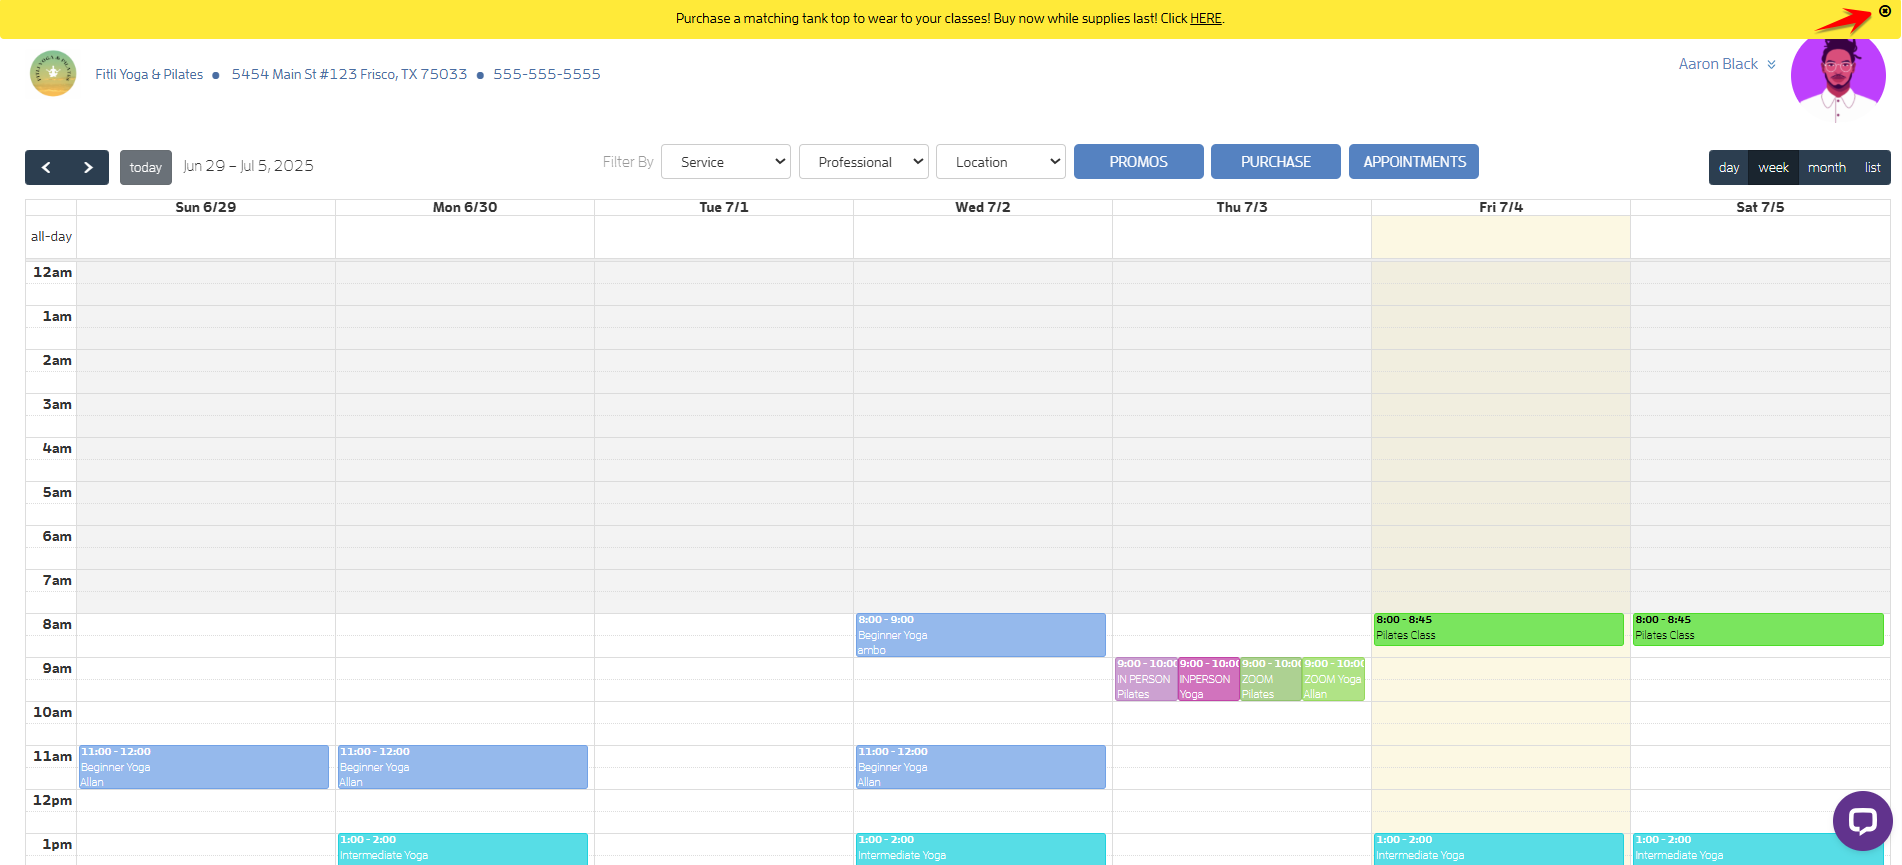
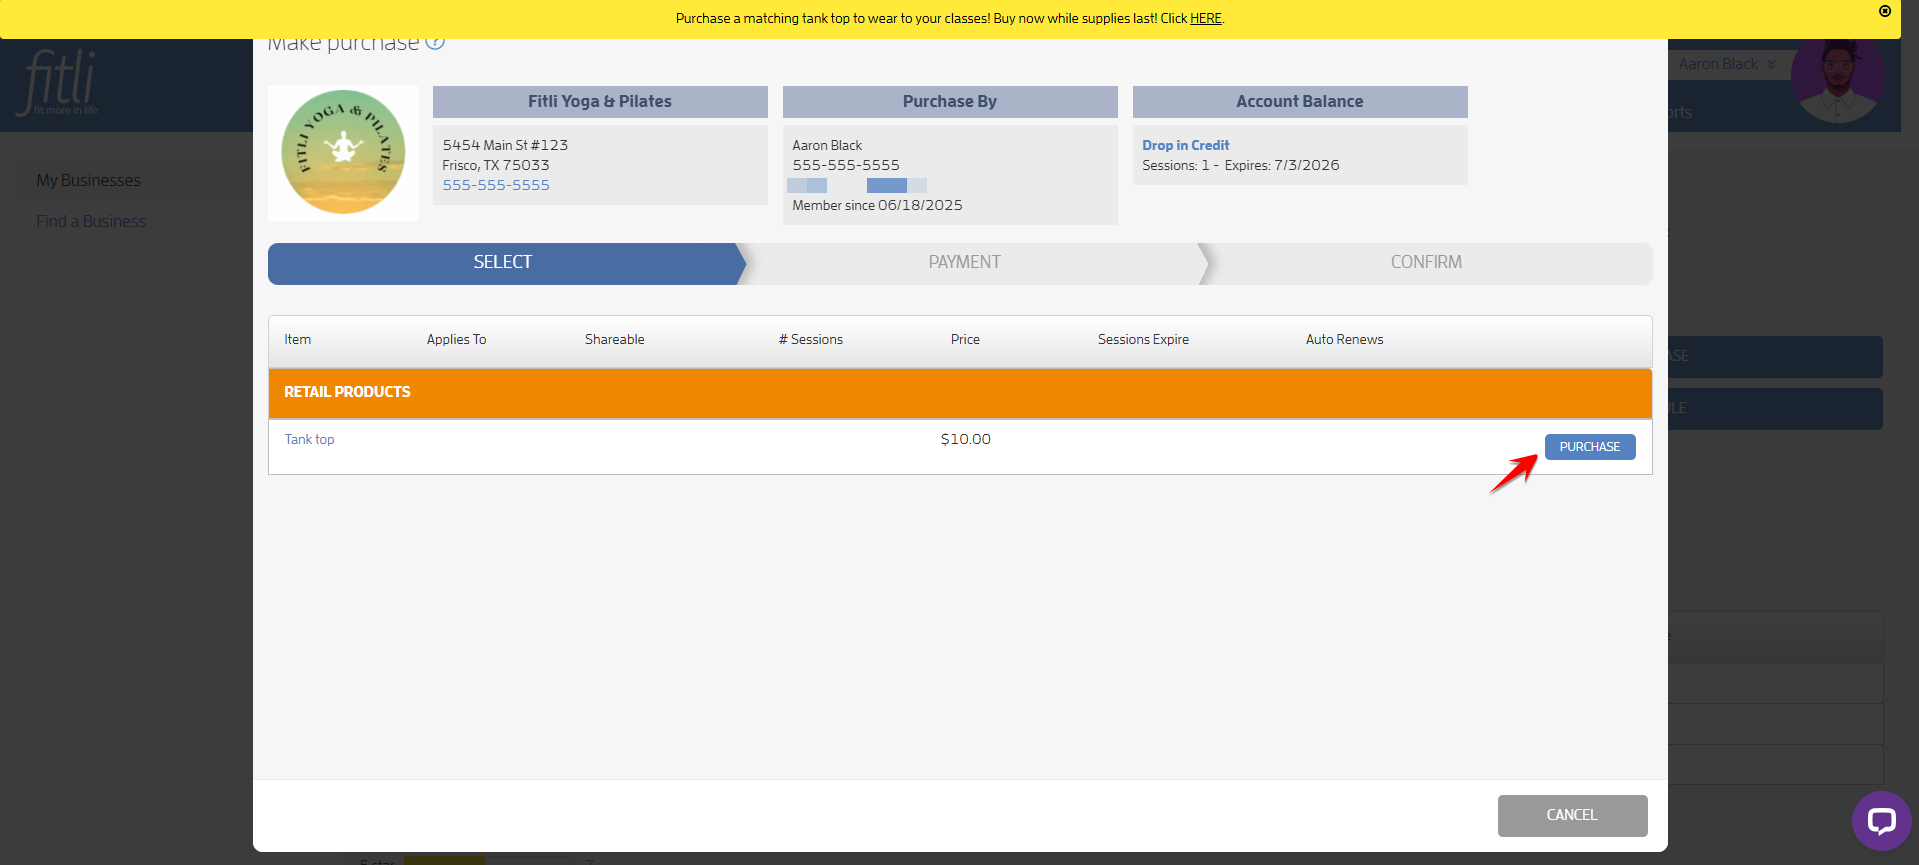
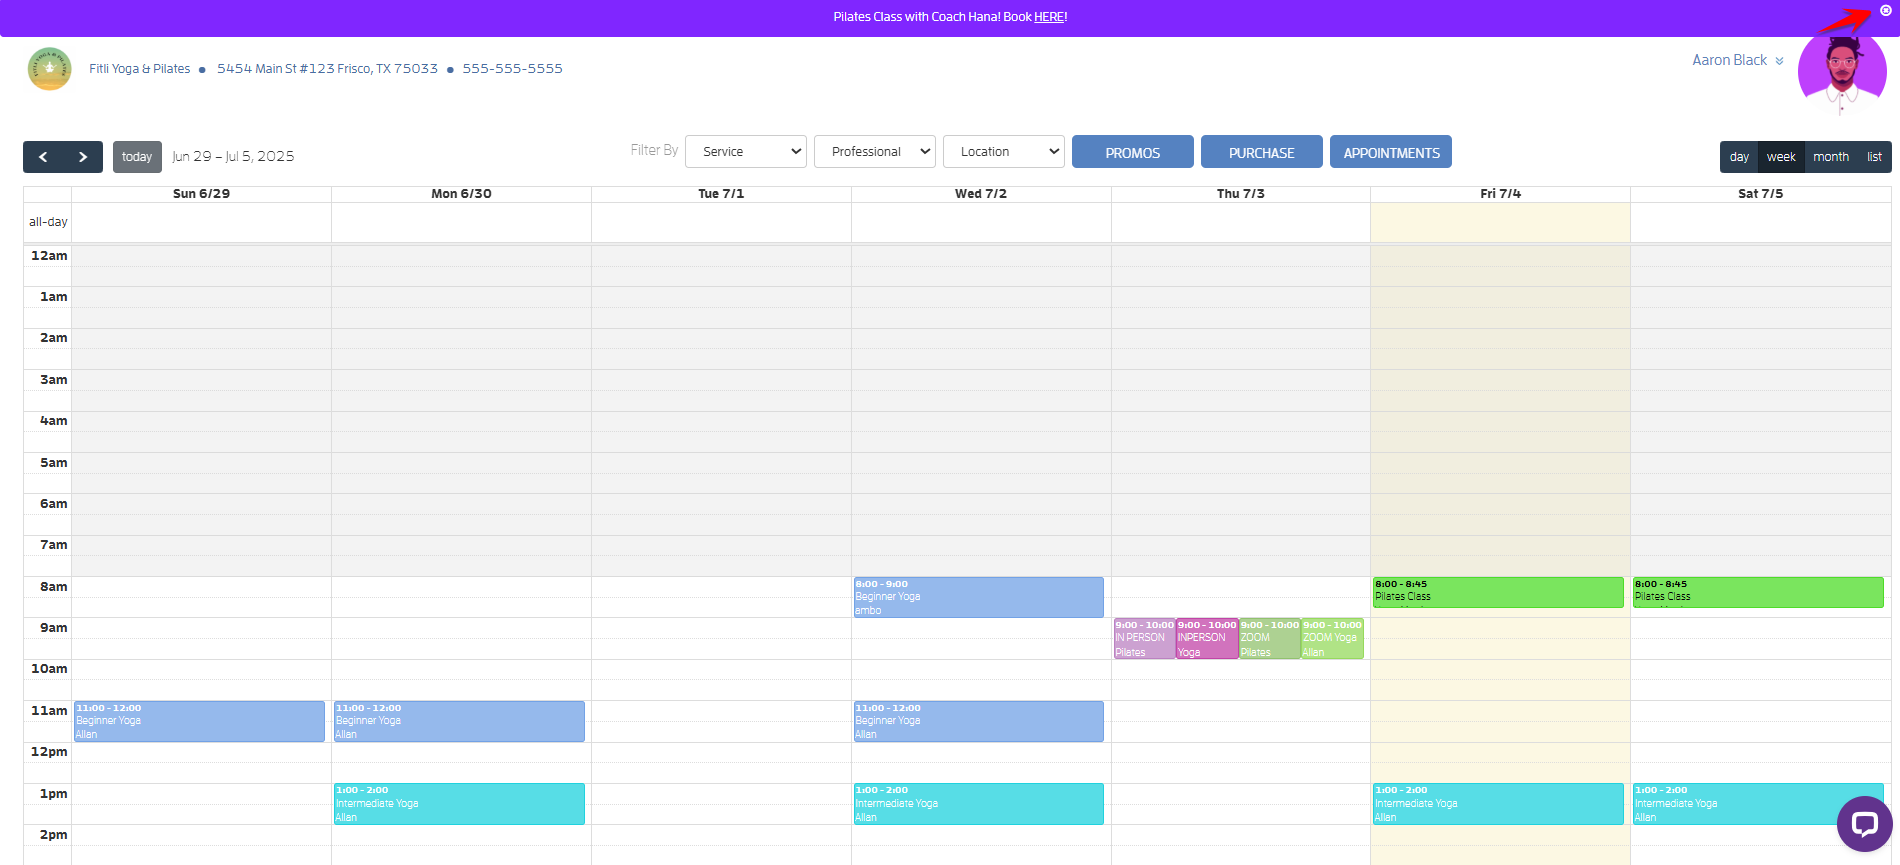
The banner message will appear like a heading on your clients' end on your business profile, public schedule and appointments sections. Clients can make the banner message go away and not show it again by clicking the small "x" on the right side.
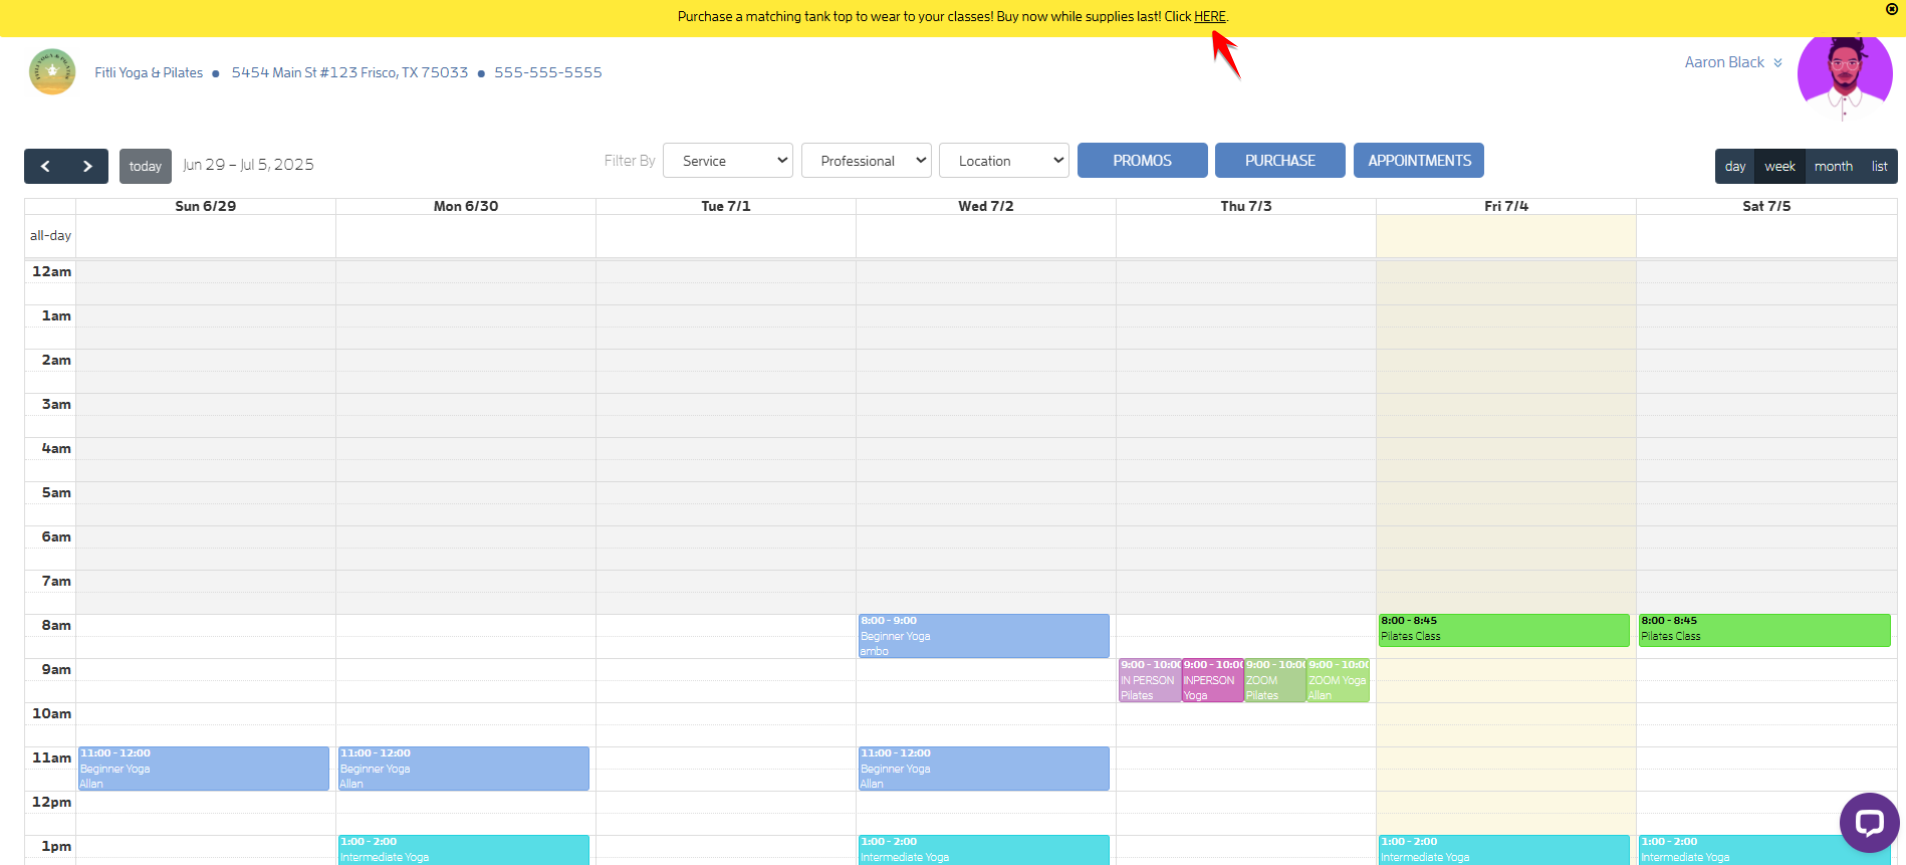
If they click the clickable link you've created, a new tab will open where they can purchase your merchandise!
Class/Event
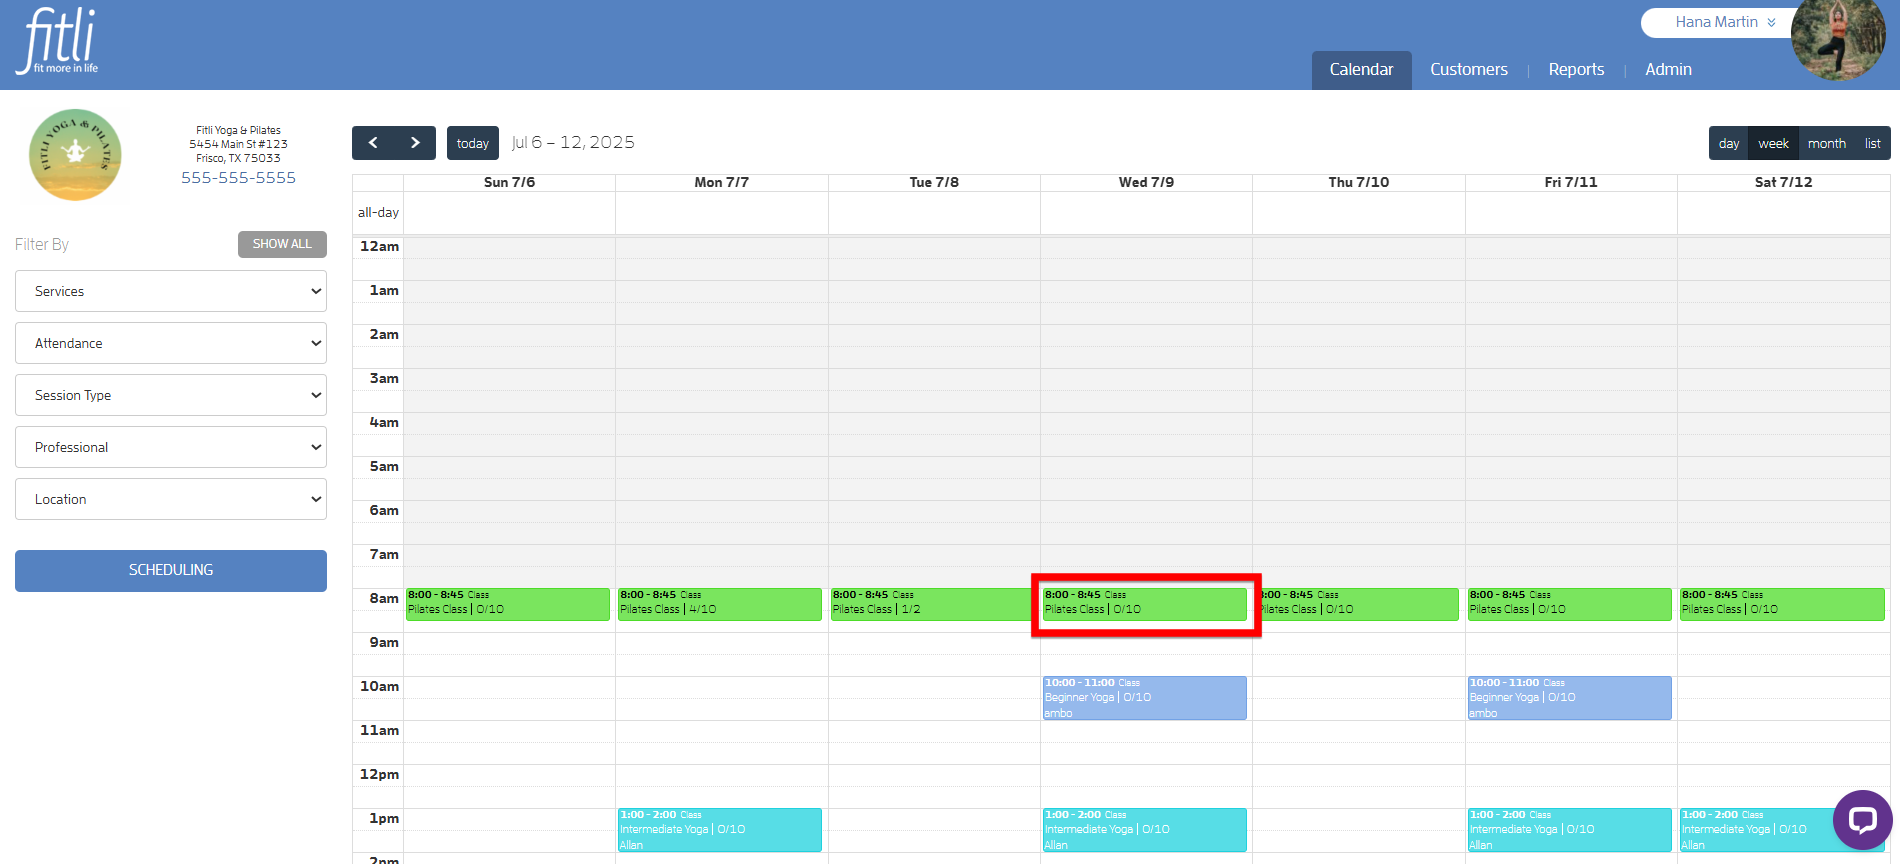
To add a link for your class/event on your banner message, add a class/event on your calendar. Then, click the class/event to open its profile.
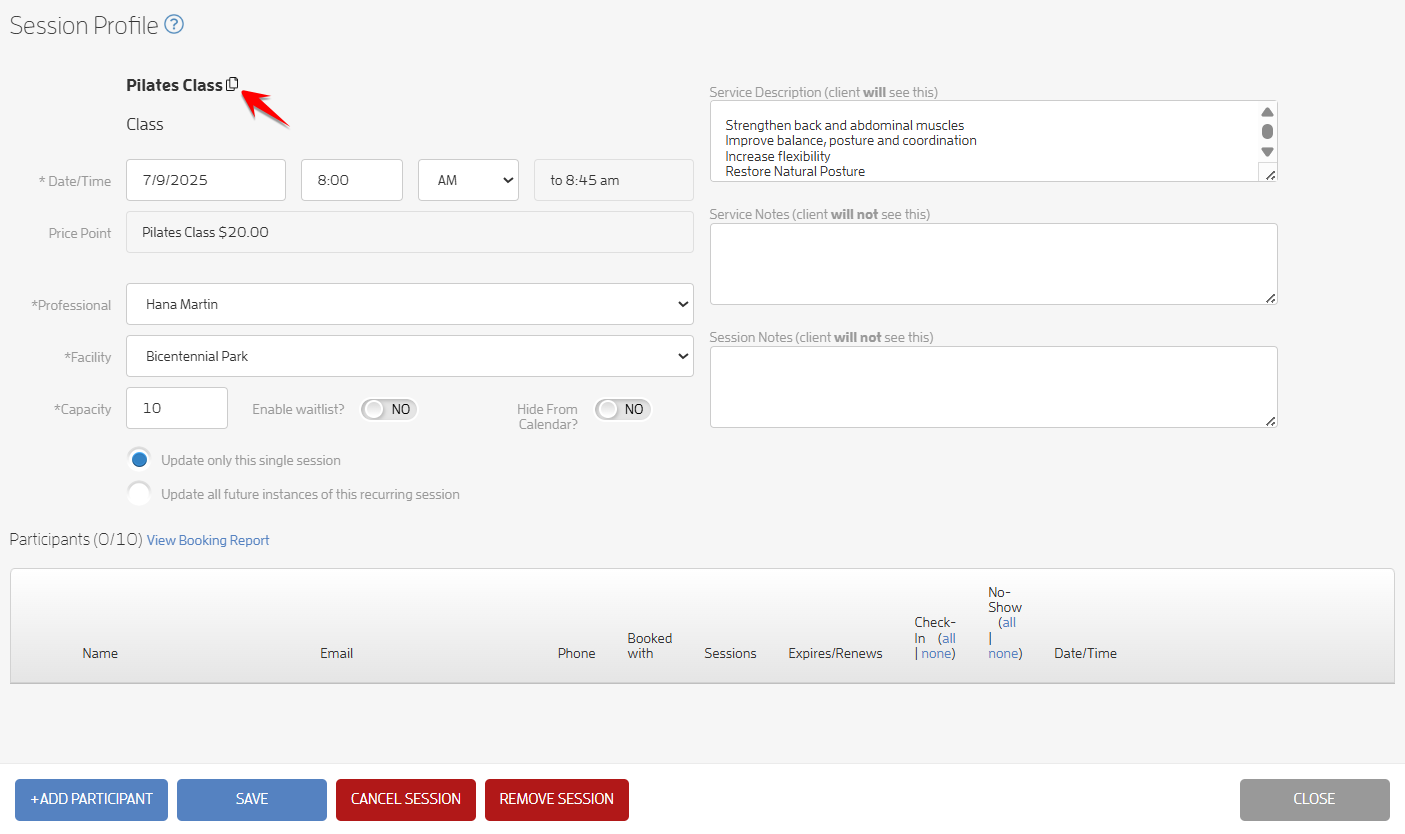
Click the copy icon beside its name to copy the link.
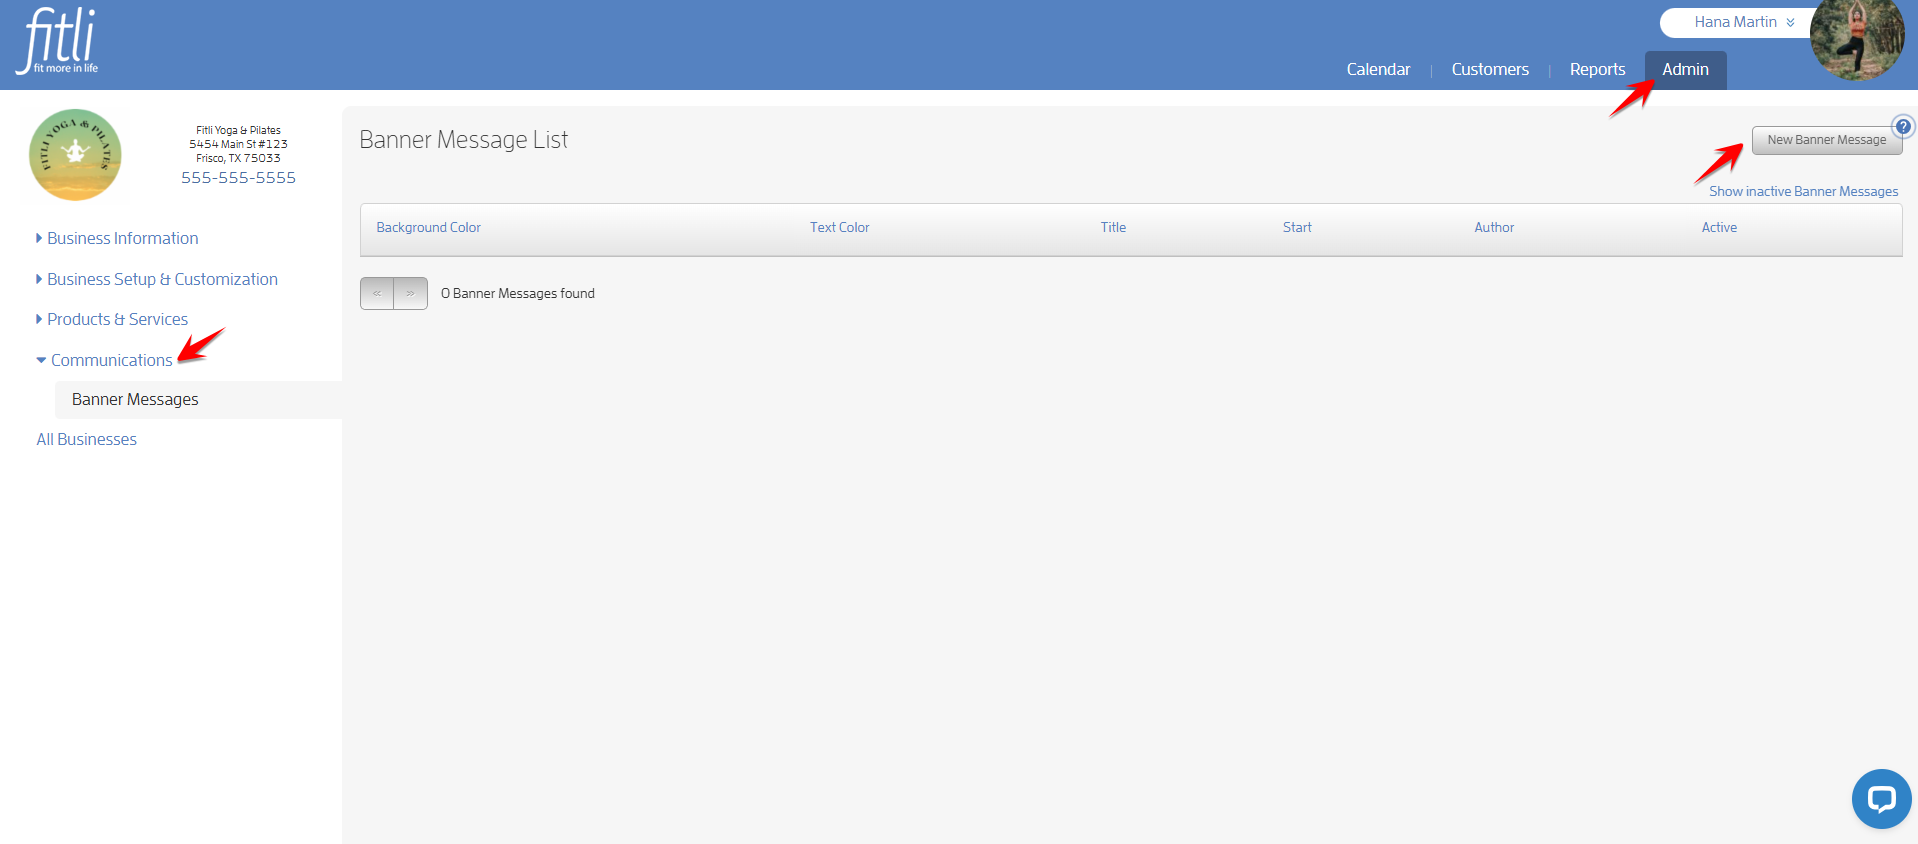
Go to ADMIN > "Communications" section to add your banner message. Click the "New Banner Message" button.
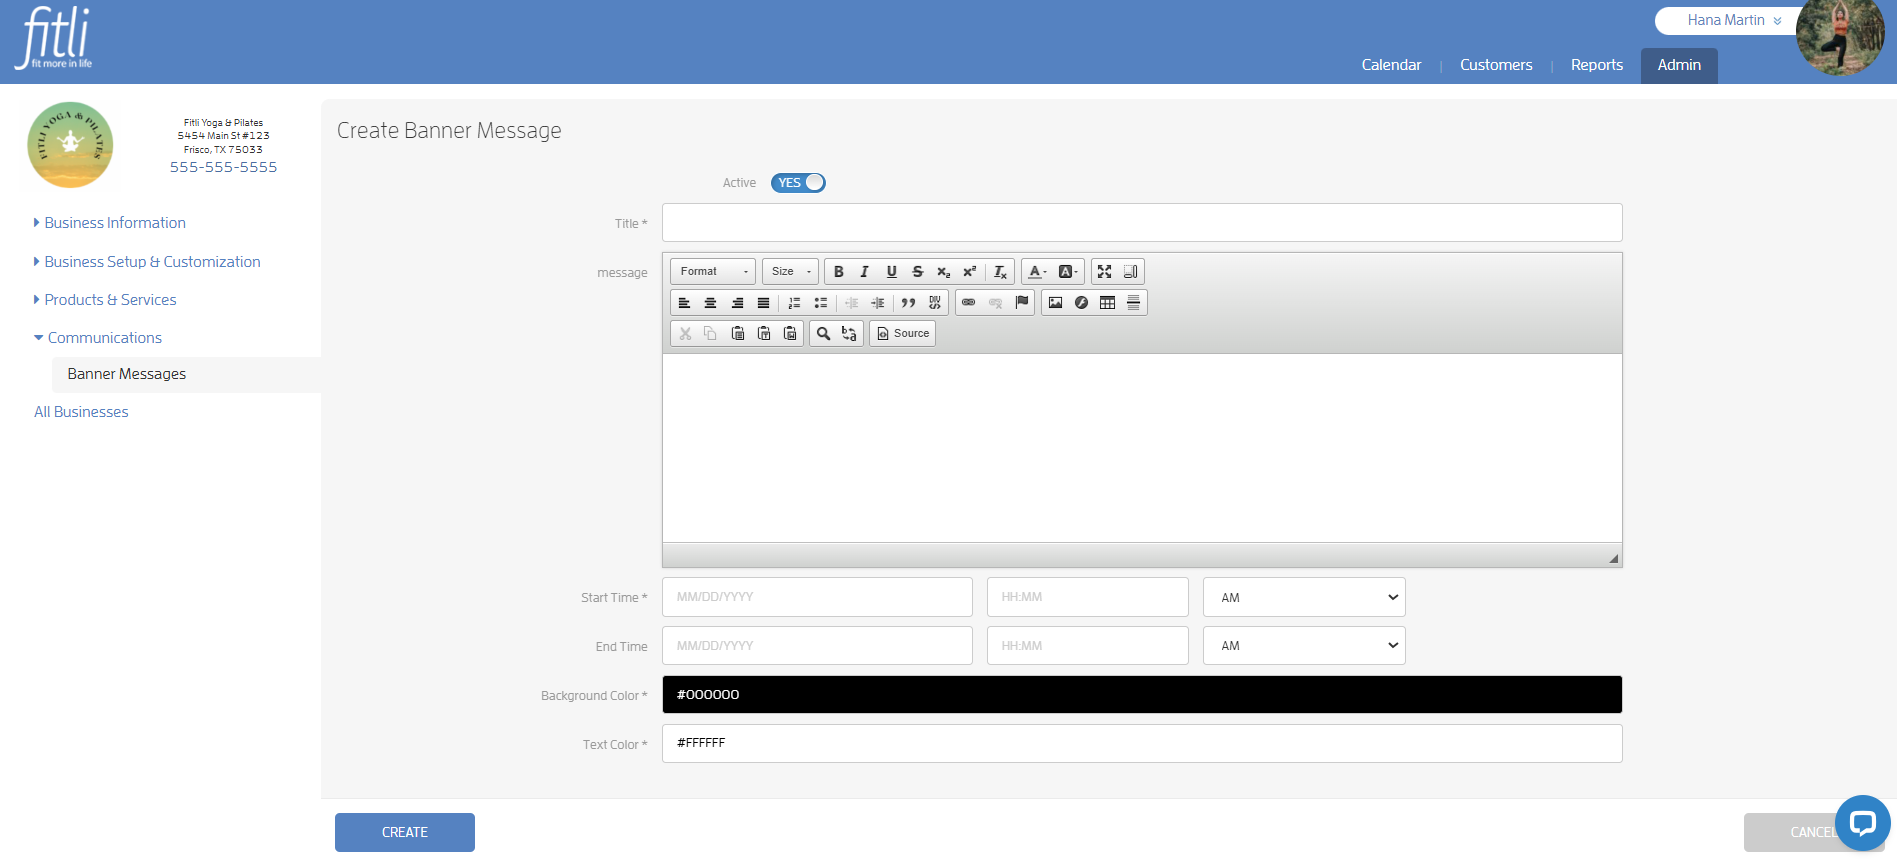
Fill out the "Create Banner Message" form. Use the editing tools to choose the font, background color, text color, etc.
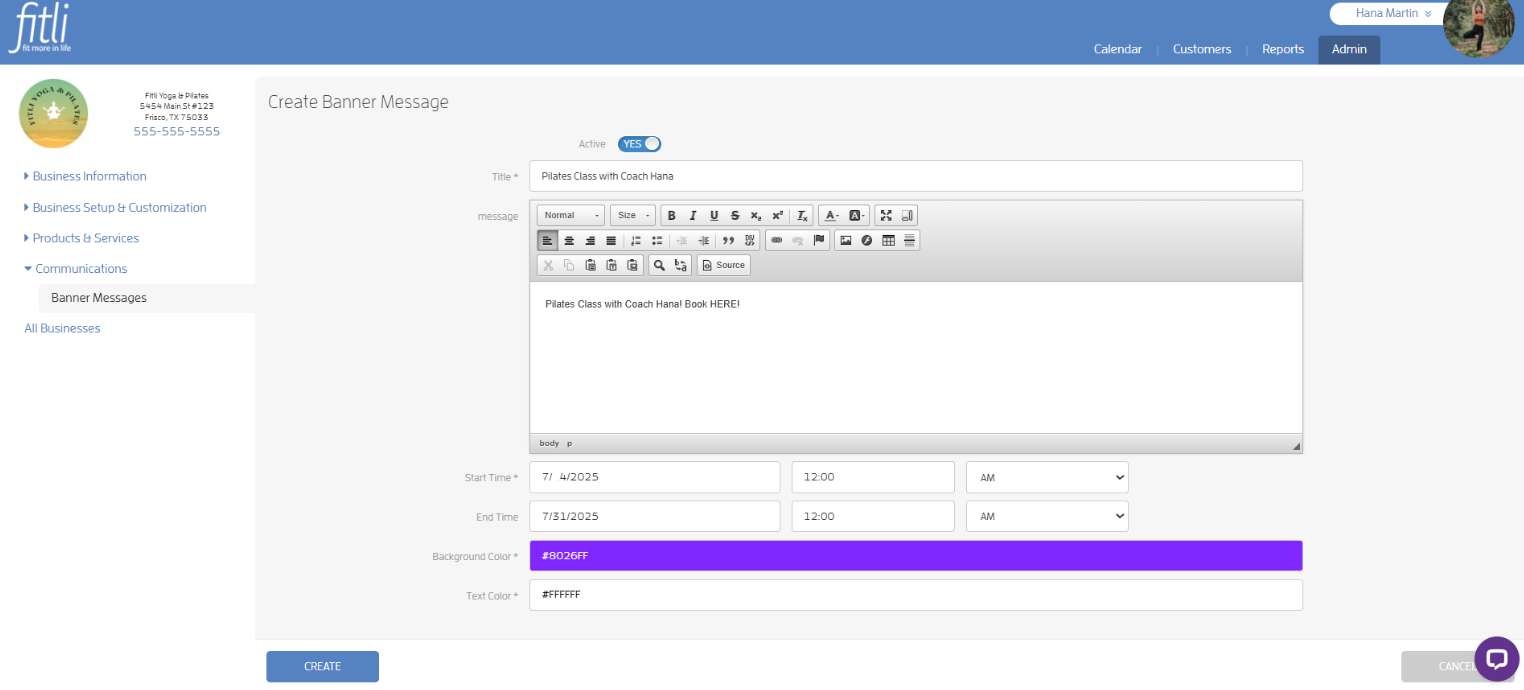
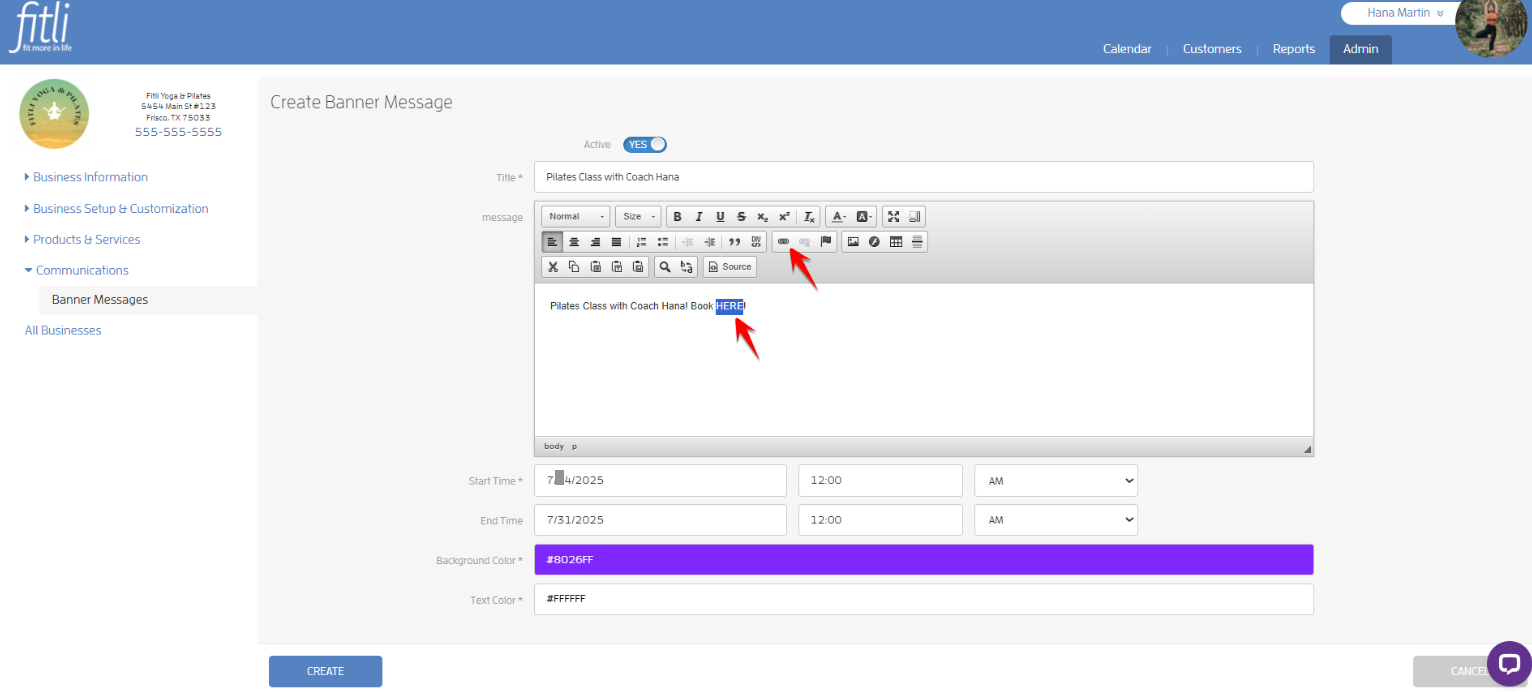
Highlight the text where you want to paste the link to the class/event. Click the link button and paste the class/event link on the "Link Info" tab.
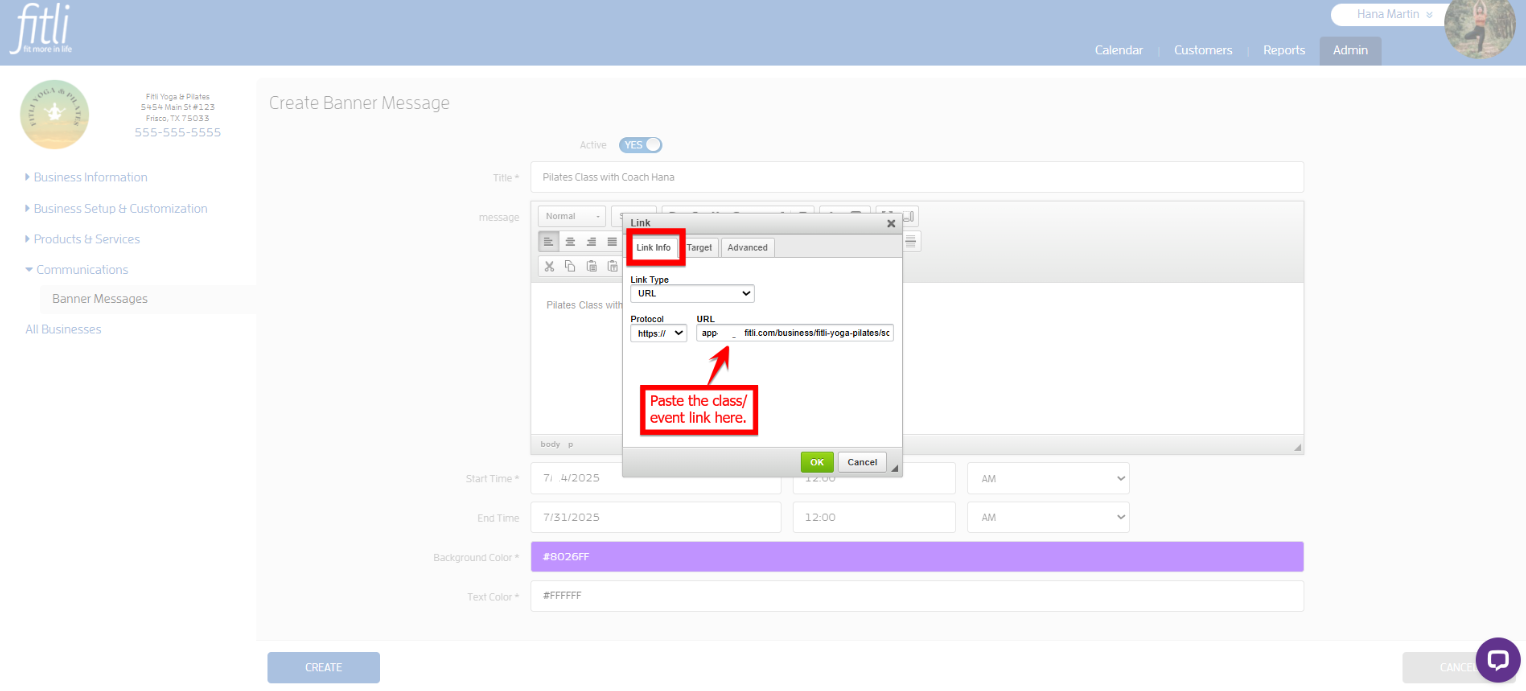
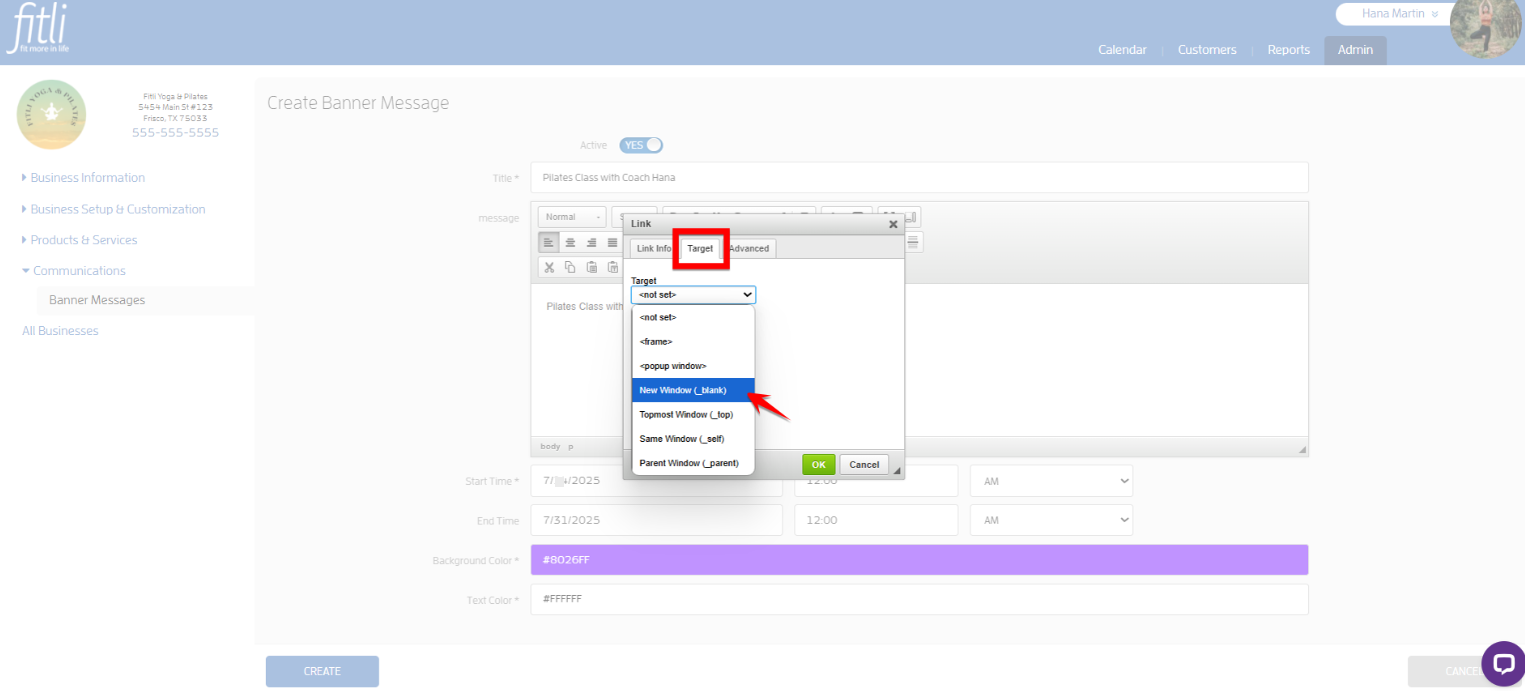
Click the "Target" tab, select "New Window (_blank)" from the pulldown and hit OK.
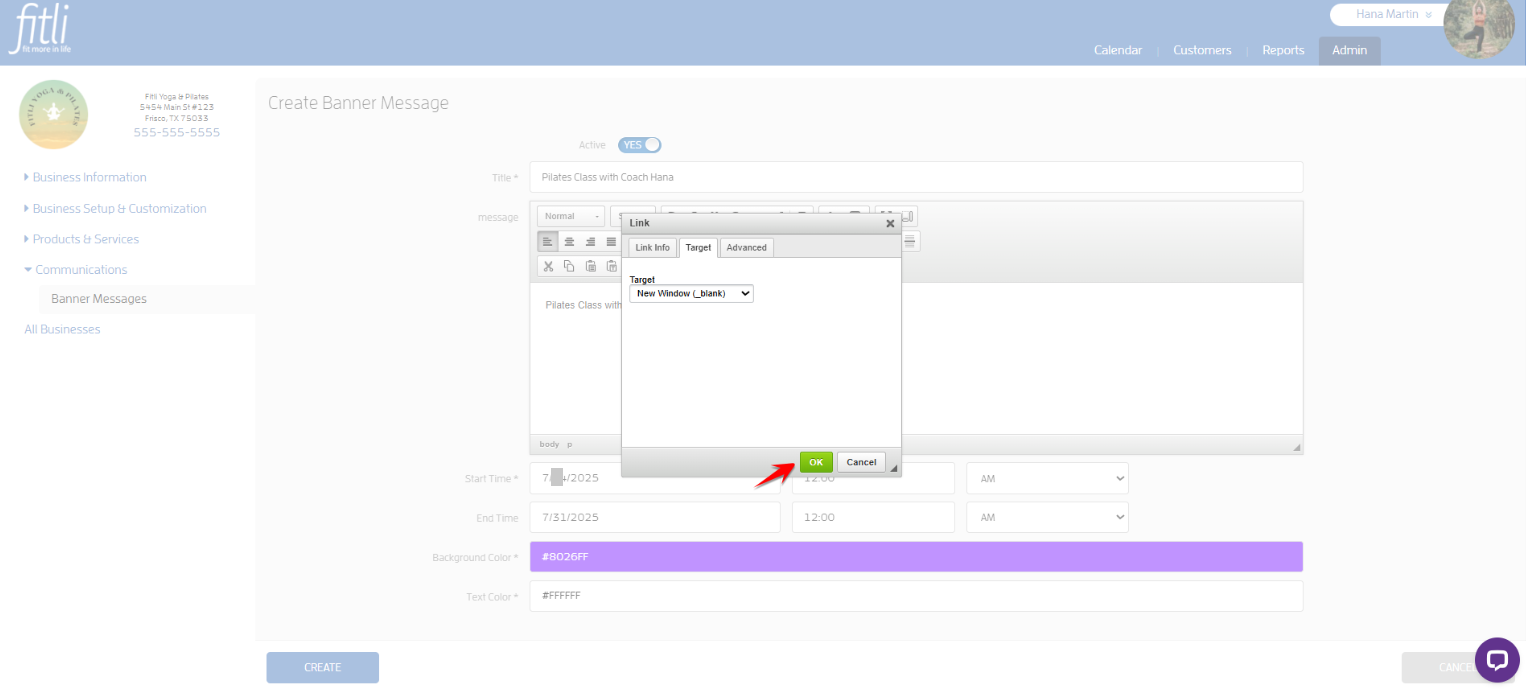
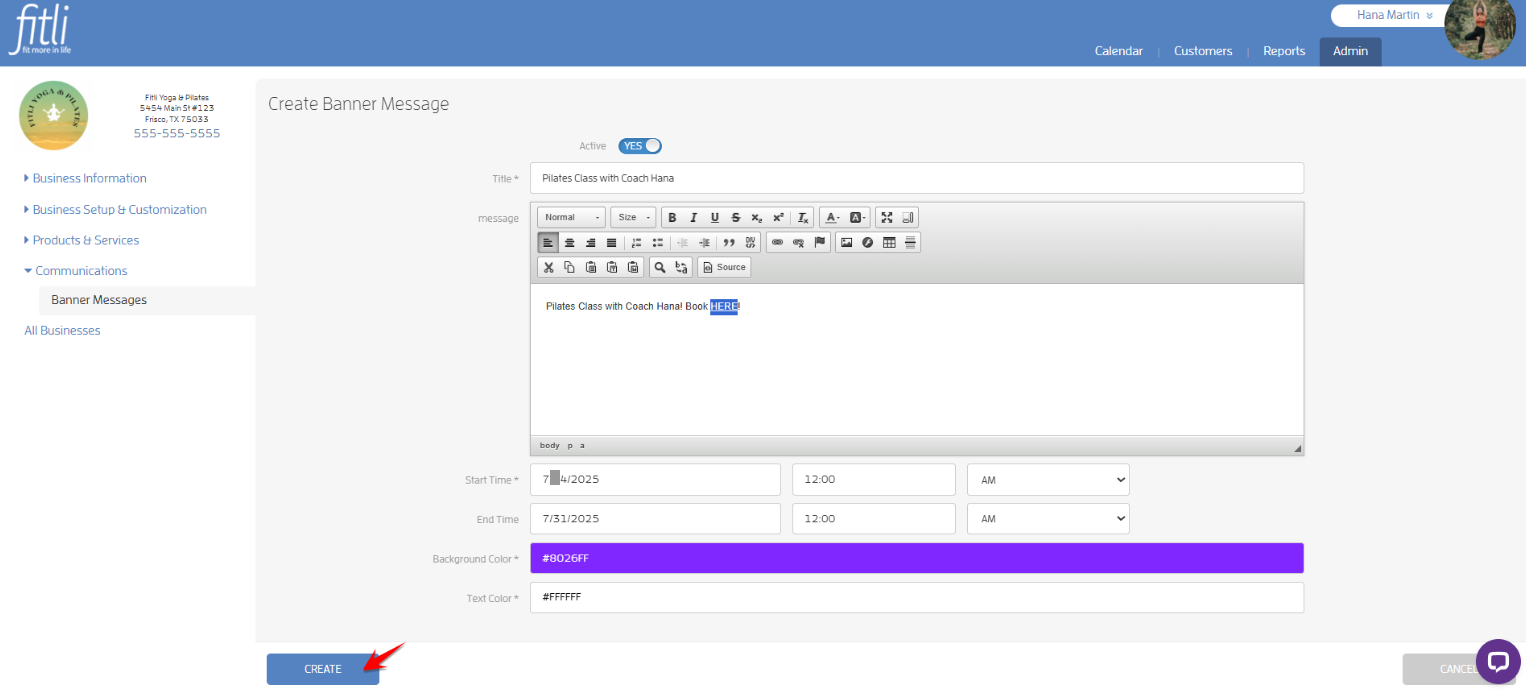
Click CREATE to save. Very Important!
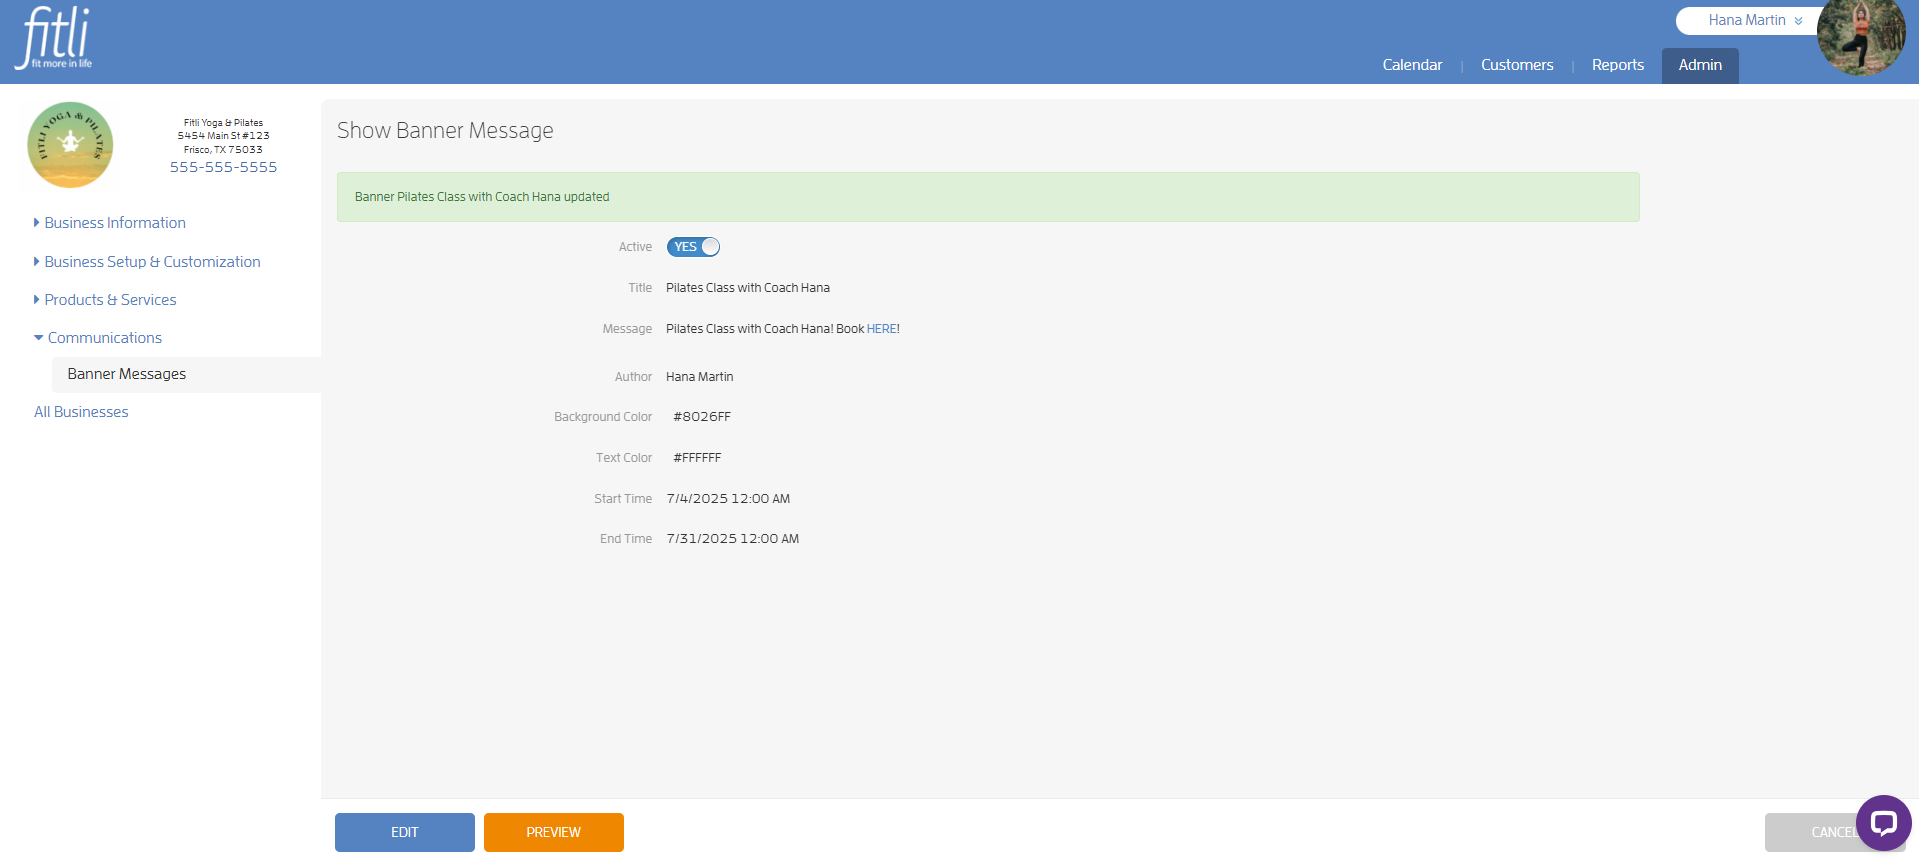
When done, a message in green at the top will confirm that you've successfully created the banner message!
Class/Event Client View
The banner message will appear like a heading on your clients' end on your business profile, public schedule and appointments sections. Clients can make the banner message go away and not show it again by clicking the small "x" on the right side.
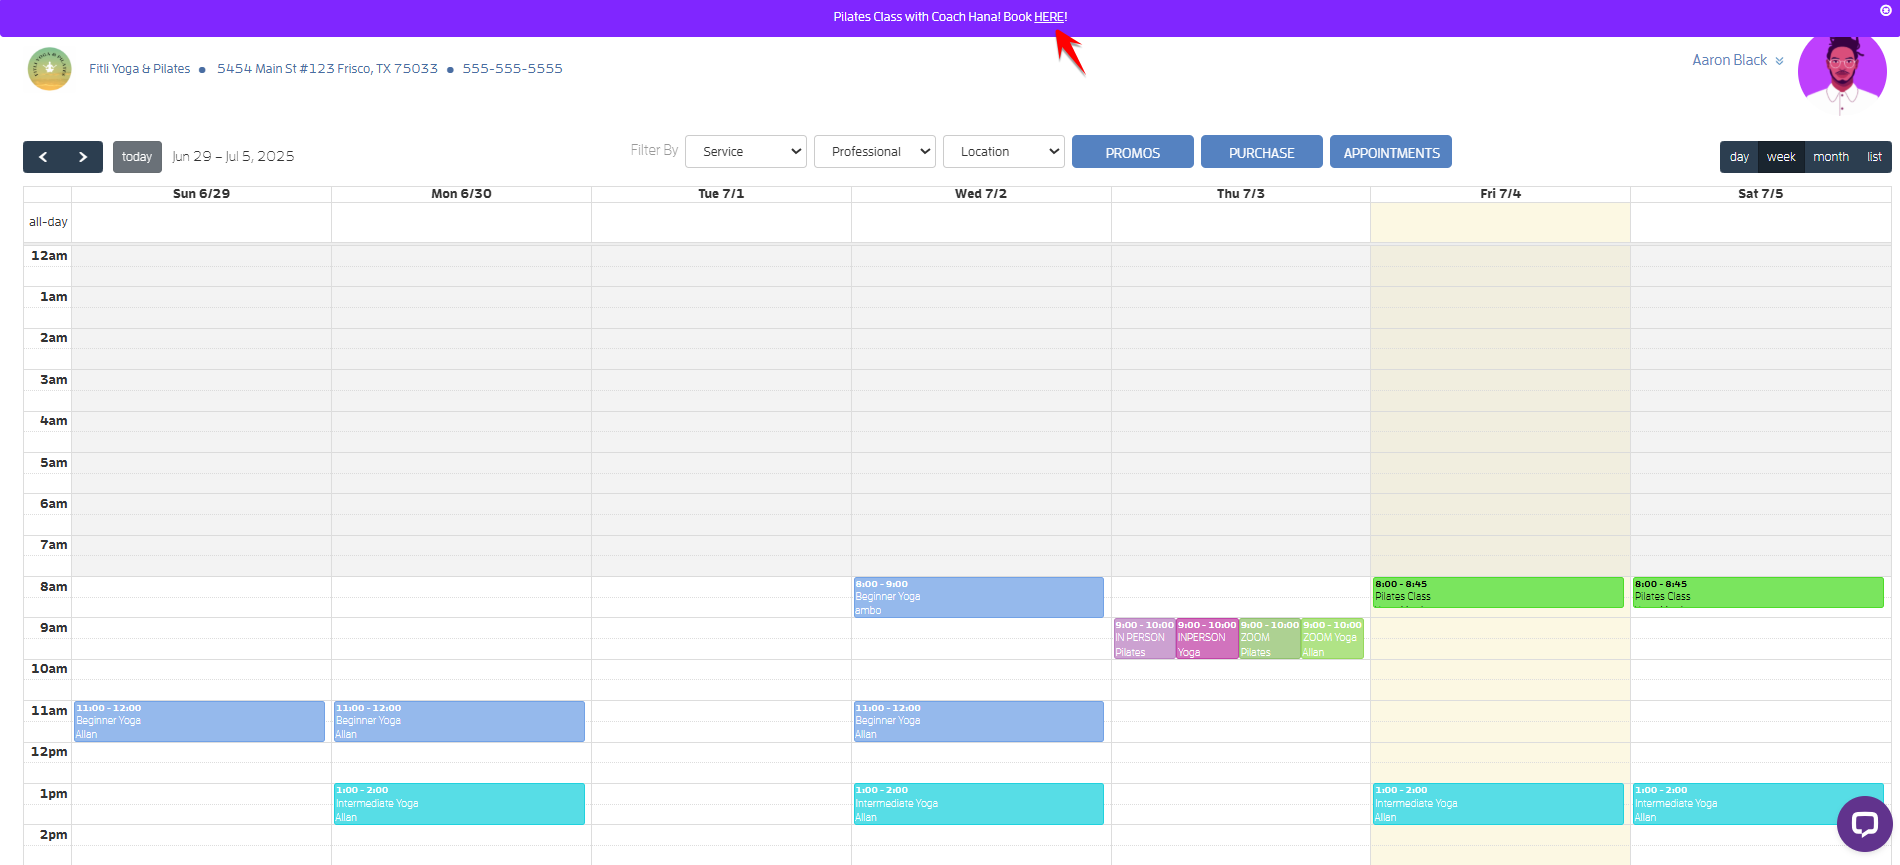
If they click the clickable link you've created, a new tab will open that will show the Session Profile where they can book the class/event.
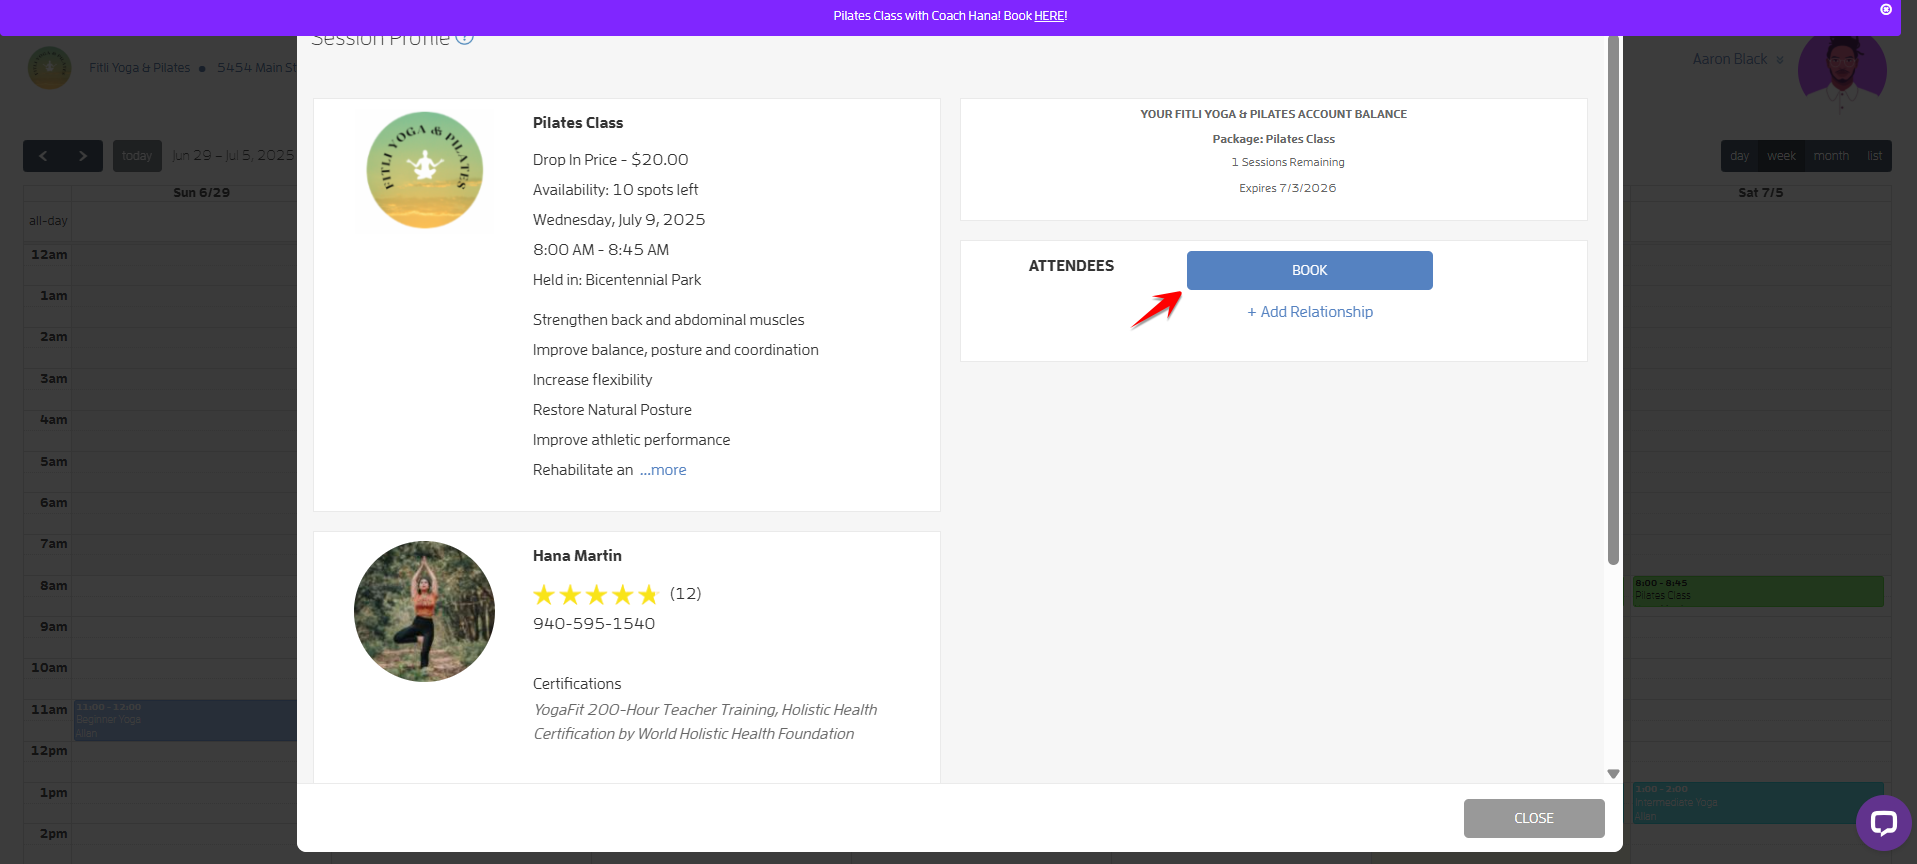
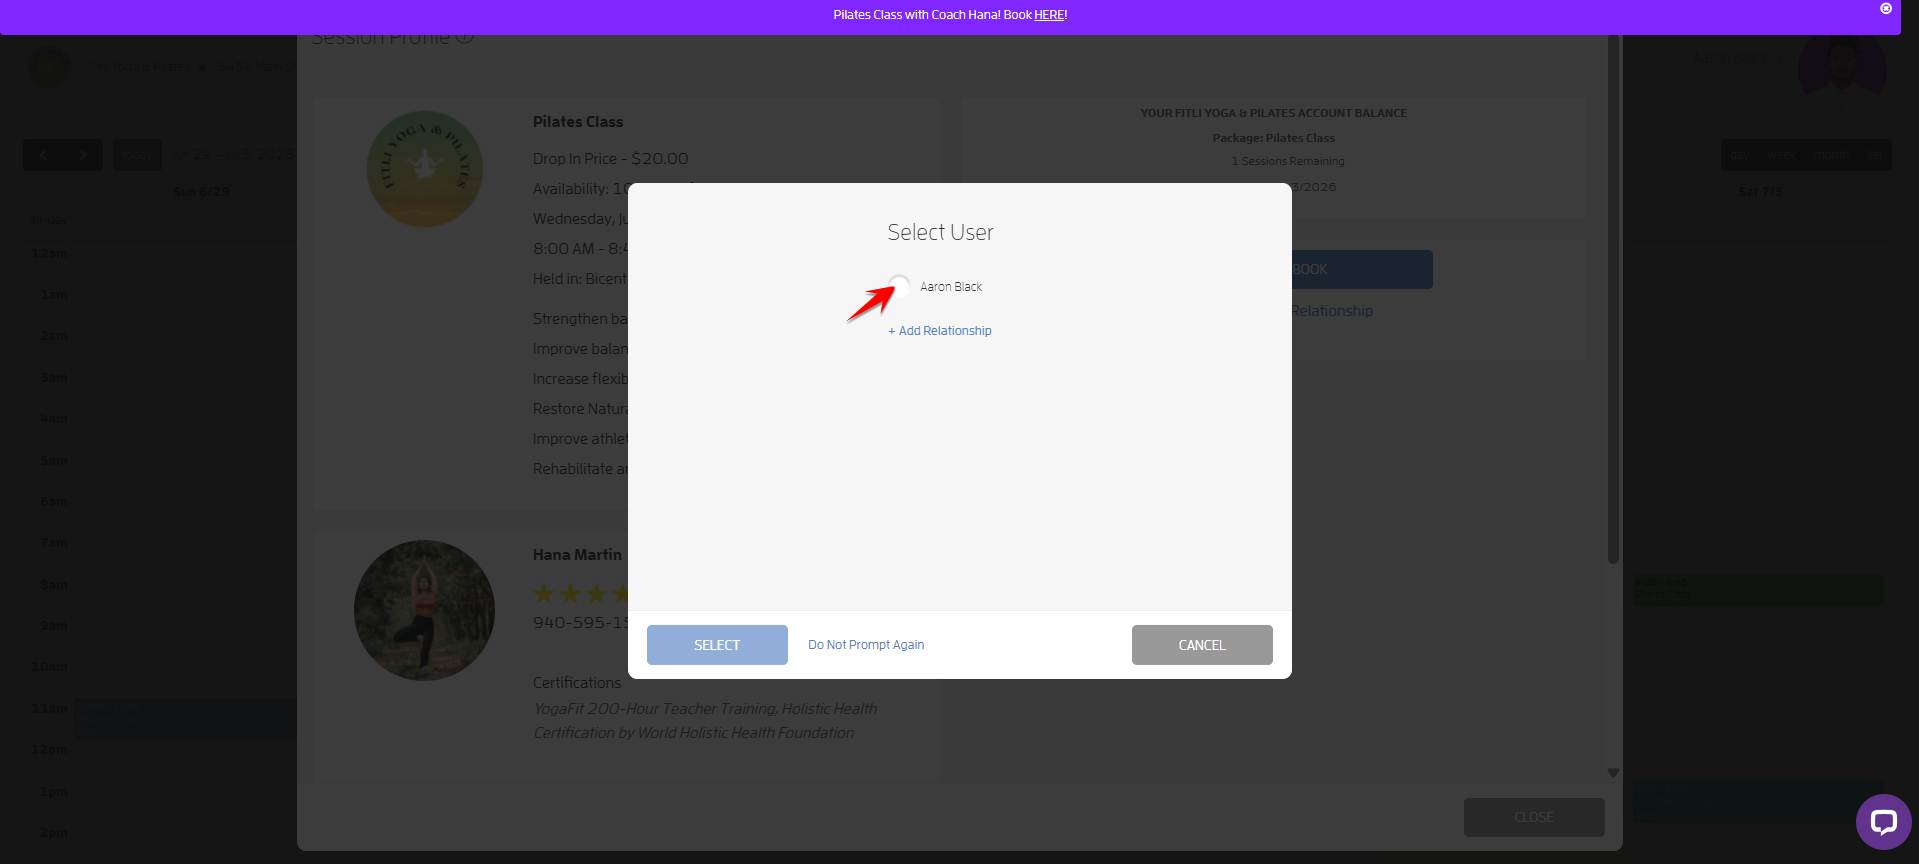
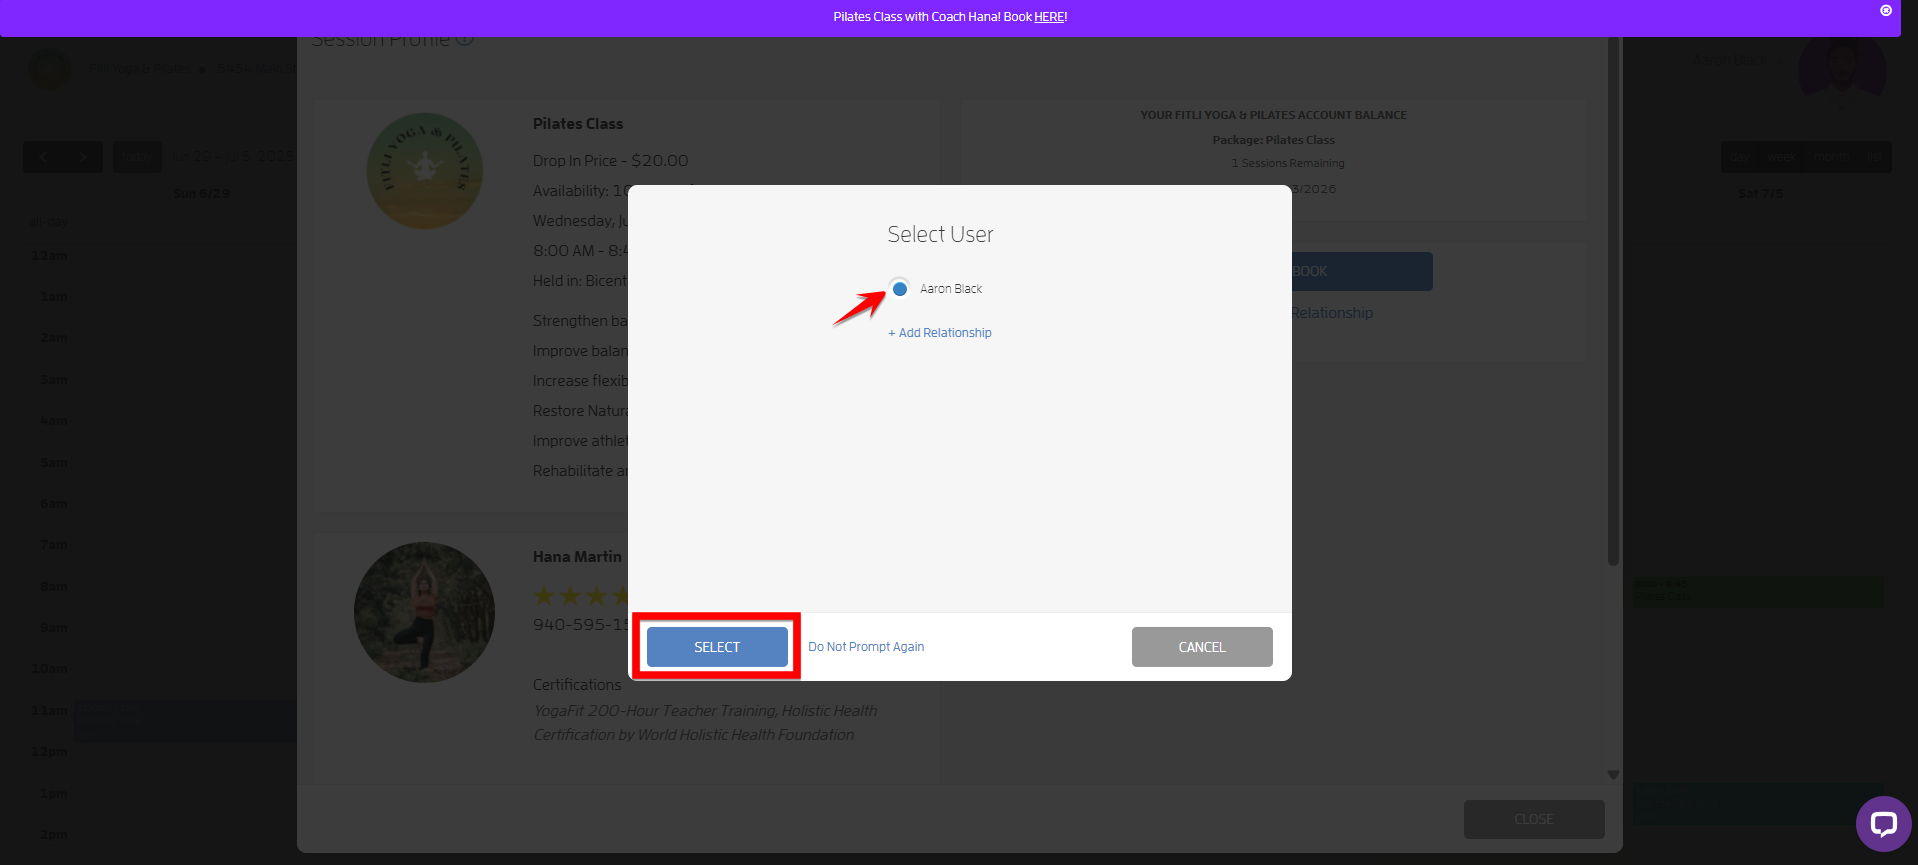
They'll be directed to the Make Purchase section where they can select their preferred payment method or book using their balance if they have any. In the example below, the customer will book using their balance.
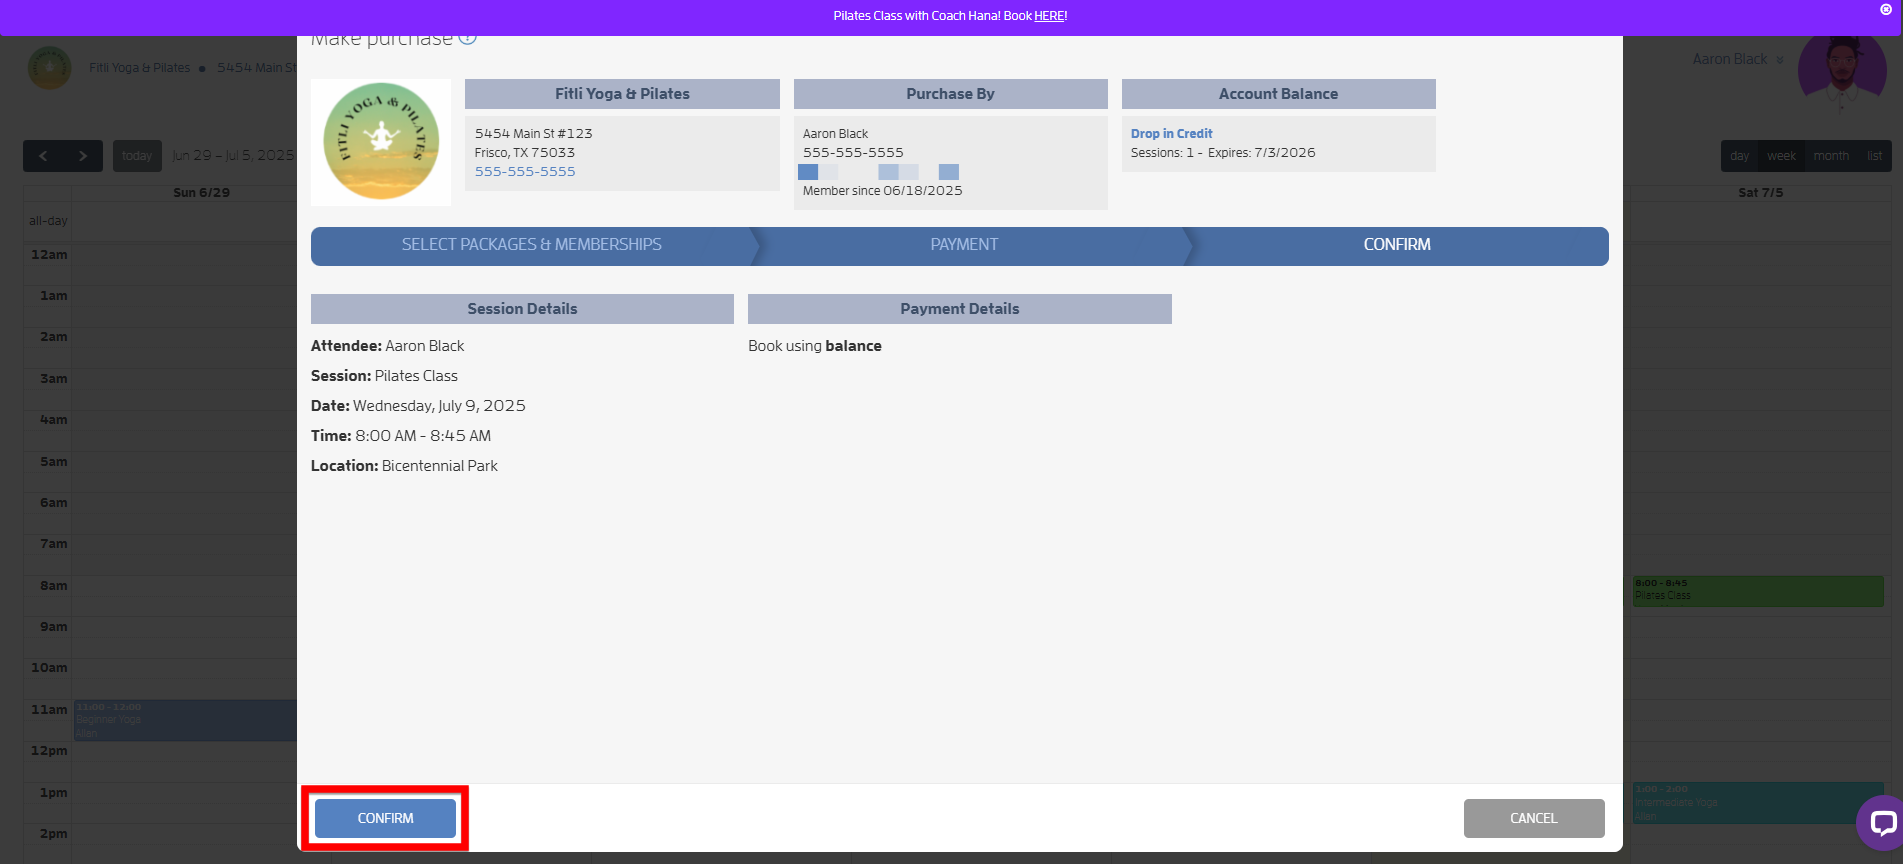
Once they've confirmed their booking, a confirmation message in blue will appear at the top.
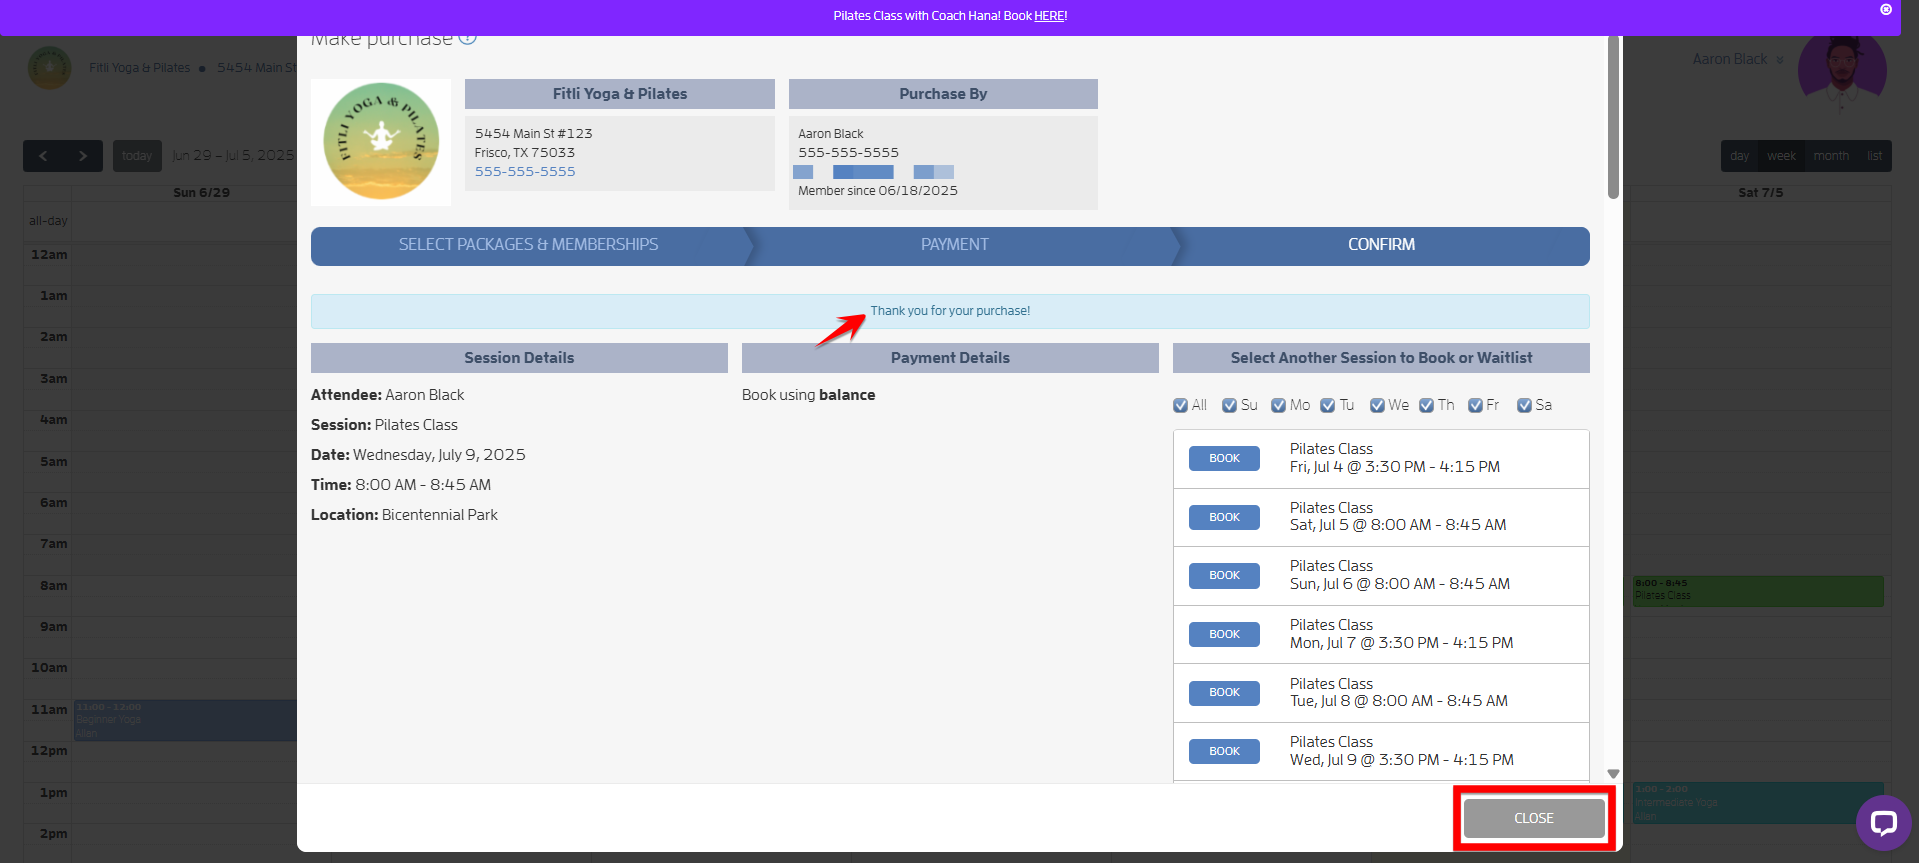
They'll see their booked session on their Fitli calendar, receive a booking confirmation email and a reminder email, 24 hours before the session starts.
That's about it! Any questions? Chat with us or send us an email to support@fitli.com.