
For business purposes, you need or would like to require certain information from your clients prior to signing up. Well, you can do this with just a few clicks! You can add and set custom fields for your clients. These fields will appear during the signup process. Here's how.
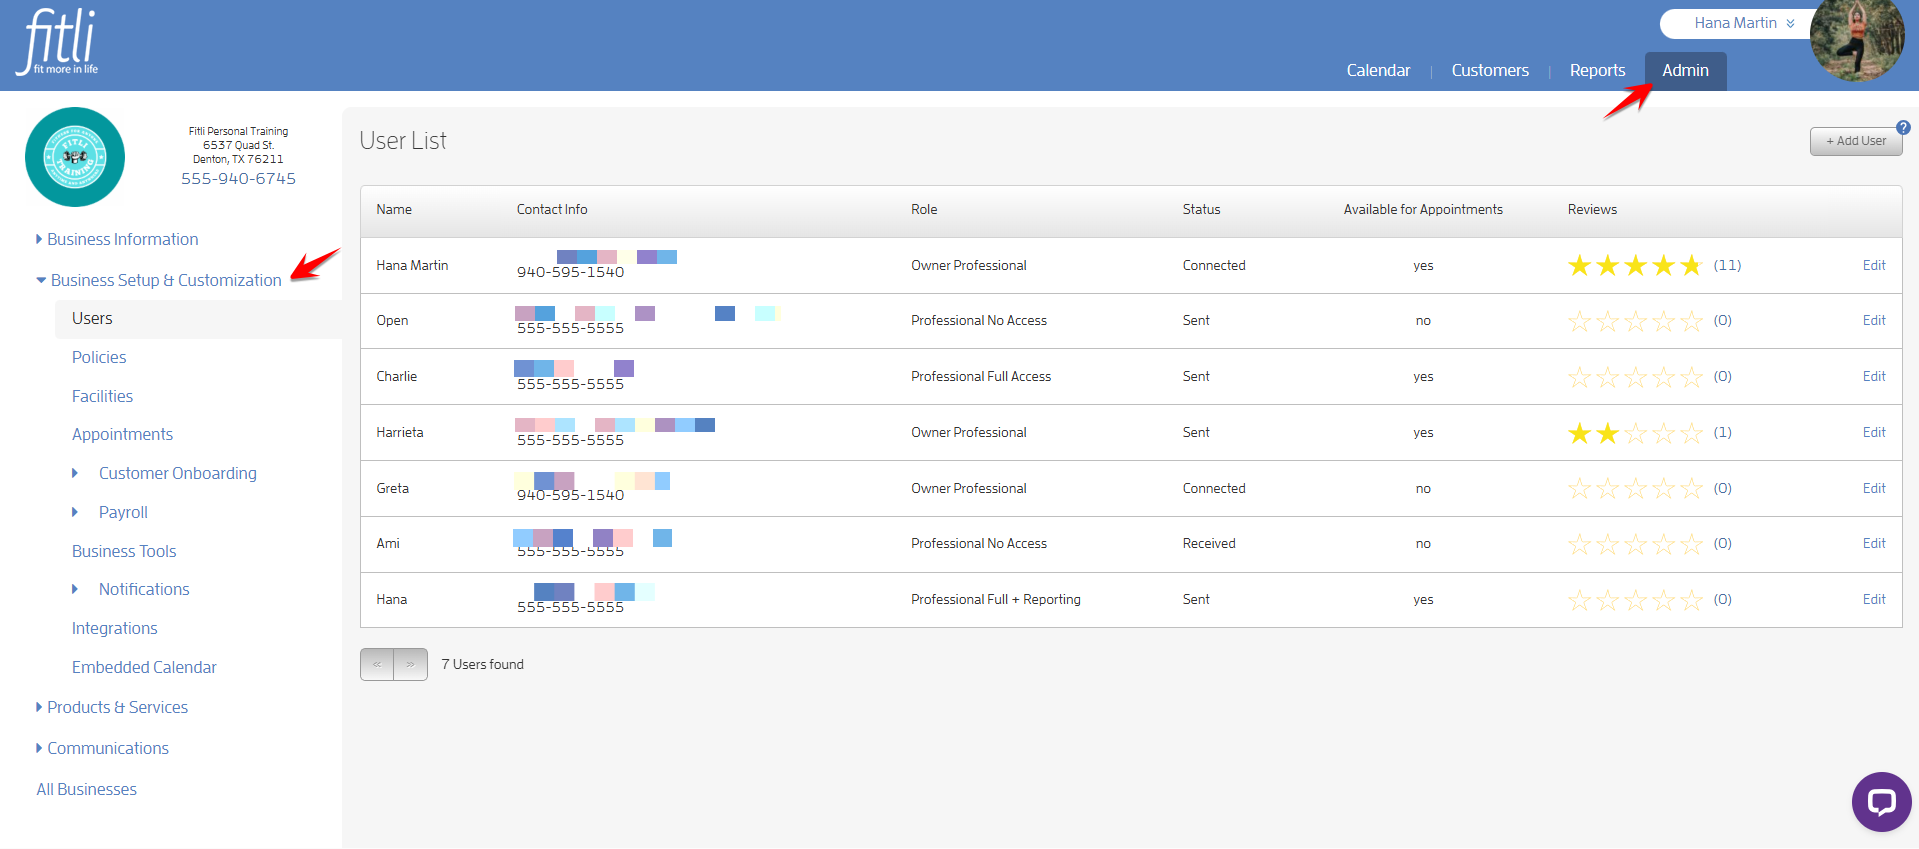
Head over to the "Admin" section of your account. Click "Business Setup & Customization" at the left.
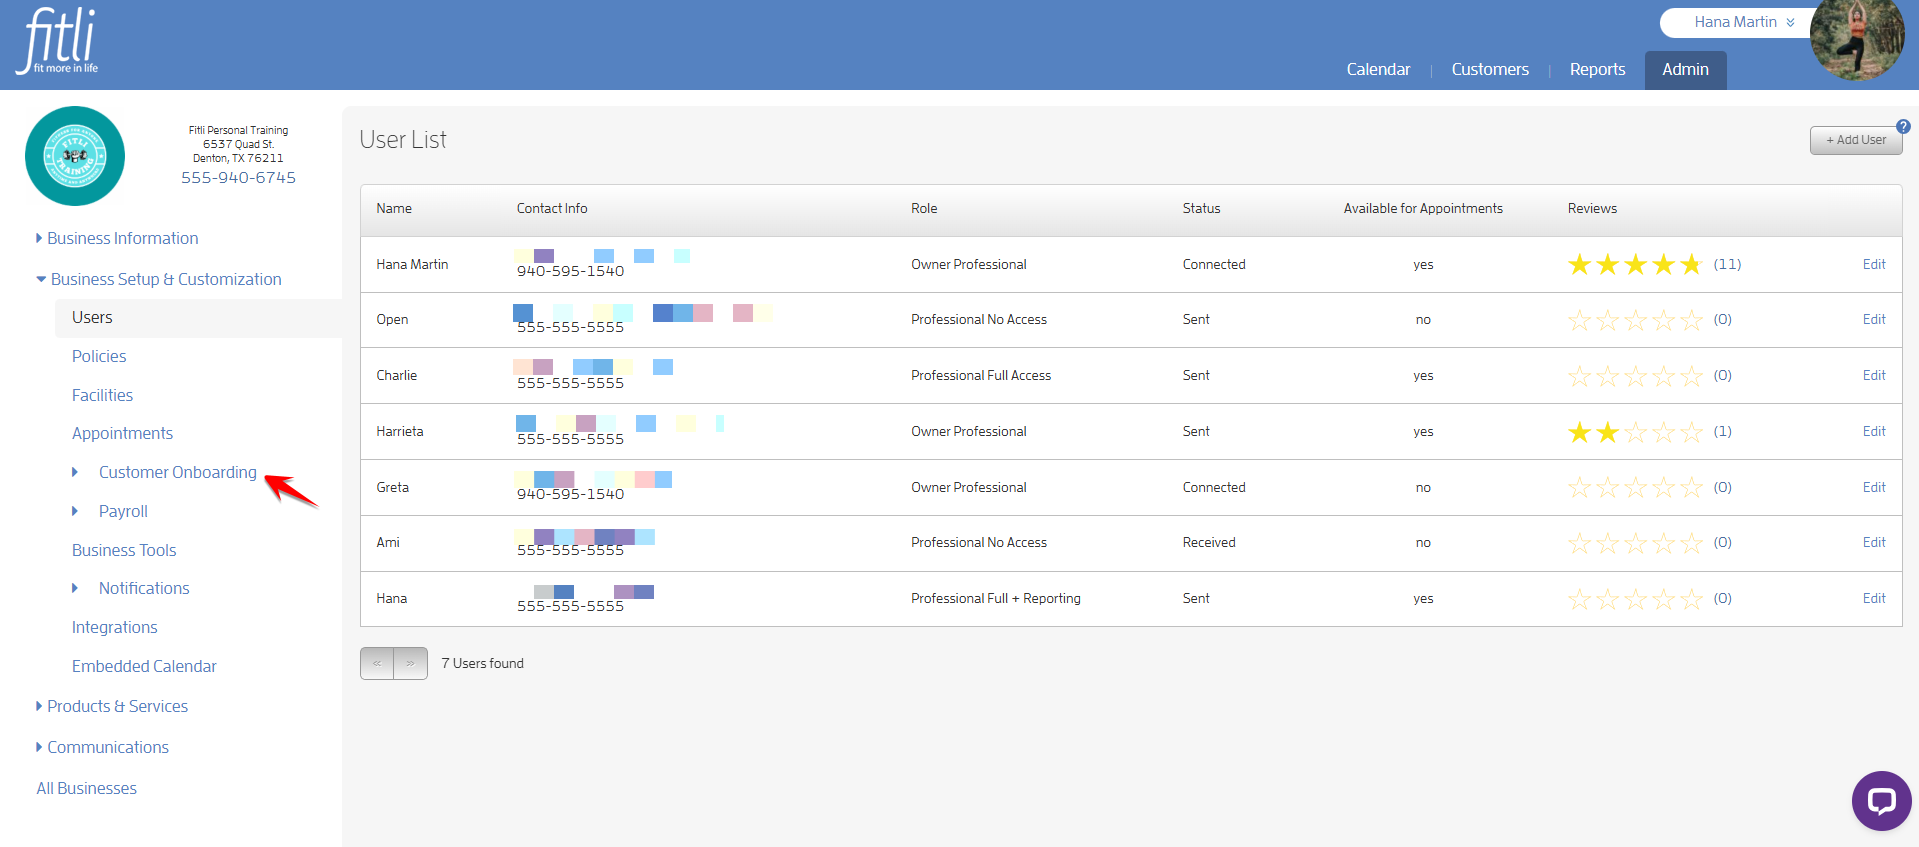
Click "Customer Onboarding".
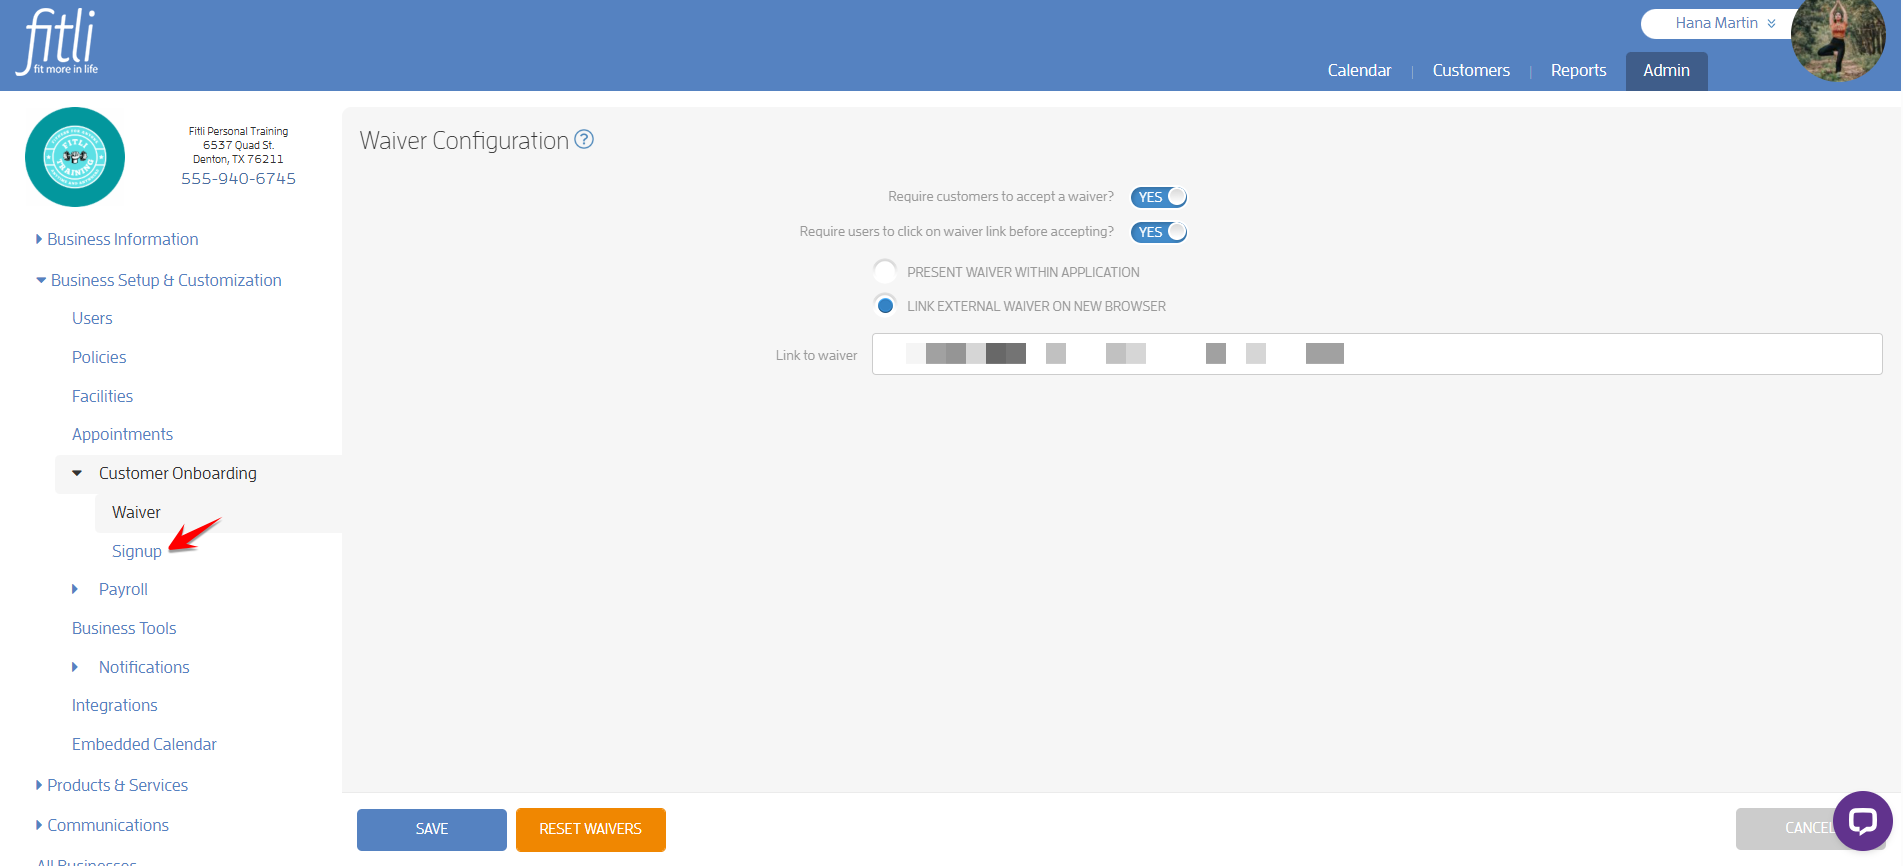
Under "Customer Onboarding", you'll see "Waiver" and "Signup". Click "Signup" to set and/or add custom fields.
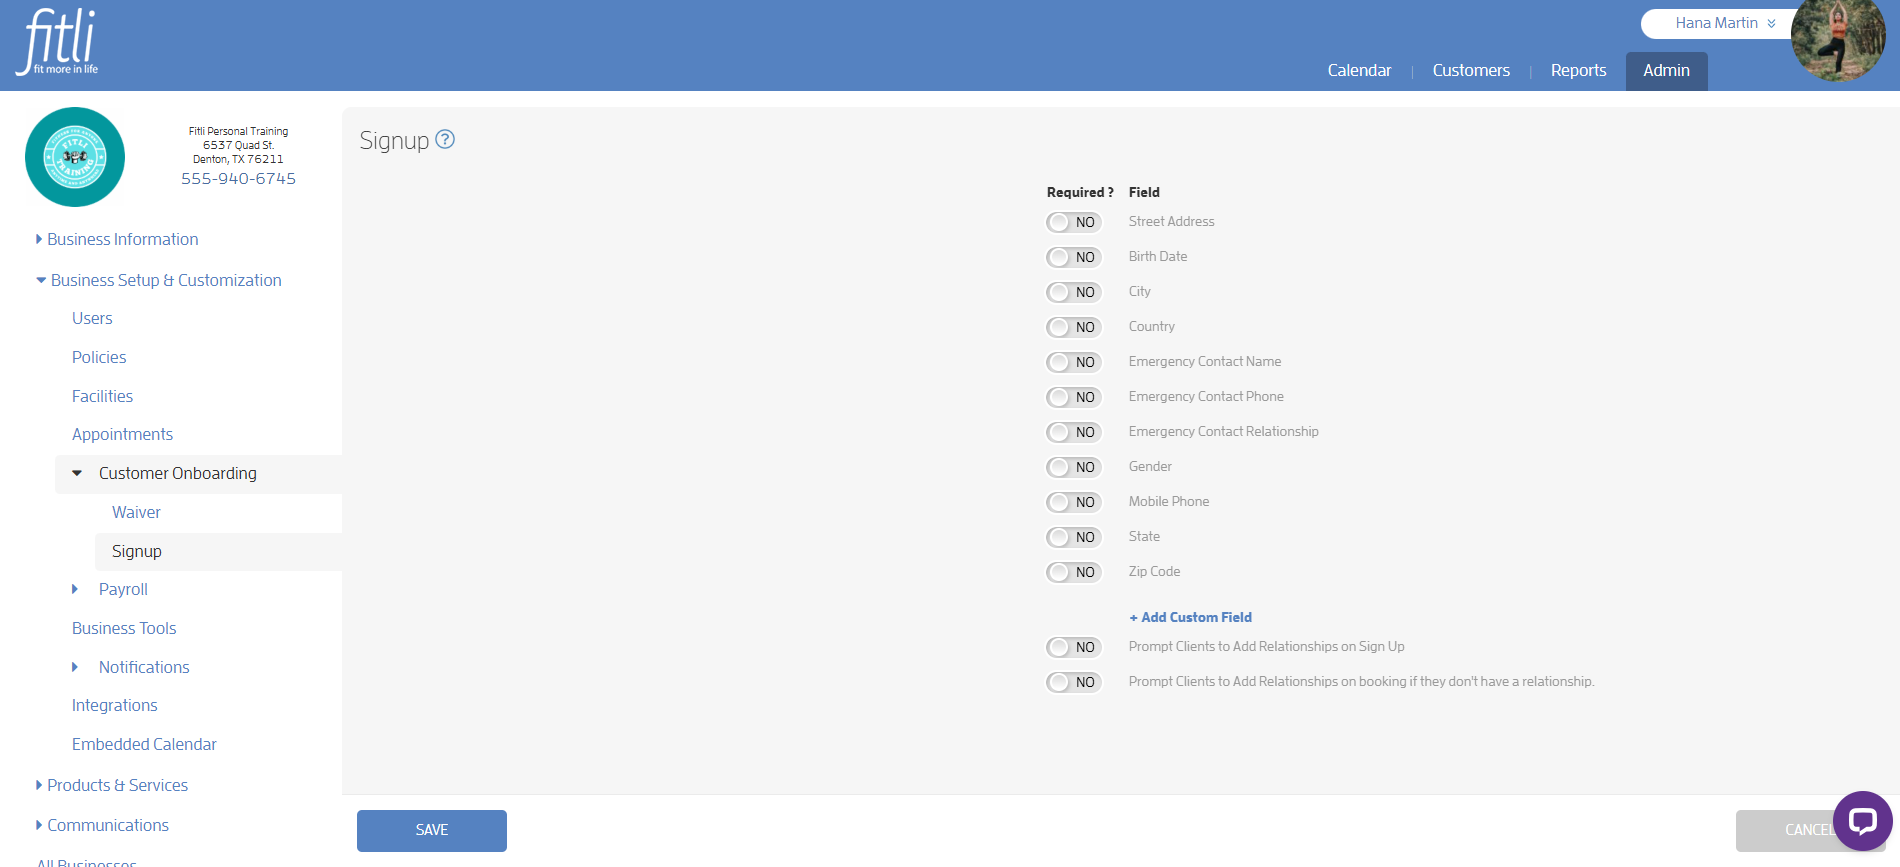
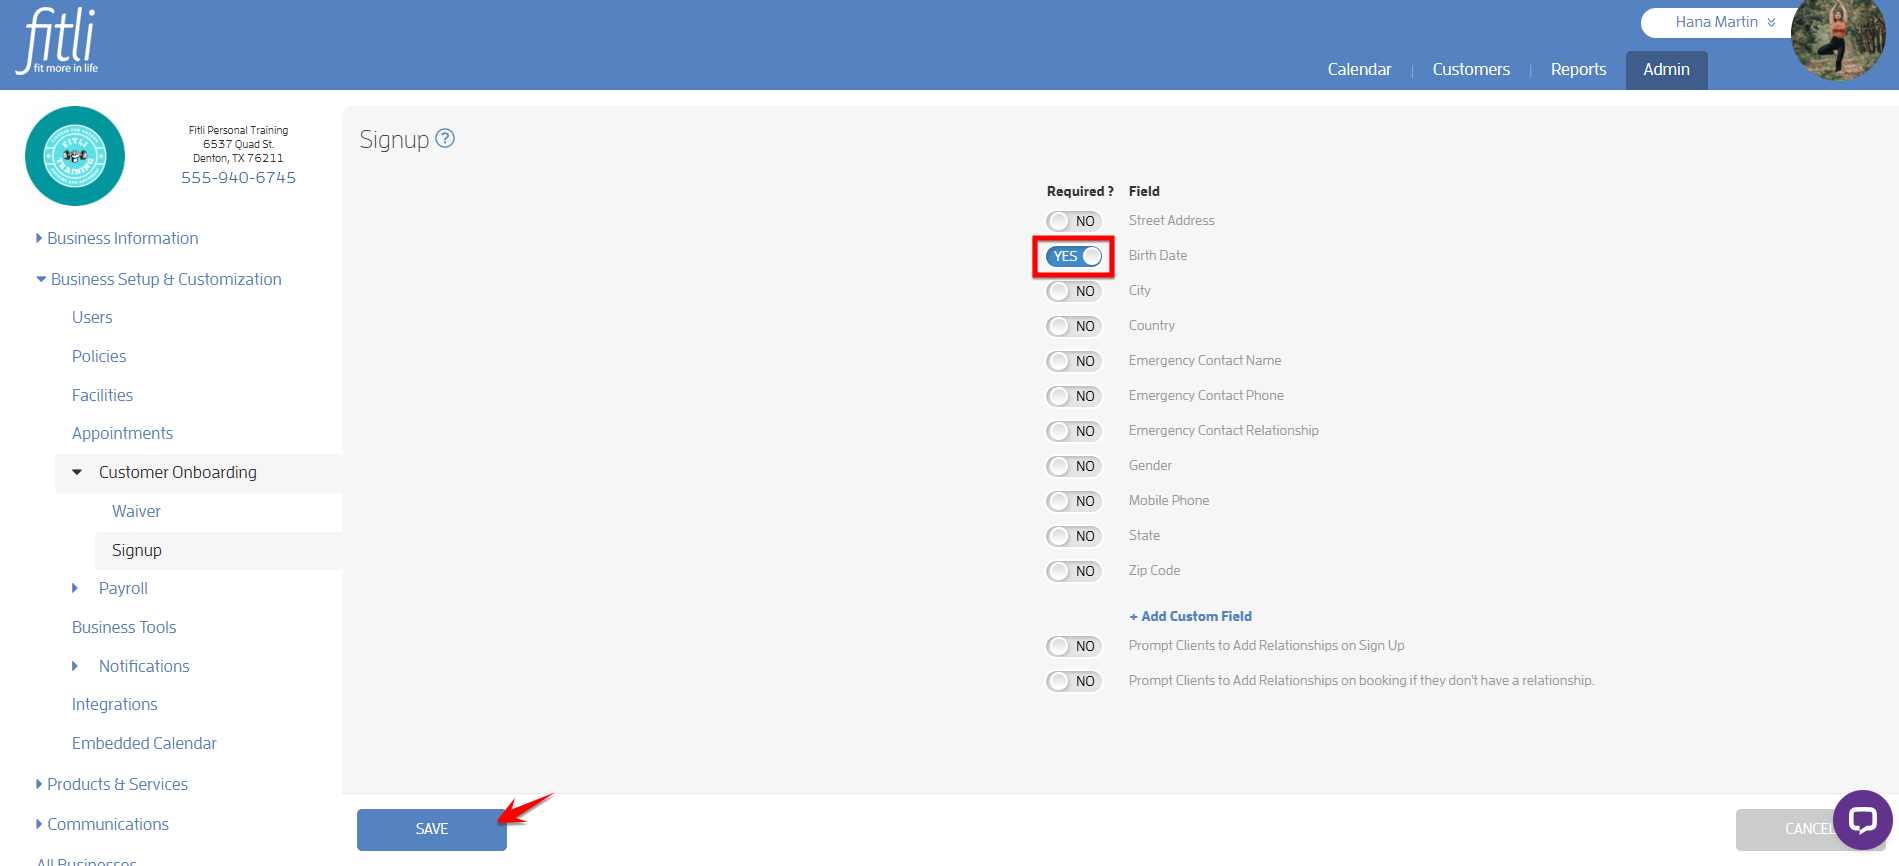
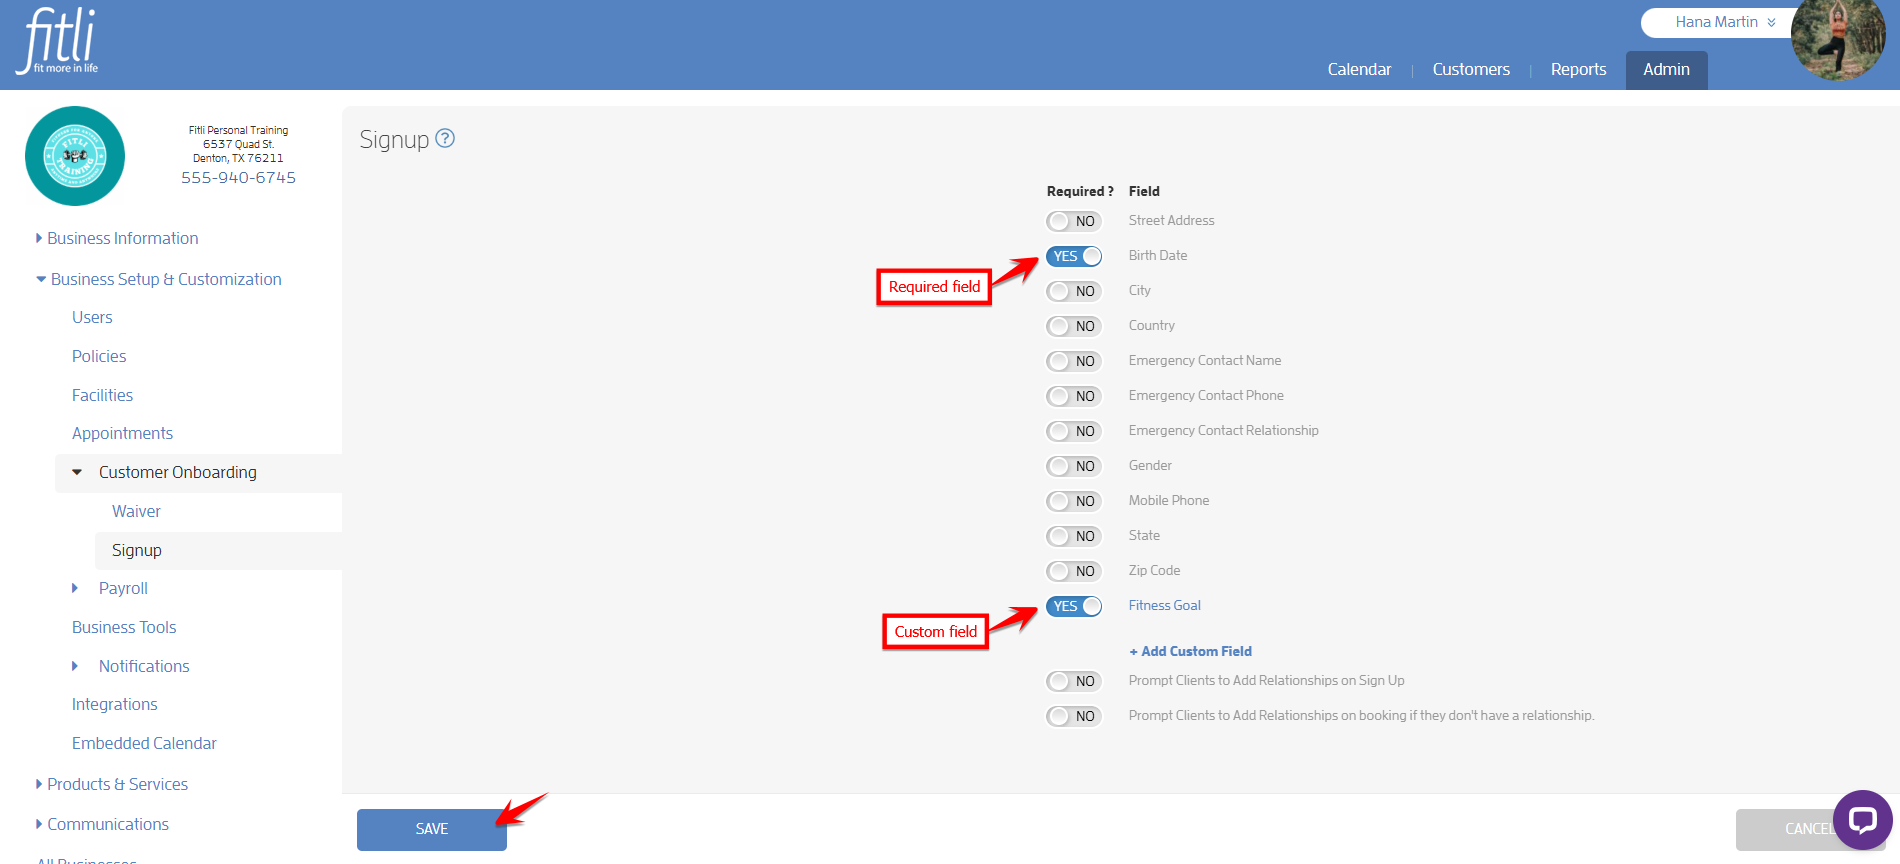
On the "Signup" page, you'll see all the customer contact information fields found on your customers' profiles. Each one has a yes/no switch for whether you want the field to be required or not. Everything is defaulted to NO. If you switch any of it to yes and hit save, then the field/s would show up on the Business Specific Signup Information page as required. Meaning, your clients would need to fill up the required fields you set up in order to complete their registration. The required fields will also show up on your old clients' contact info page which I will discuss later.
In this example, I turned on the required slider for "Birth Date" and hit SAVE.
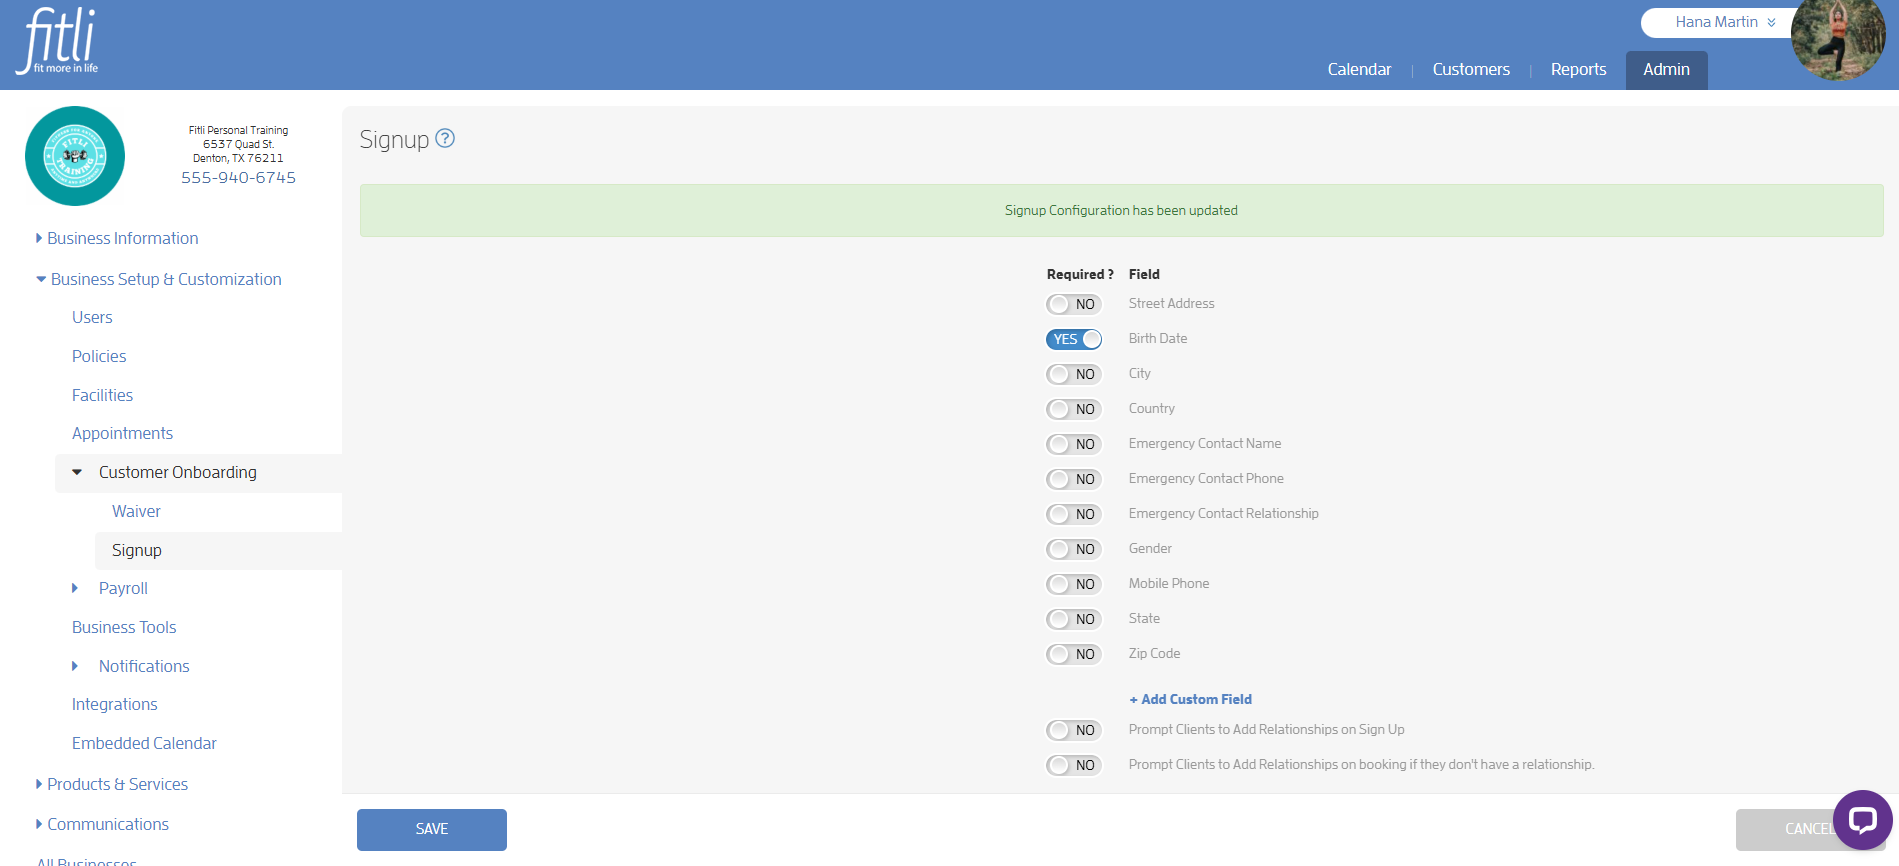
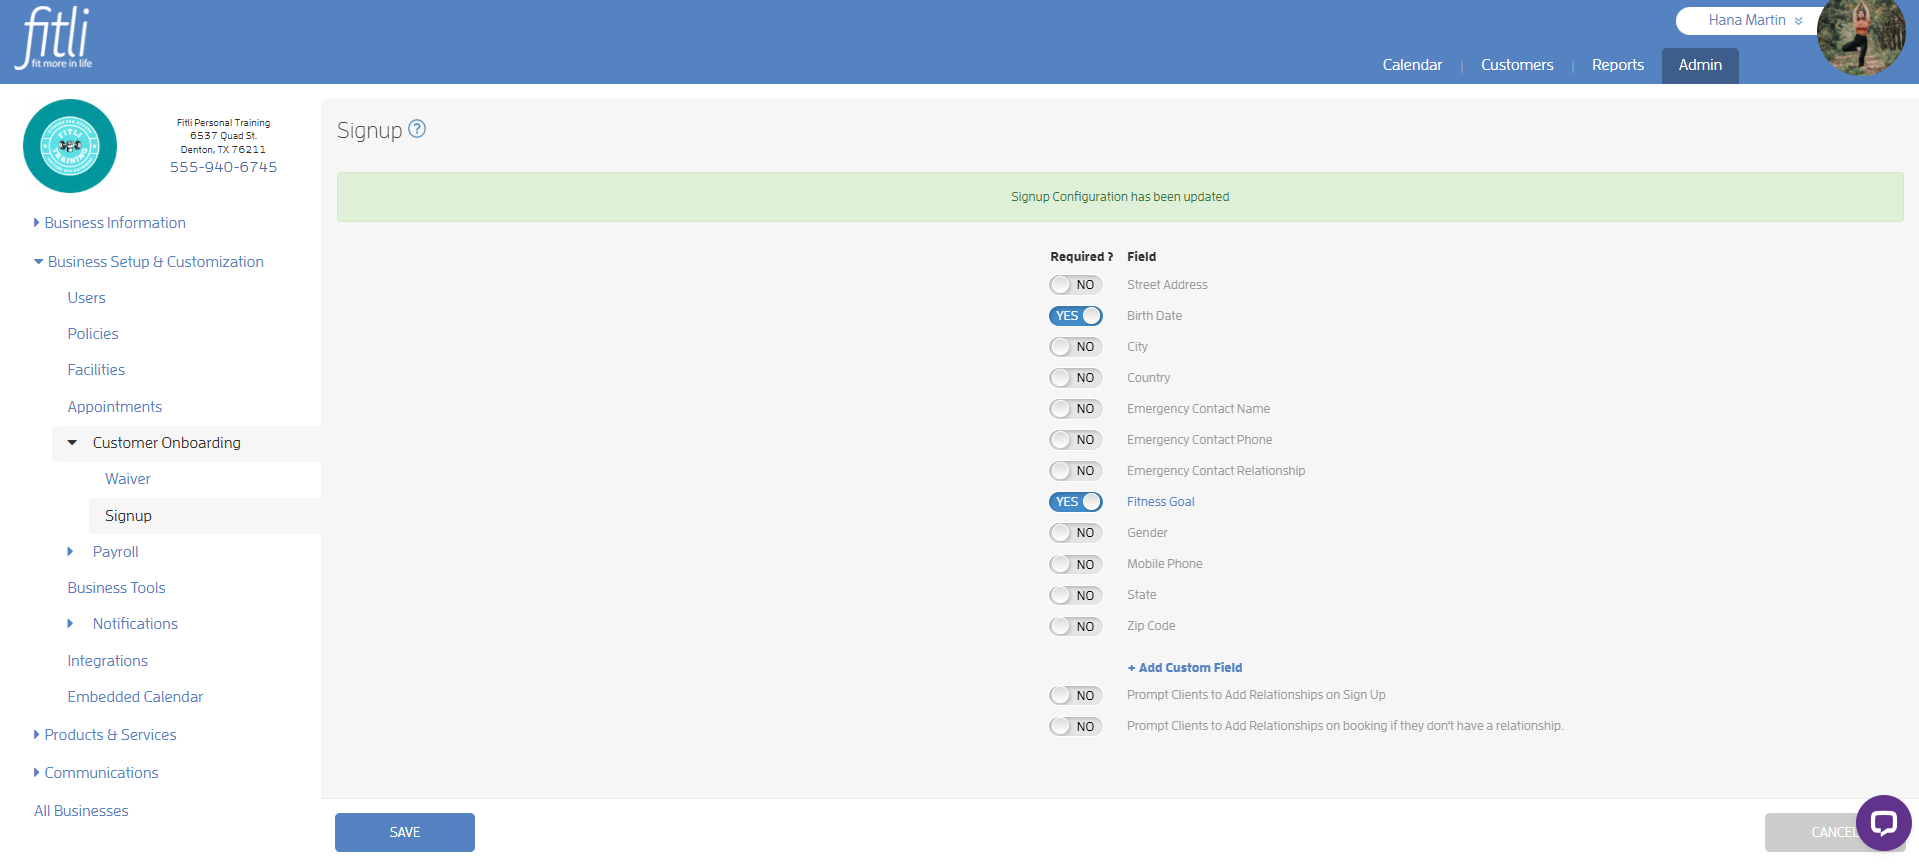
A confirmation in green will appear at the top that the Signup Configuration has been updated.
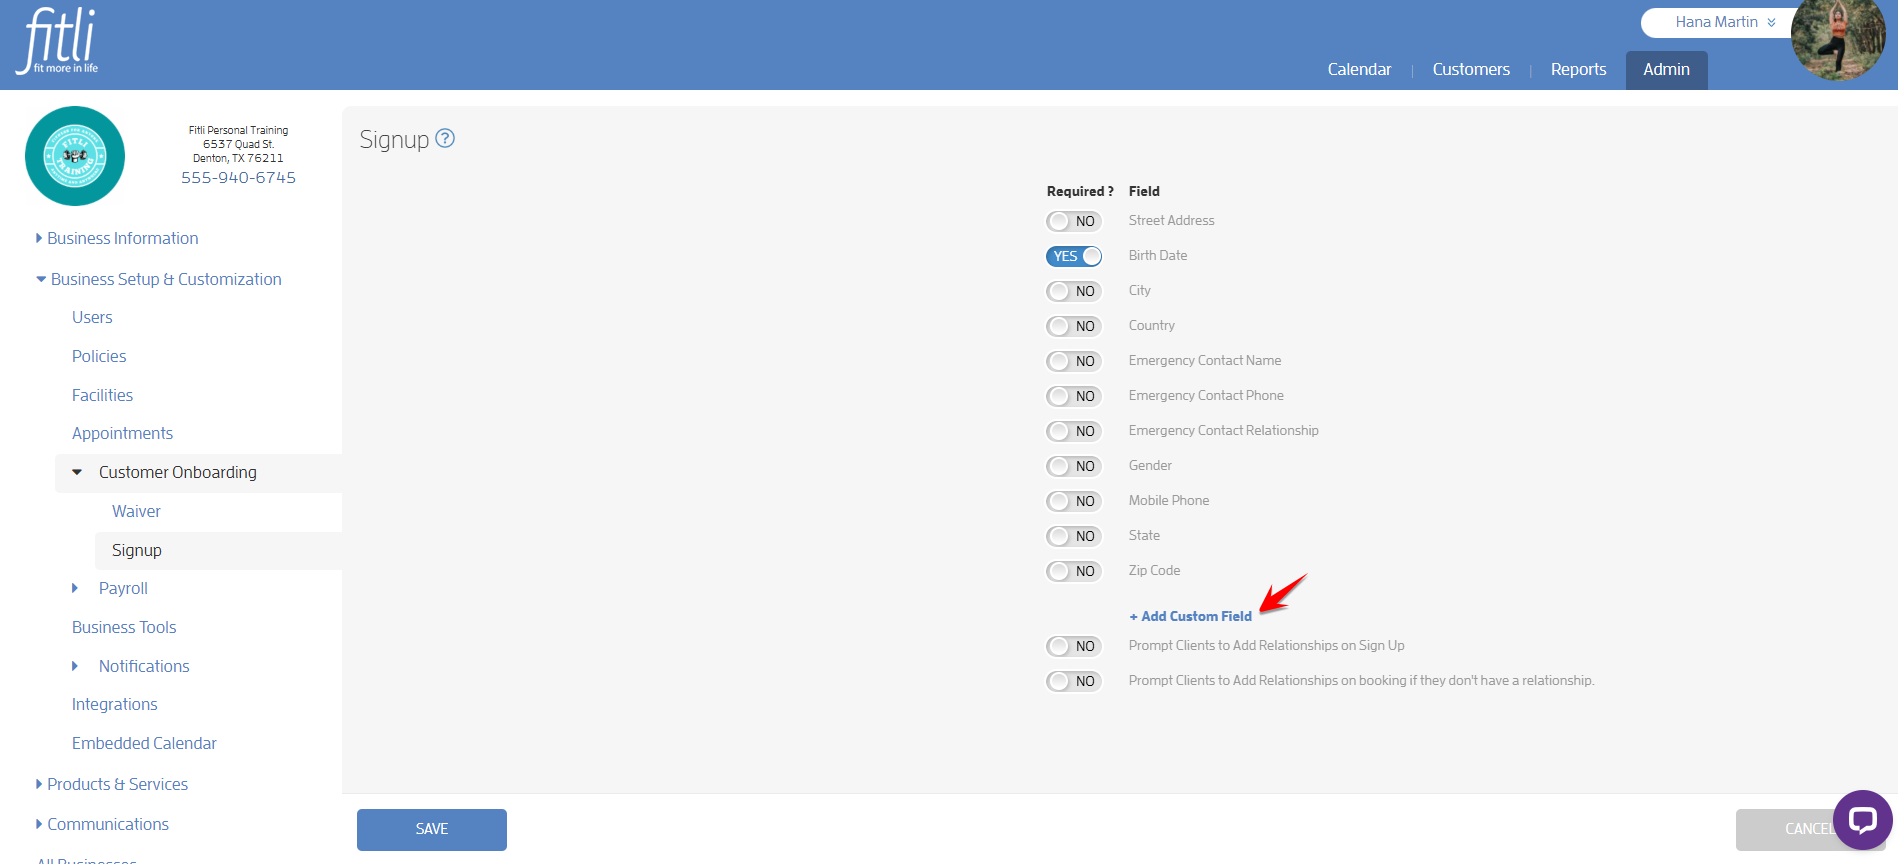
To add a custom field, click "+Add Custom Field" to add a new custom field.
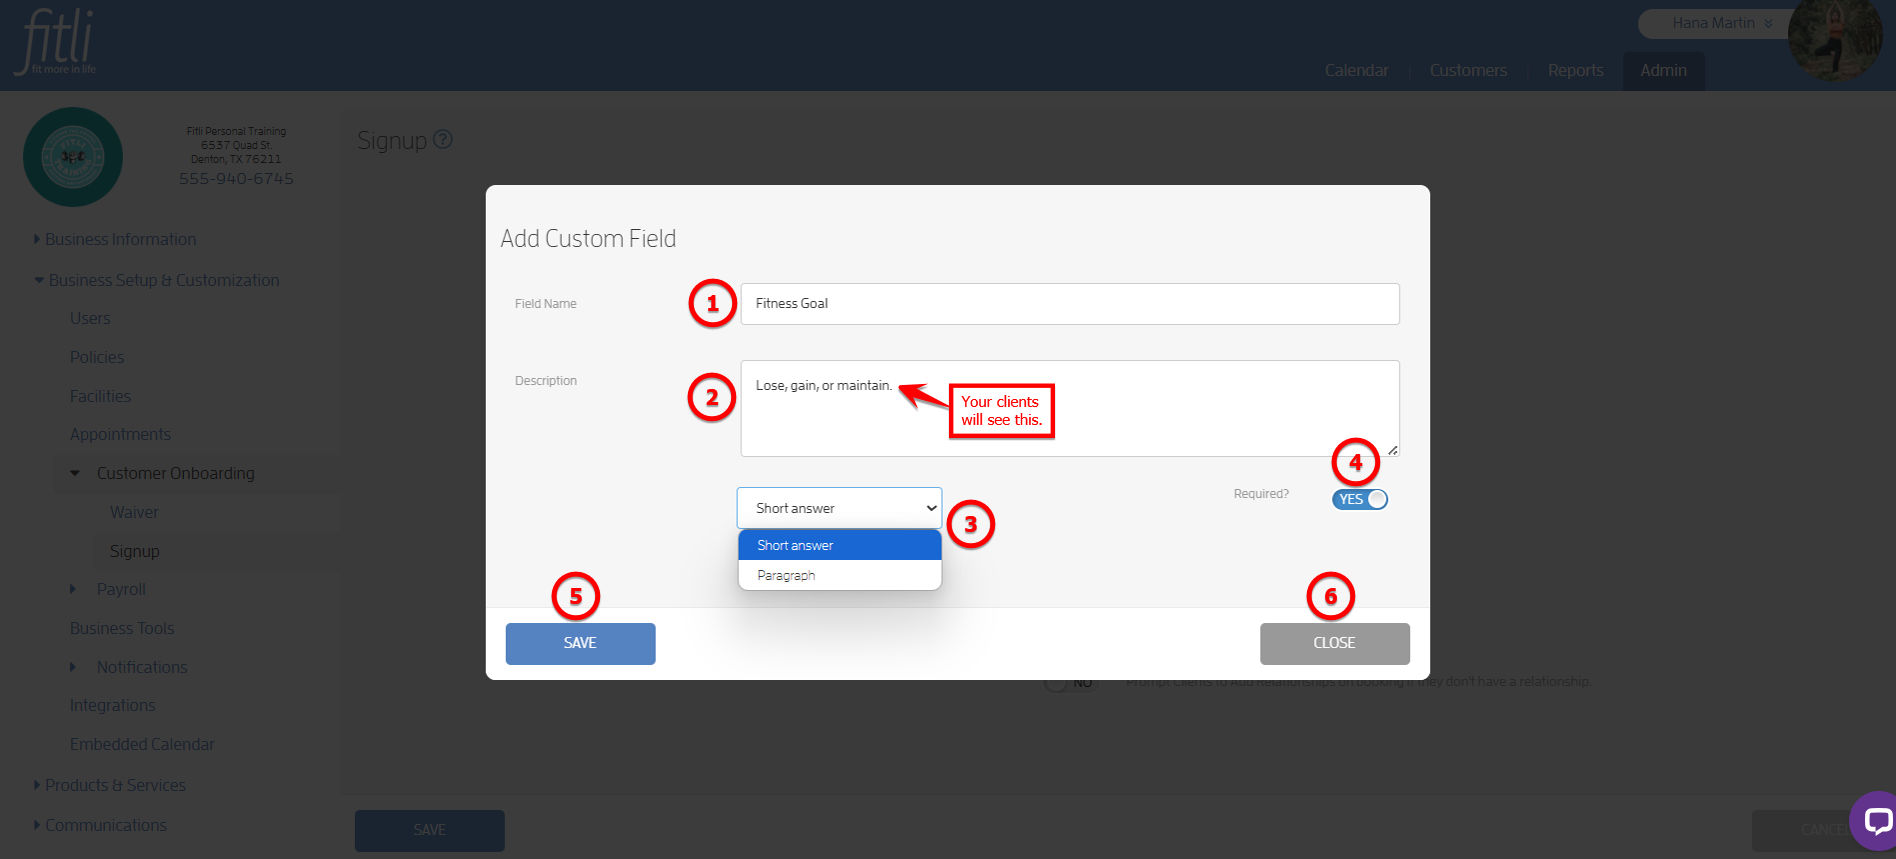
The "Add Custom Field" modal will pop up. In this example, I'll add a custom field for Fitness Goal.
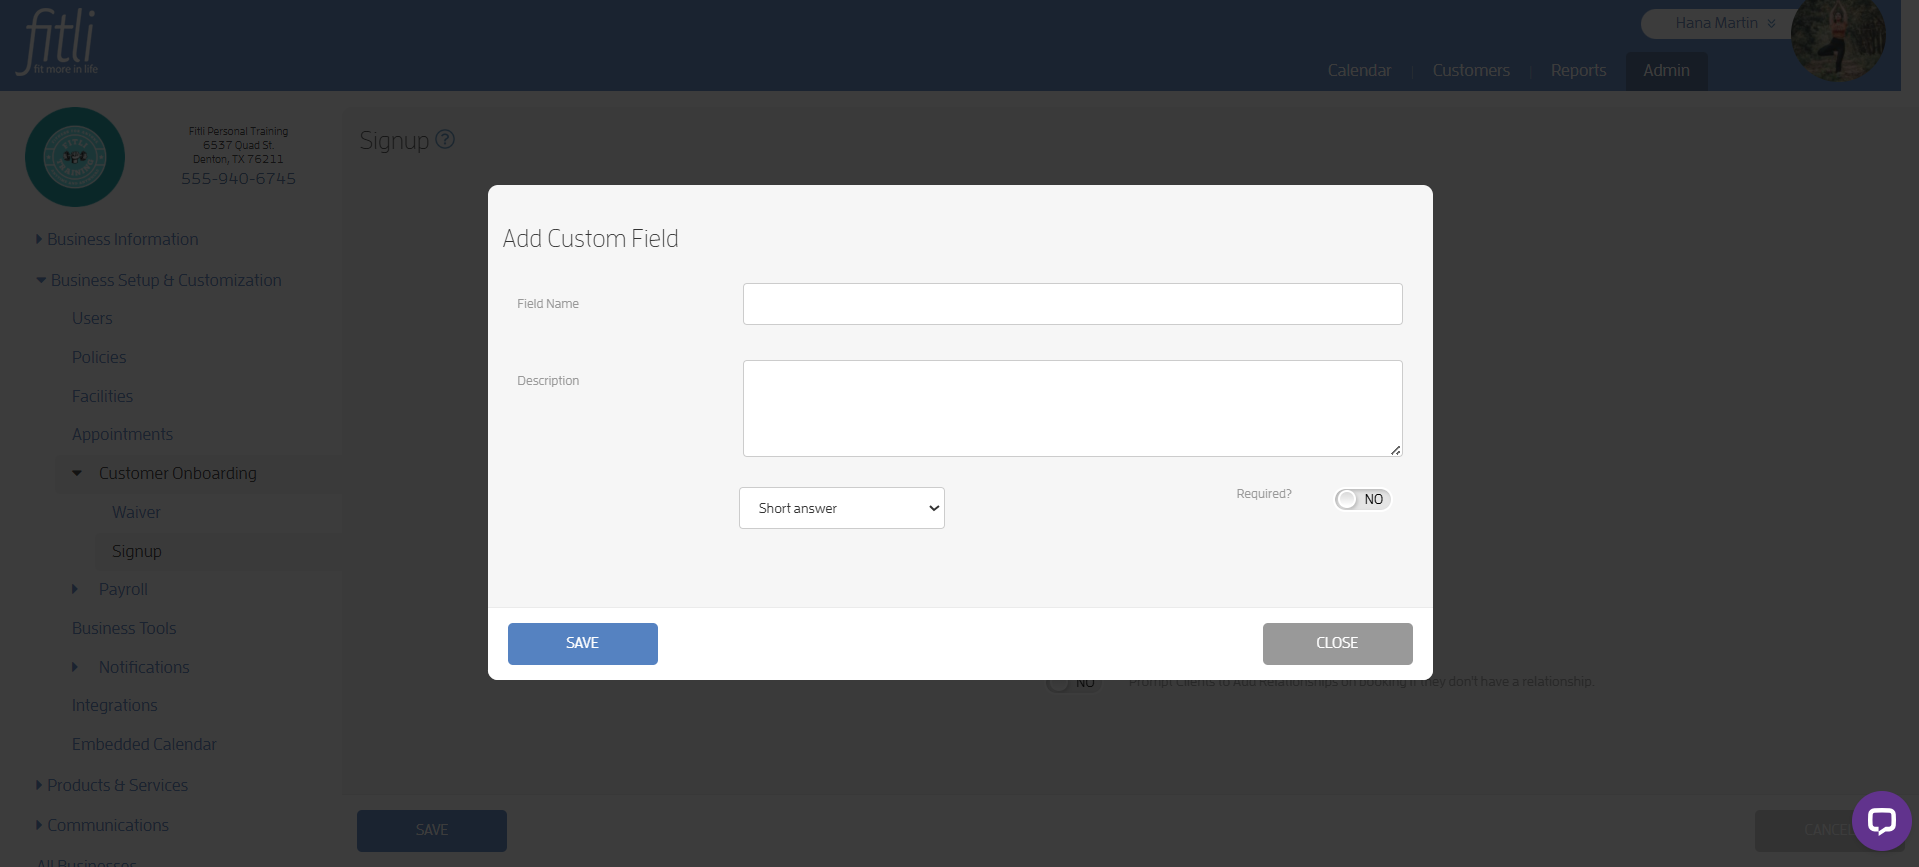
Enter the field name, a brief decription, select short answer or paragraph from the pull down, turn on the required slider to YES or leave it off to NO and click SAVE. In case, you've changed your mind and don't want to add a custom field, click CLOSE. The added field will then show up on the Signup page. Click SAVE. Very Important! When done, a confirmation message at the top will appear confirming that changes have been saved.
Note: All information you enter on the description box will be seen by your new clients during the sign up process. Your old clients will also see this on the "Contact Info" section of their accounts. They will be prompted to fill out the required fields if they access the "Contact Info" section and hit SAVE.
A confirmation in green will appear at the top that the Signup Configuration has been updated.
To edit or remove a custom field, click the field on the Signup page.
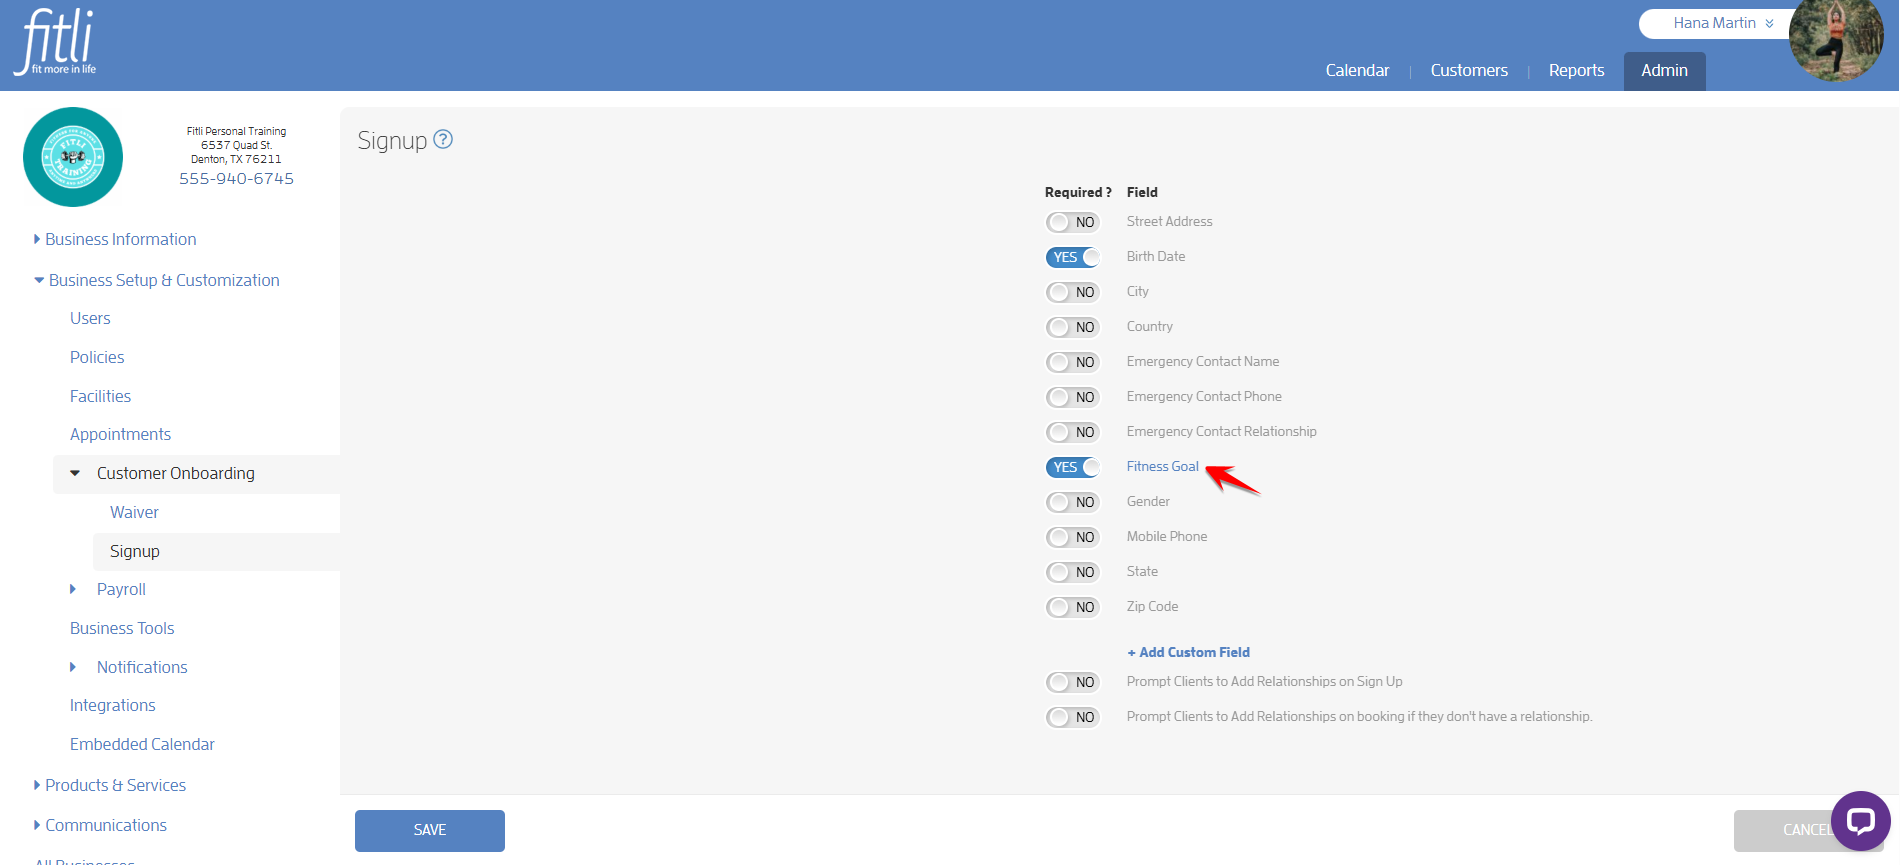
Update the details on the "Edit Custom Field" modal then click SAVE. Otherwise, click REMOVE to delete the custom field.
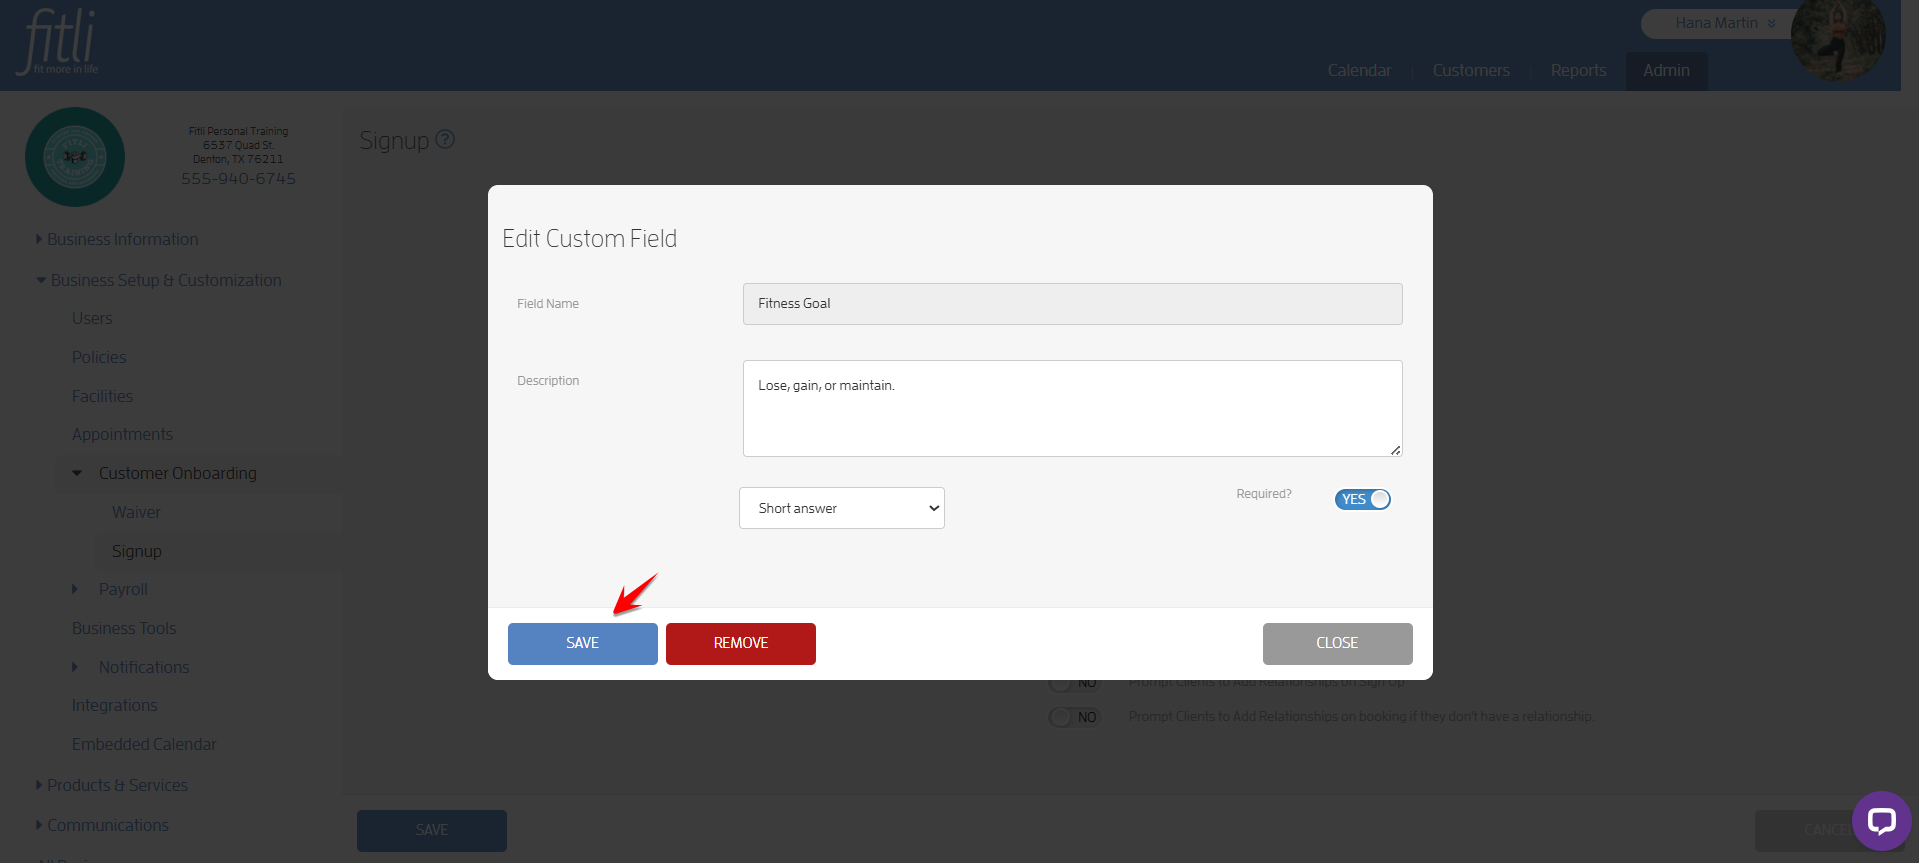
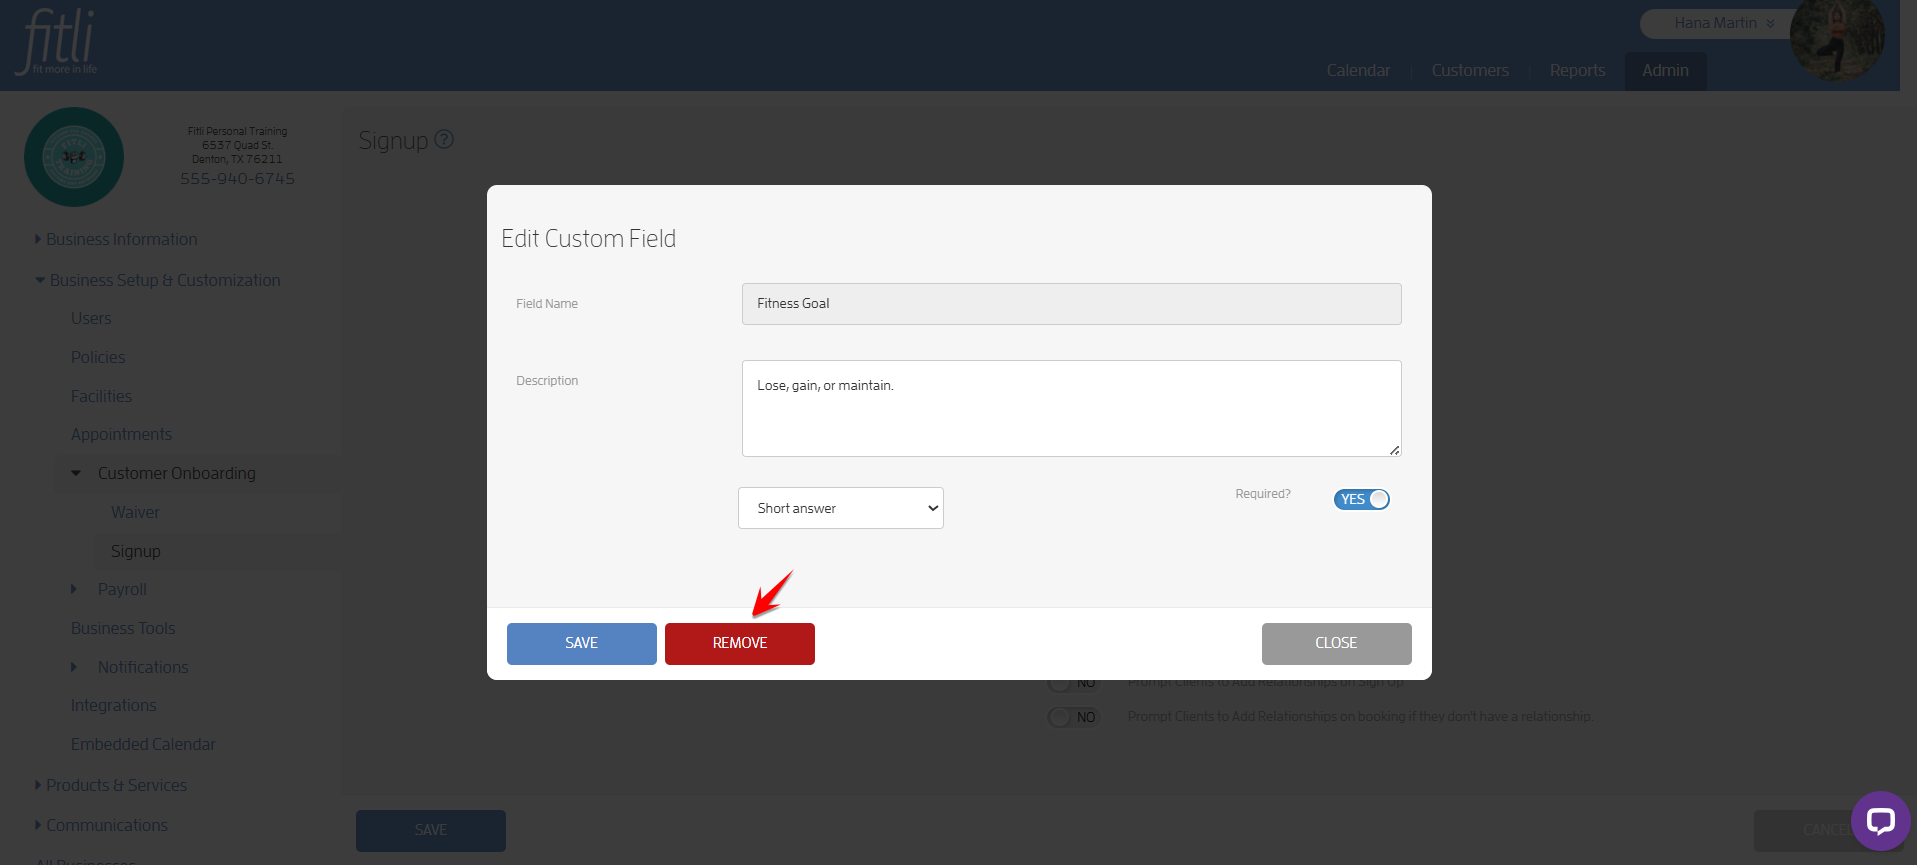
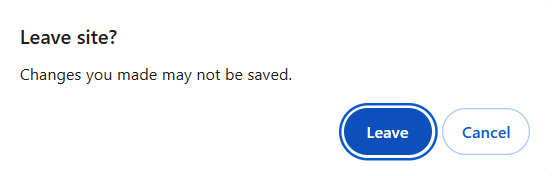
Make sure to hit SAVE on the Signup section. A confirmation message will pop up at the top confirming that your changes have been saved. Otherwise, leaving the Signup section without saving, a pop up message will appear prompting you that your changes have not been saved. Click "Leave" to not save your changes or click "Cancel" to stay on the page then save your changes.
BUSINESS VIEW
Your added custom field/s will appear on your clients' profiles on your Customers list. It will be at the bottom of the contact information fields, above the waiver sliders and notes. The contact information field/s you set to required will still be on the same place.
Your custom fields will be included on your exported customers list.
CUSTOMER VIEW
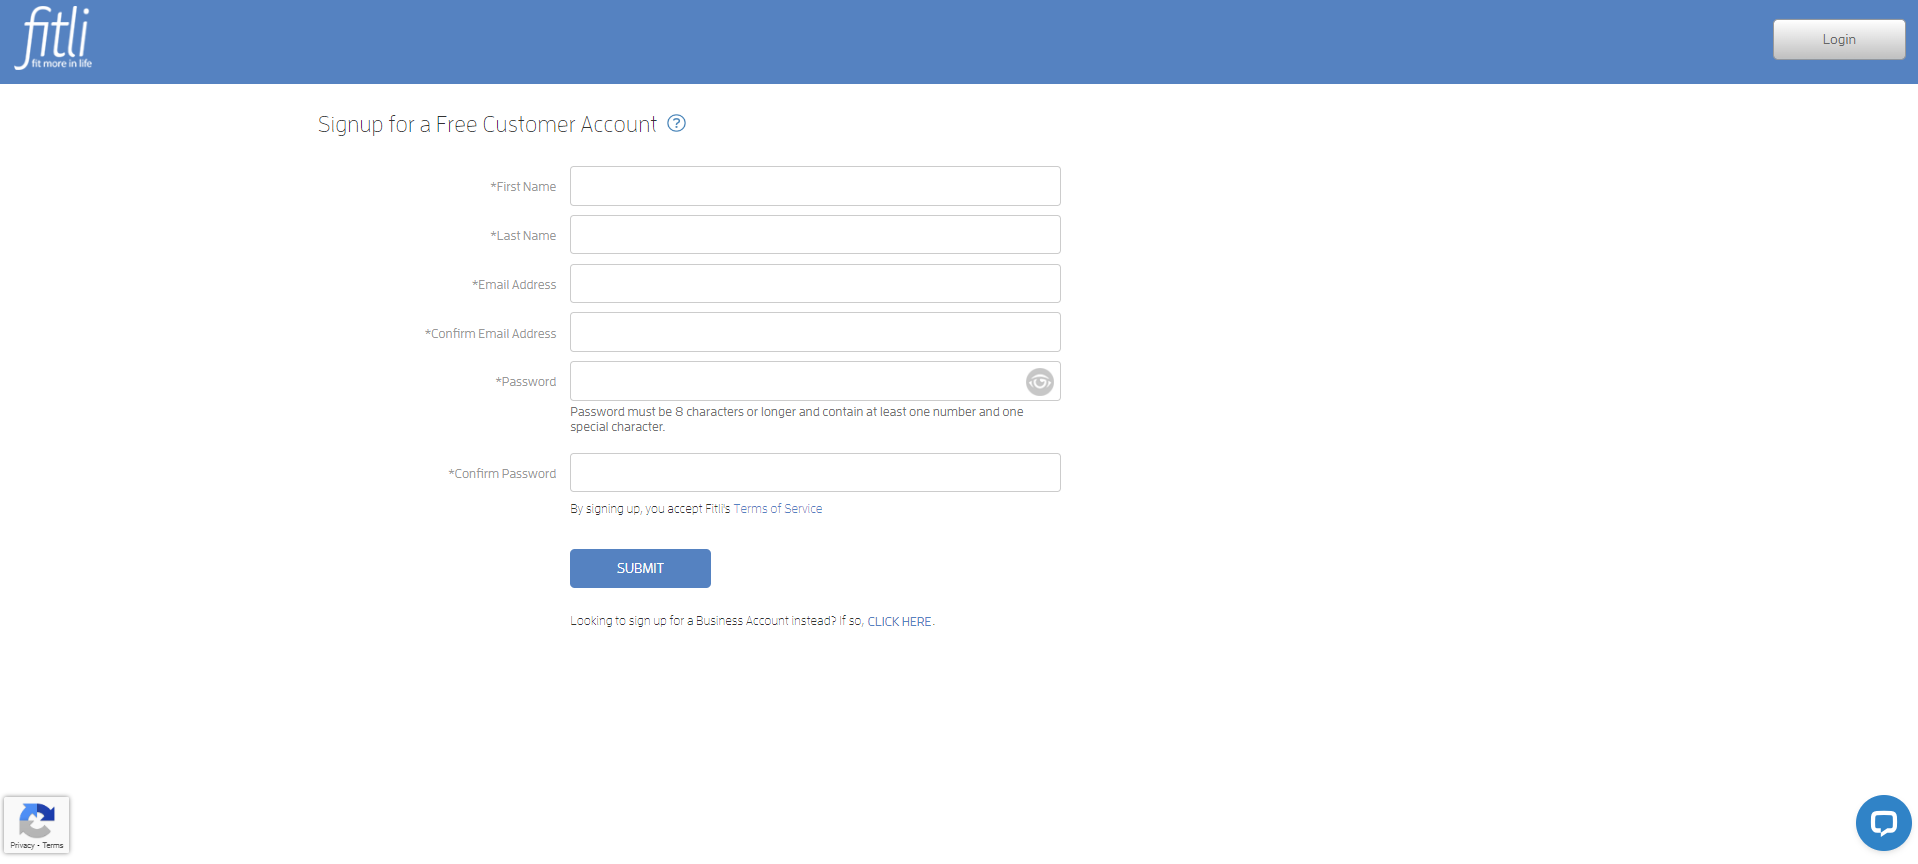
Your custom fields will appear after the "Signup for a Free Customer Account" page during your client's registration.
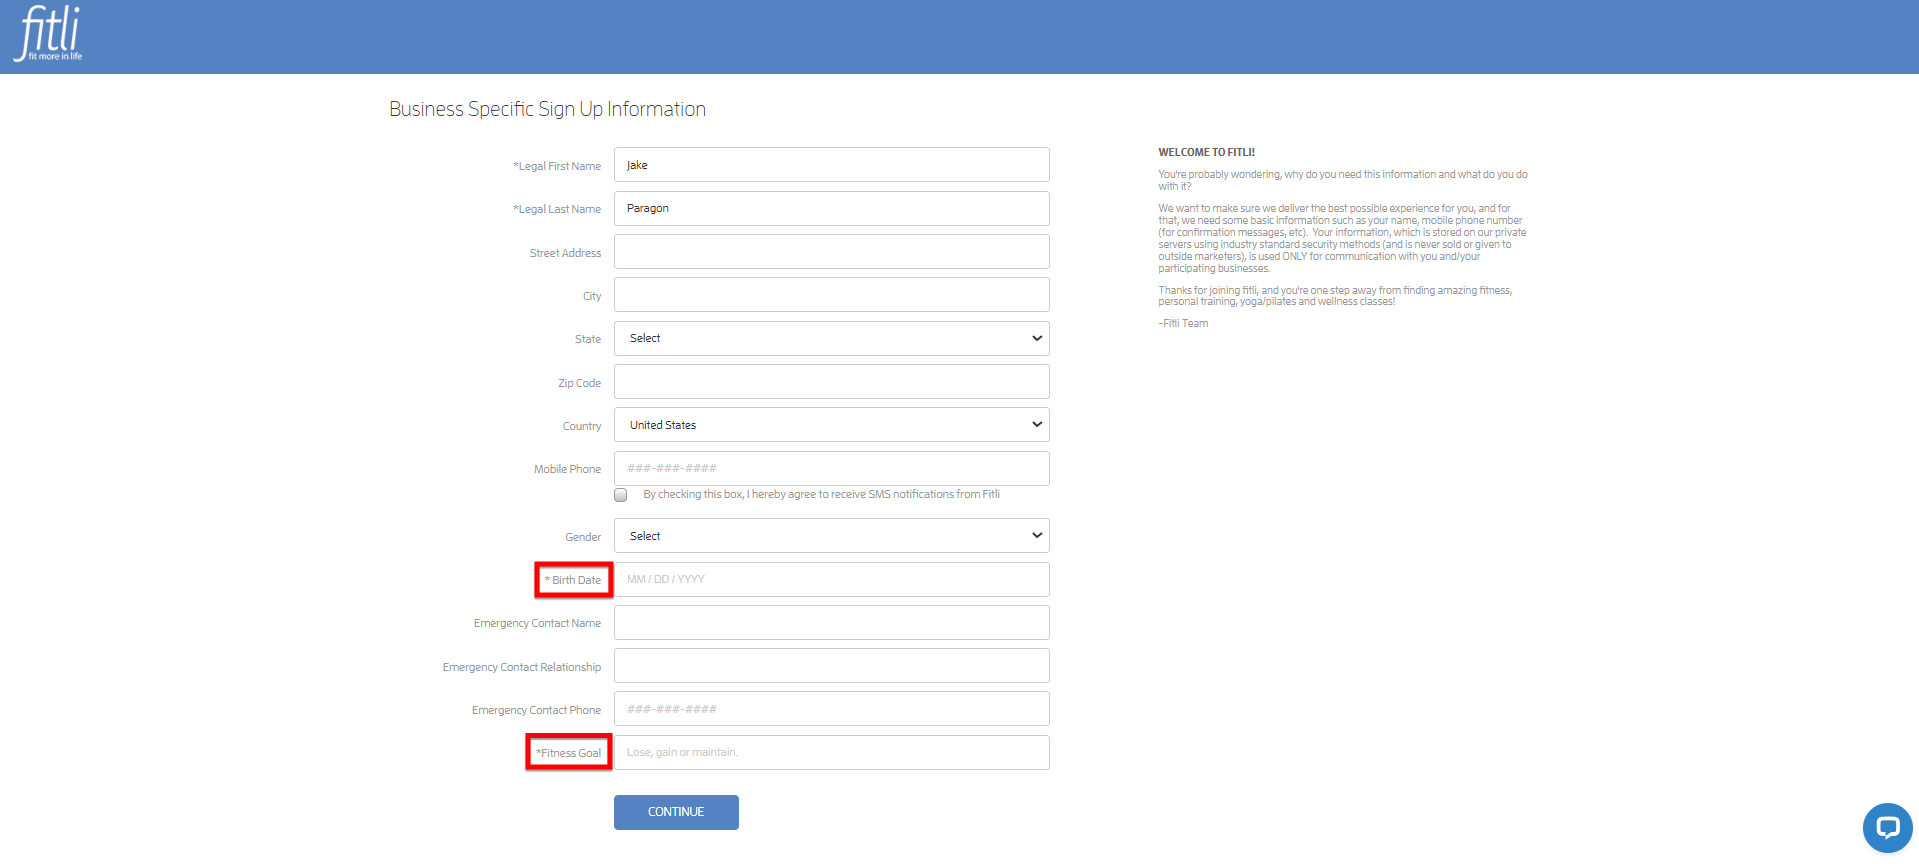
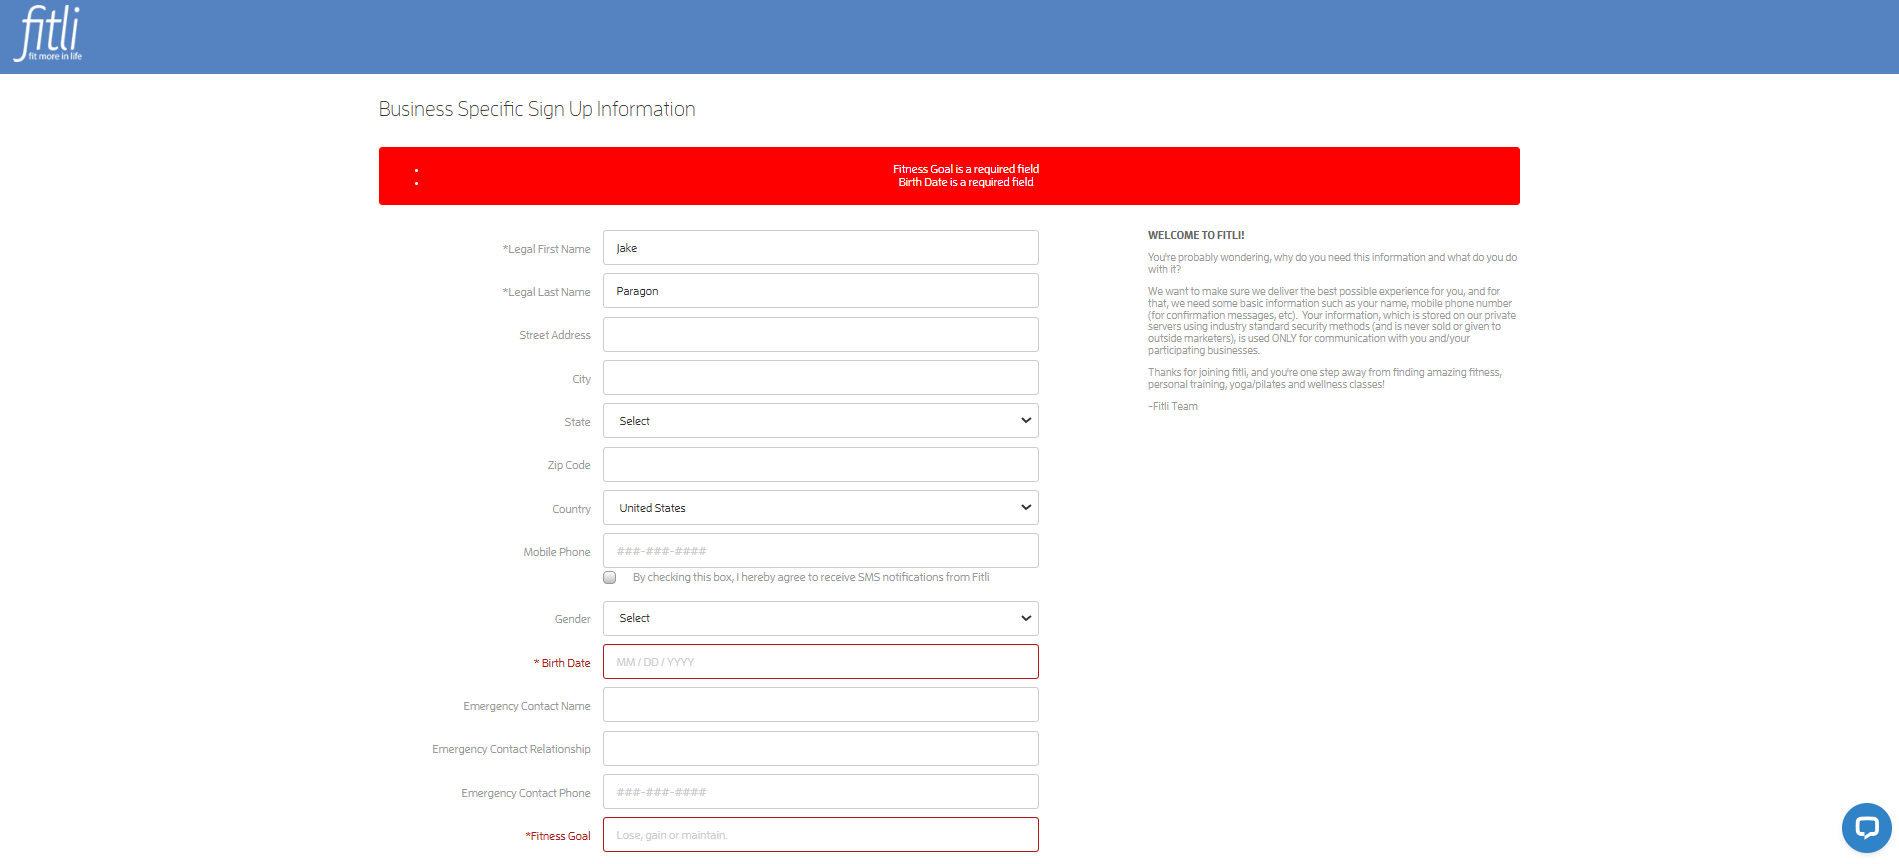
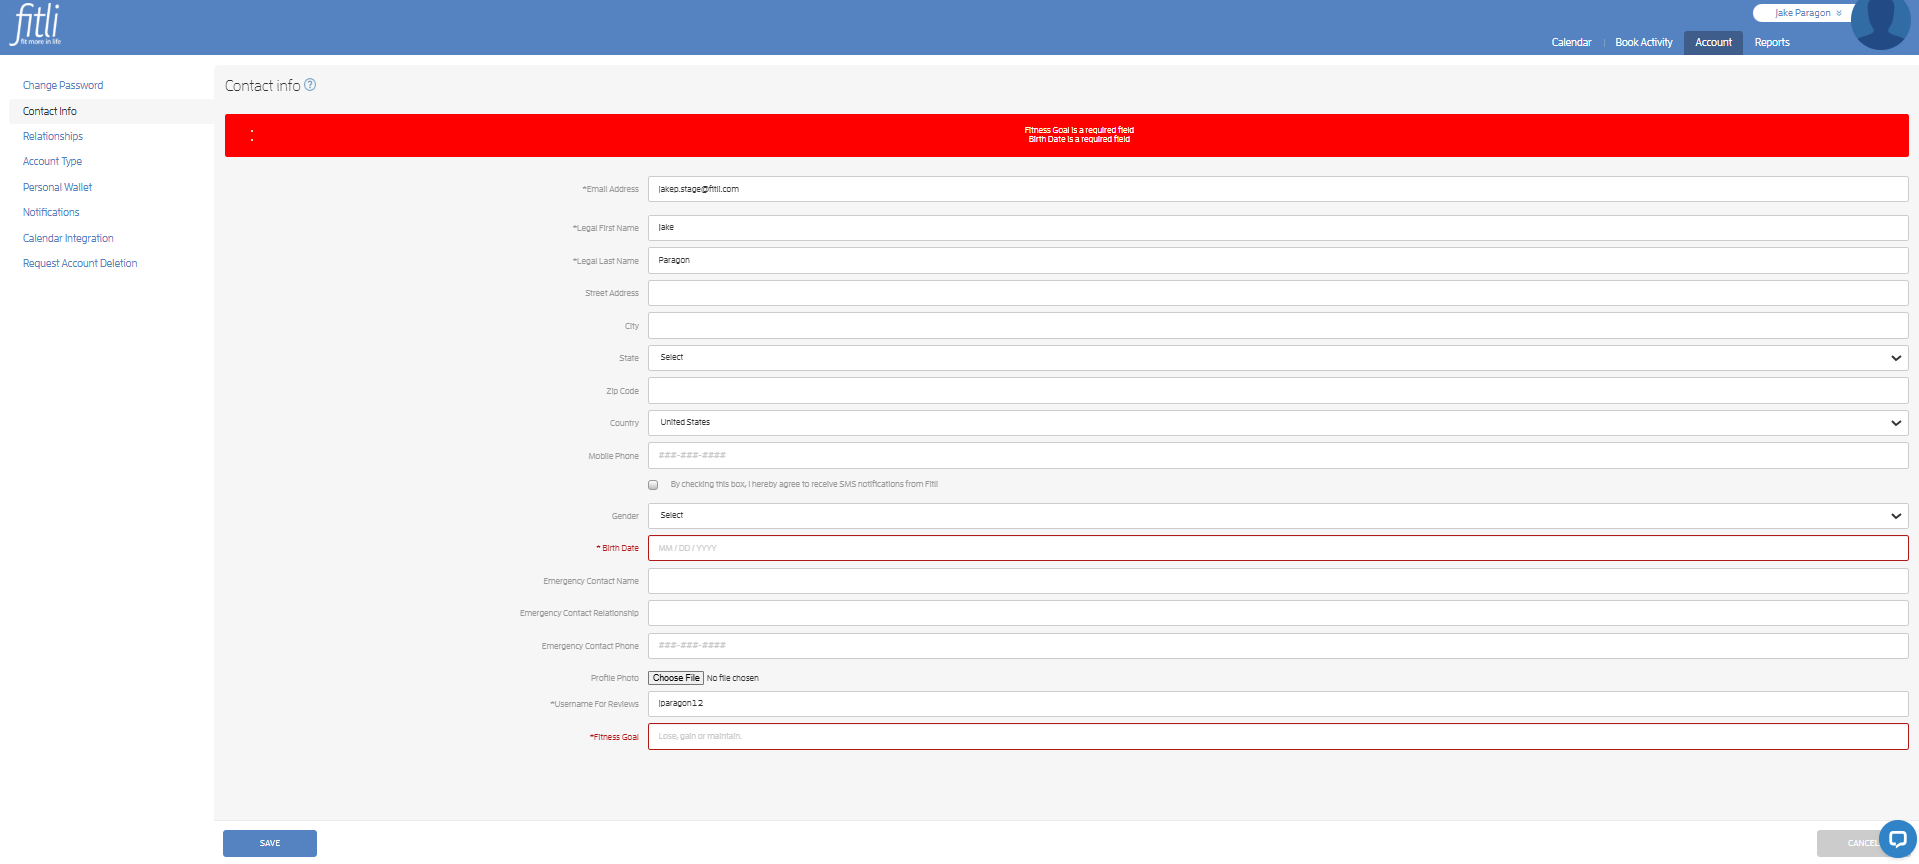
If your client clicks CONTINUE on the "Business Specific Sign Up Information" page without entering his details on the custom fields, he'll be prompted to do so. A message will appear at the top and the required fields will be highlighted in red.
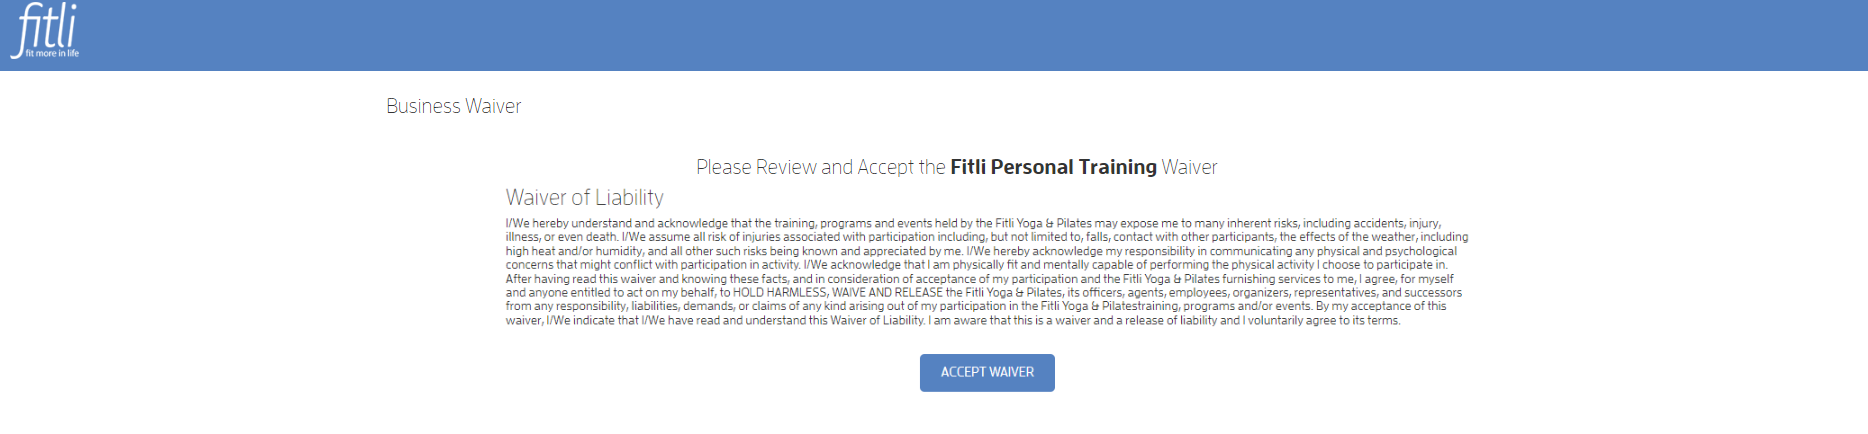
Once he completes the required information, he'll be prompted to accept the waiver on the next page (if you have waiver configured). Then, he'll be automatically logged in.
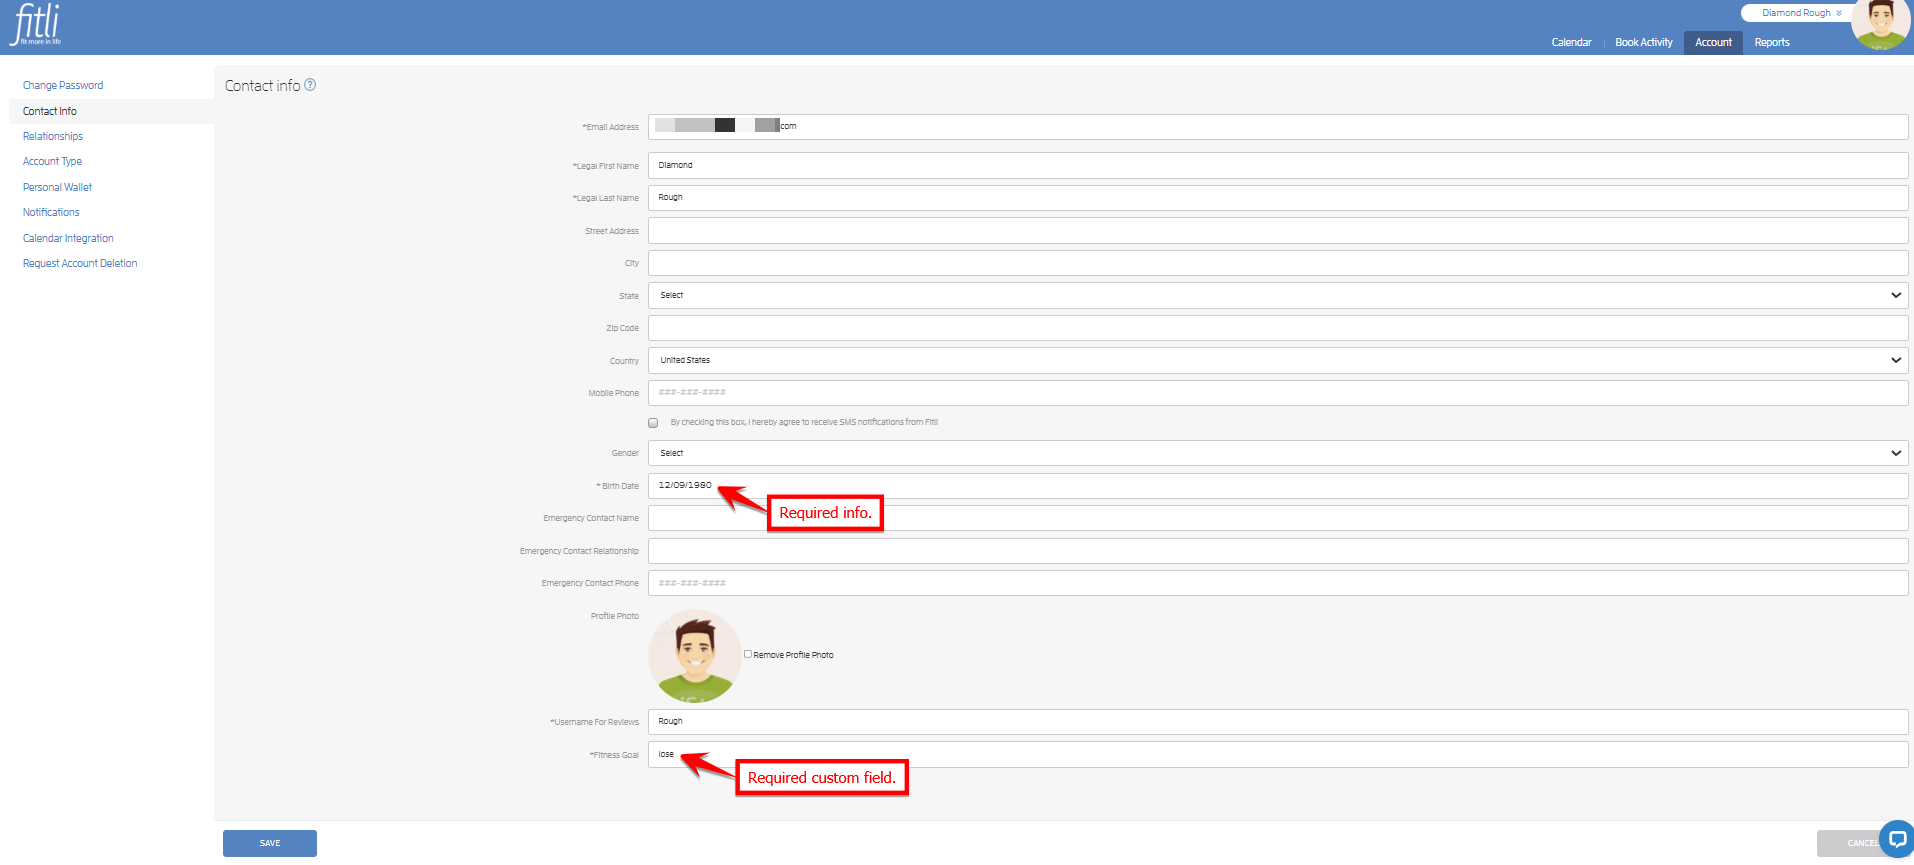
Your custom fields will also appear on your old clients' "Contact Info" section.
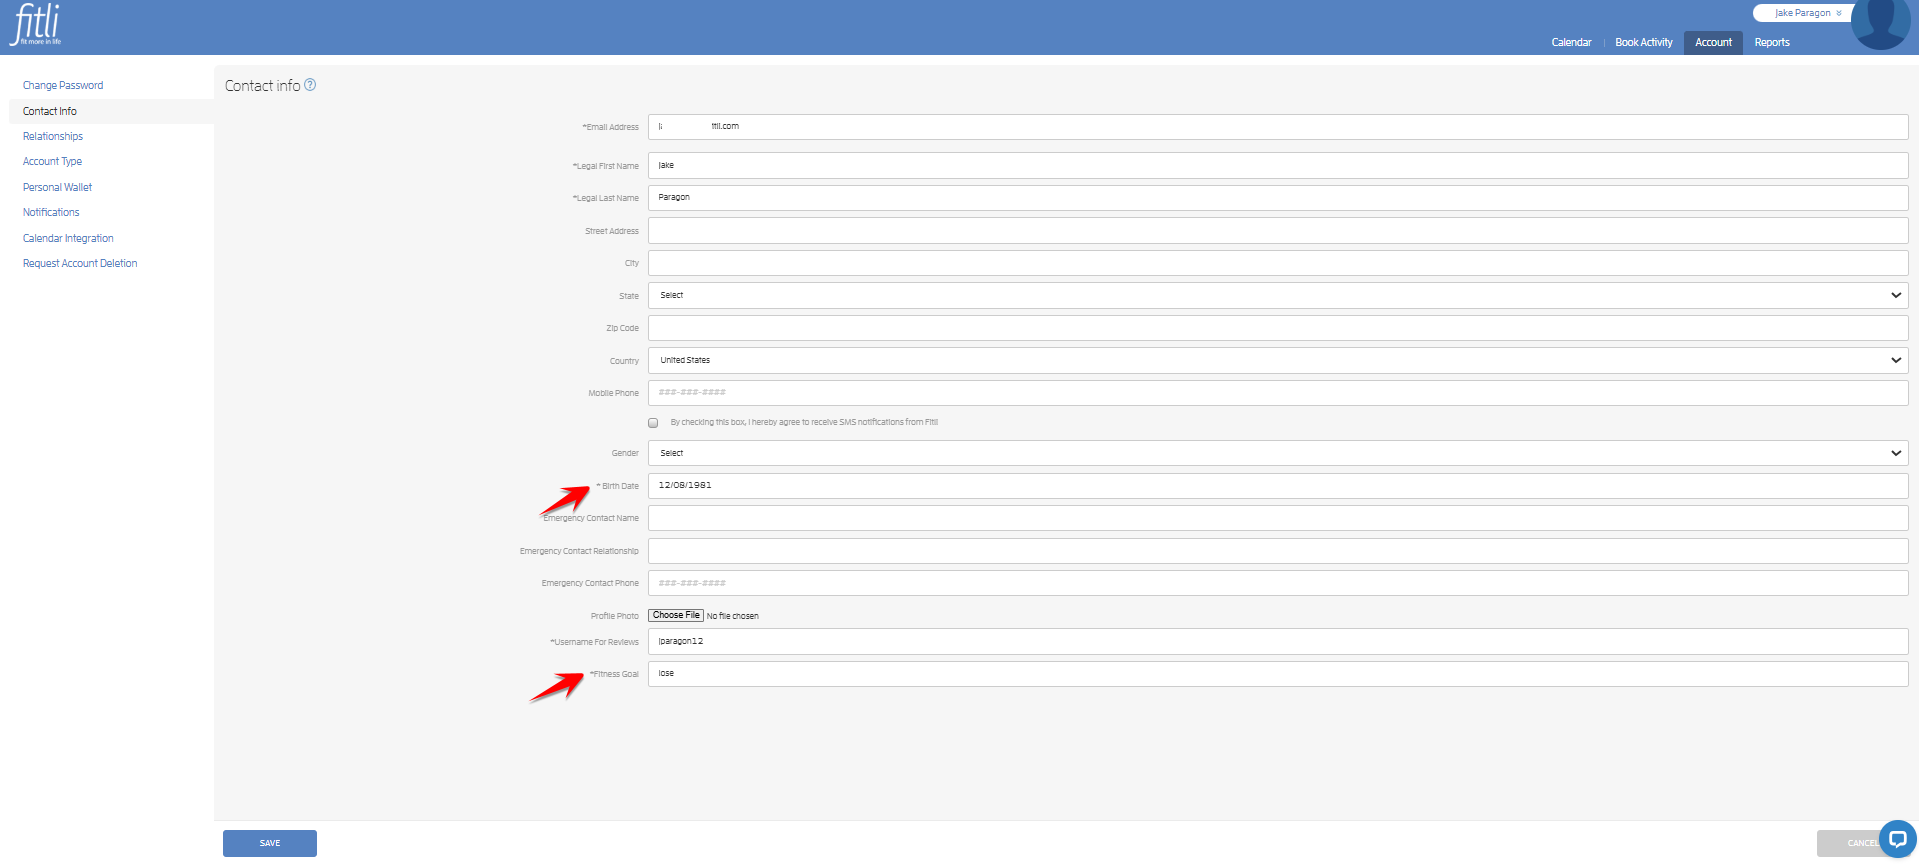
If they access this page and hit save, they'll be prompted to update their details as seen below if you set up custom fields after they've registered. A message will appear at the top and the required fields will be highlighted in red.
Commonly Asked Questions:
Q: I have a new customer who just signed up. I set up a custom field but he's able to sign up without completing the required information. Why is this possible?
A: Make sure to turn on the required slider on the custom field modal, click EDIT and hit SAVE.
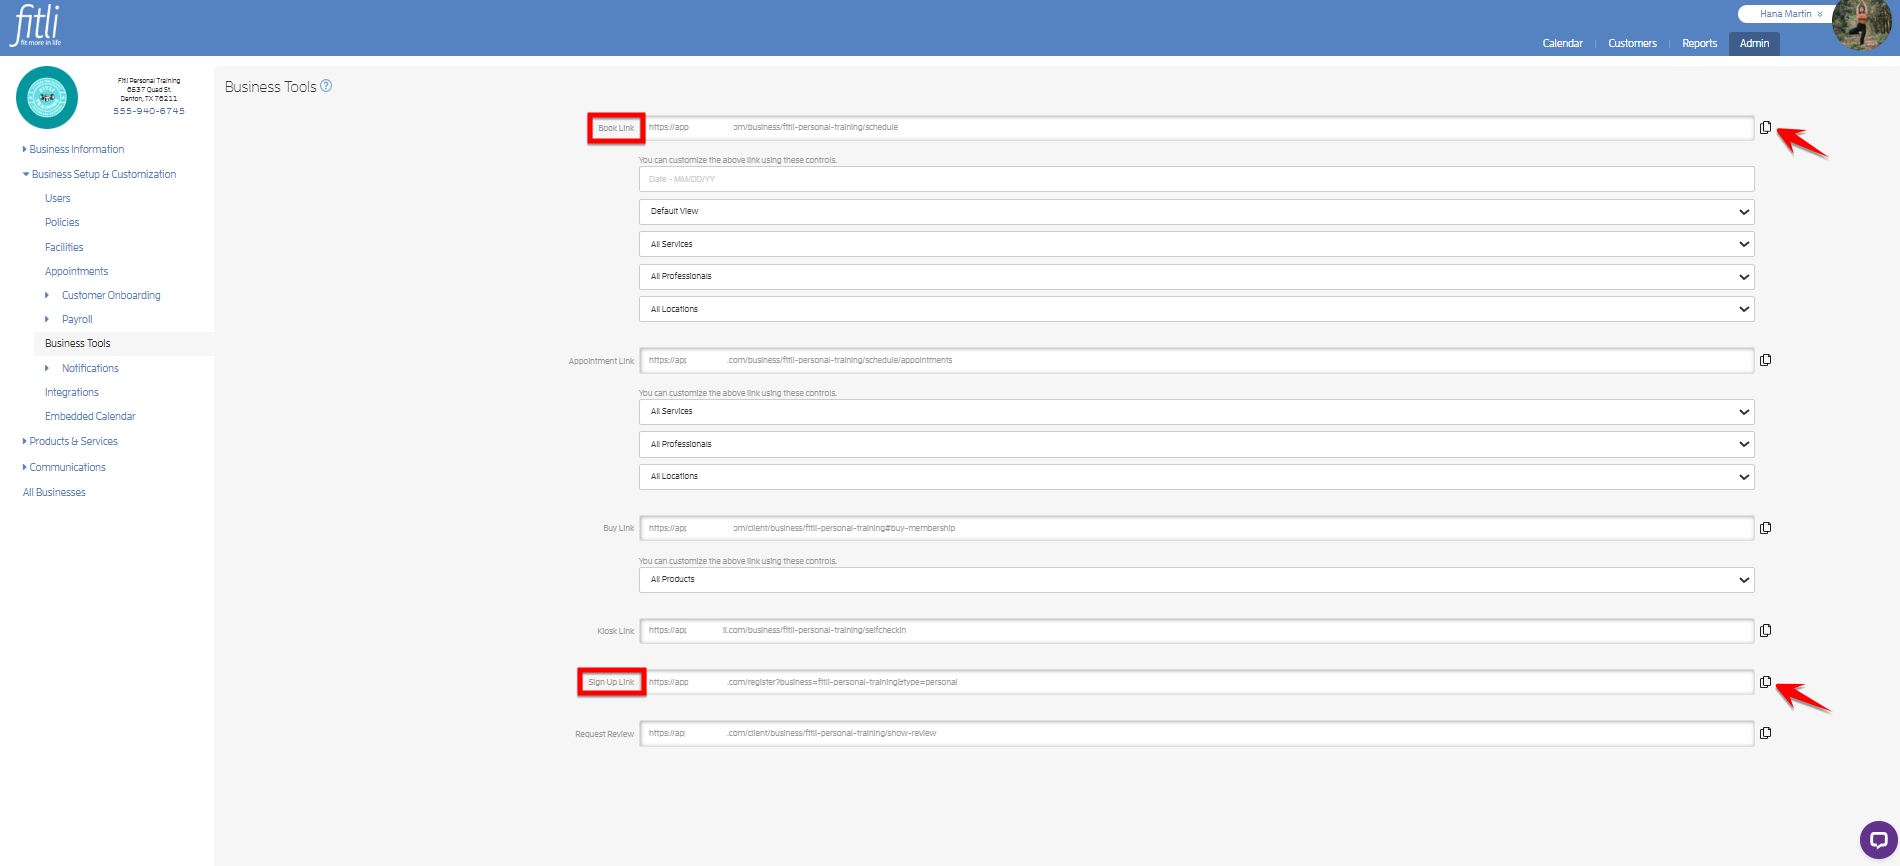
IMPORTANT: Custom field/s will only work for your clients who have signed up using the invitation/referral link we've sent via email, the "Sign Up Link" and "Book Link" on the "Business Tools" page.
Invitation link
Whenever you add clients on your Customers list, we automatically send them an invitation email to join Fitli. Your clients need to click the "Activate Account" button at the bottom of the email for it to work. If your clients signed up without an invitation, meaning, they went directly to fitli.com to register, the custom field/s won't work, hence, allowing them to sign up without filling out the details needed for the required field/s.
Sign Up Link and Book Link
Your clients signing up via the "Sign Up Link" or "Book Link" will also be required to fill out the details needed for the required custom field/s. You can copy any of the links on the "Business Tools" page and send it to your clients. If you choose this option, you don't need to add them to your Customers list. If they sign up via the "Sign Up Link" or "Book Link" and complete the registration process, they'll be automatically added on your Customers list and be connected to your business.
Q: How will I have my old clients update their details for the required information I need for my business?
A: Advise them to go to the "Contact Info" section under the "Account" page and enter the required details for the fields with asterisks and hit SAVE.
Q: I tried adding a custom field but the site won't let me. Why is this happening?
A: The site won't allow you to add custom fields with similar field names and invalid field names (Non-alphanumeric characters).
That's about it! Any questions? Chat with us or send us an email to support@fitli.com.